


Leather conditioner for horse tack can help keep leather supple when it is clean, dry, and maintained with a suitable product. The best choice depends on the leather, its finish, and how the tack is used. A careful routine matters more than applying a heavy coat.
Shop horse tack and care supplies
What should leather conditioner do for horse tack?
Conditioner is intended to replenish some of the oils and flexibility that can be lost as leather dries through use, exposure, and cleaning. Leather that is maintained can remain easier to handle and less likely to feel stiff. Conditioner does not repair torn stitching, cracked structural leather, stretched holes, or a failed buckle. Those are inspection and repair issues, not problems to solve by adding more product.
Think of conditioning as one step in a larger care cycle: inspect, remove dirt, let the leather dry appropriately, condition if needed, then store it clean. Tack regularly exposed to sweat, dust, rain, or arena footing may need attention more often than equipment used lightly and stored in a dry place. The product label and the tack maker's instructions should guide care when they are available.
Key Takeaway
Conditioner supports routine leather care, but it is not a substitute for cleaning, careful inspection, correct storage, or repair of damaged tack.
How do you choose leather conditioner for horse tack?
Start with the leather item and its finish, not a broad promise on a container. A product that works for one type of leather may not suit another. Finished, coated, dyed, or specialty leather can respond differently from unfinished leather. When the manufacturer names an approved cleaner or conditioner, follow that guidance first.
Read the label and look for clear directions about the leather types the product is intended for, how much to apply, whether it should be wiped or buffed off, and any limits on use. Avoid assuming a product is safe for every surface because it is marketed for leather. If the label is vague, the leather is valuable, or its finish is unfamiliar, ask the tack maker or a qualified leather-care professional before treating the whole item.
| What you are comparing | What to check | Practical choice |
|---|---|---|
| Leather finish | Is the leather finished, coated, dyed, or untreated? | Use only a product labeled as suitable for that surface; test an inconspicuous spot first. |
| Product consistency | Is it a liquid, cream, balm, or oil, and how does the label direct application? | Choose a format you can apply sparingly and evenly without leaving a thick residue. |
| Intended use | Does the label name tack or the relevant leather type? | Prefer clear use instructions over broad claims or assumptions based on a product name. |
| Current leather condition | Is it simply dry, or is it cracked, sticky, moldy, or structurally damaged? | Condition only sound leather; get advice for damage, contamination, or an unusual surface. |
| Rider contact areas | Could residue remain where hands, clothing, or the horse contact the tack? | Follow directions, wipe away excess, and let the tack dry before use. |
Ingredients alone do not tell the whole story. Two products with similar ingredient descriptions can behave differently because of their formulation and the leather finish they are meant for. Do not choose a conditioner solely because it is described as natural, waterproofing, or long-lasting. Match the intended use to the tack and follow the product directions.
It also helps to separate three different decisions: whether the leather needs cleaning, whether it needs conditioning, and whether it needs repair. A dusty but sound bridle may only need loose dirt removed. Leather that feels dry after appropriate cleaning may be a candidate for a compatible conditioner. A split strap or loose stitching needs assessment, not a product experiment. Making that distinction prevents unnecessary applications and keeps the task focused on the actual condition of the item.
For a useful example of why care should be matched to the item, the University of Connecticut fact sheet advises horse owners to check tack for safe, comfortable use. That inspection mindset belongs alongside cleaning and conditioning, not after a problem appears. Read the University of Connecticut fact sheet.
Quick Summary
Choose a conditioner by the leather's finish and the label's instructions. If the material is uncertain, test first and ask the maker before applying product broadly.
Prepare leather before conditioning
Take the tack apart only as far as you can confidently reassemble it. Lay the pieces on a clean surface with enough room to see the stitching, billets, holes, buckles, and folds. If you are not sure how a component fits, clean it in place or consult someone familiar with the tack rather than risking an incorrect reassembly.
- Inspect first. Look for cracked or unusually dry areas, loose stitching, stretched holes, corrosion, mold, and tack that has become sticky or misshapen. Set aside anything that may be unsafe and have it assessed before riding.
- Remove loose dirt. Use a clean, soft cloth or a suitable brush to lift dust and grit. Abrasive particles can mark leather when rubbed across its surface.
- Clean only as directed. If the leather needs more than dry dusting, use a cleaner intended for that leather and follow its label. Do not soak tack or combine cleaners and conditioners without instructions.
- Allow suitable drying time. Keep damp tack in a ventilated place away from direct heat. Do not apply conditioner over wet leather or use a heater to speed drying.
- Test before treating the whole item. Apply a small amount to an inconspicuous area and let it dry. Check for a change in color, finish, texture, or tackiness before proceeding.
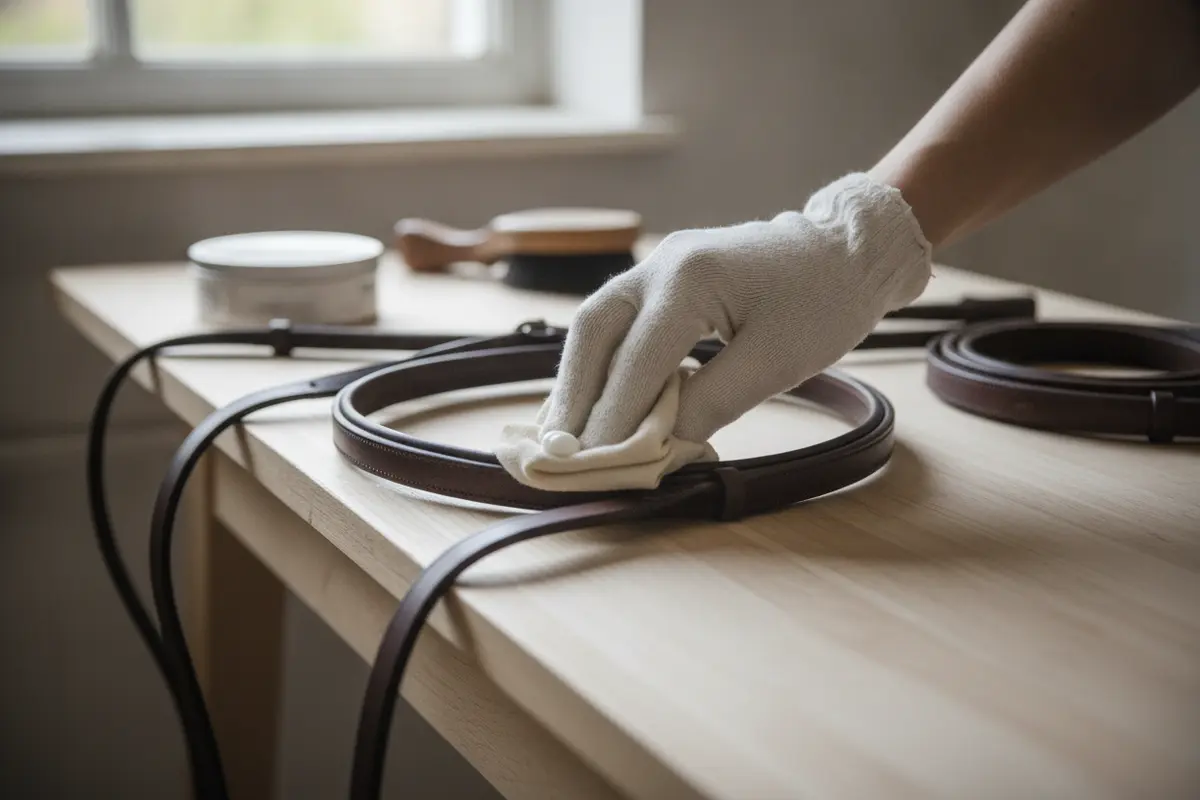
A patch test should be small enough to stay out of sight but representative of the surface you plan to treat. An underside edge or an area hidden beneath a keeper may work, if it is the same leather and finish. Do not test on hardware, stitching, or a separate component and assume that the result will apply to the rest of the tack. Let the test area dry for the time recommended on the product label, then examine it in good light. If it darkens, feels sticky, or looks uneven, stop and ask for advice instead of covering the change with more product.
Shop by care need: For a conditioner or cleaner, review the leather restorer, harness oil, and leather wash options, then choose only a product whose directions match your tack.
Routine cleaning is part of leather upkeep. The University of Kentucky Equine Programs mentions saddle-soaping leather equipment in a discussion of disinfection work, but that reference is not a product recommendation or a complete tack-care protocol. Follow the instructions for your own equipment and products. See the University of Kentucky Equine Programs discussion.
Apply conditioner with a light, even touch
Use a clean cloth and begin with less product than you think the leather needs. Work a small amount over a manageable section, using gentle, even strokes. Pay attention to areas that bend or flex, while avoiding a thick build-up around stitching, buckles, holes, and hardware. Add more only if the leather absorbs the first small application and the product label allows it.
Work in sections so you can see where product has already been applied. For a bridle, for example, you might treat one cheekpiece at a time, check the finish, and then continue to the next strap. On a saddle, divide the work into manageable panels rather than spreading conditioner across the whole surface at once. This slows the process enough to catch a change in color or feel before it affects a large area.
Let the product sit for the time stated on its label. Then wipe away any excess with a clean cloth. Leather should not feel slick, gummy, or heavily coated when you are done. If it does, stop adding product and follow the label's directions for removing residue. Too much conditioner can attract dirt, leave tacky patches, or alter the feel and appearance of a surface.
Keep conditioner away from areas where residue could affect grip or contact. Do not assume that a product is appropriate for the underside of a saddle, the reins, or every part of a bridle simply because it can be used on another leather piece. When different components have different finishes, treat them according to their own care directions.
Allow the leather to dry fully before putting the tack back together or using it. Check that the surface is not slippery and that buckles and straps remain easy to handle. If you have treated reins, girth straps, or other pieces that need a secure feel, take extra care to make sure no conditioner remains on the contact surface.
Once the piece is dry, make a final pass with a clean cloth and inspect the result. A thin, even finish is preferable to a glossy layer of residue. Flex the strap gently in the way it normally bends and check that the leather remains comfortable to handle. Do not pull sharply on a questionable area as a test of strength; that cannot establish whether damaged tack is safe.
Shop leather care for horse tack
Build a practical routine for saddles, bridles, and reins
There is no single calendar that fits every horse and riding schedule. After each use, remove sweat and visible dirt as appropriate for the leather and product directions. Then inspect the equipment while it is in your hands. Conditioning should be based on the leather's condition and manufacturer guidance, rather than automatically repeated after every ride.
- Bridles: Check the parts that bend around the horse's head, the holes and buckles, and stitching near points of stress. Clean grime from narrow folds without pulling or stretching the leather.
- Reins: Pay attention to areas that contact the rider's hands. Residue can make reins slippery or unpleasant to hold, so use a restrained amount and wipe thoroughly.
- Saddles: Inspect the seat, flaps, billets, girth area, and stitching. Follow saddle-specific care guidance, especially if the leather has a special finish or the saddle includes mixed materials.
- Other tack: Breast collars, headstalls, and straps may have different finishes, hardware, and wear patterns. Check each piece rather than treating an entire tack set as if it were one uniform surface.
A useful routine has two levels. The quick check happens after riding: brush off dust, remove sweat or visible grime according to the leather-care directions, hang the tack so it can air, and note any area that needs closer attention. The more deliberate check happens periodically, when you can lay each item out and inspect all sides, folds, and hardware without rushing. Conditioning belongs in that second session when the leather and product instructions call for it.
Keep a simple note of what product you used and when, especially if several pieces have different finishes. That record can help you avoid repeating an application too soon and can make it easier to identify which product caused a color or texture change. It does not need to be elaborate: the item, product name, date, and result are enough. If the manufacturer changes its instructions or you replace a component, update the routine rather than assuming the old directions still apply.
Keep tack in a clean, dry, ventilated storage area. Avoid leaving leather in a hot vehicle, a damp pile, or direct sun for long periods. Do not store it while damp or coated in dirt. Store pieces so they are not crushed, sharply folded, or pressed against hardware that could mark the leather.
If you are choosing a care product, compare the item's intended use and directions before purchase. Hooves and Paws carries options such as Weaver Leather Therapy Restorer, Sheps Neatslene Harness Oil, and Weaver Leather Leather Therapy Wash. Review each product page and follow the product label, because a cleaner, restorer, and oil are not interchangeable for every leather finish or tack component.
Key Takeaway
Clean and inspect after use, then decide whether conditioning is actually needed. A regular inspection habit is more useful than a rigid application schedule.
How can you compare conditioner formats and care approaches?
Products may be sold as liquid, cream, balm, or oil, but the format by itself does not establish that one is best. The label, leather finish, and intended use matter more than a general preference for a thicker or thinner product. Use this comparison as a way to ask better questions, not as a substitute for the maker's care instructions.
| Format or approach | Potential practical advantage | What to watch for |
|---|---|---|
| Liquid conditioner | May be easy to spread in a thin layer over a broad surface. | Control the amount carefully and check for pooling near stitching or folds. |
| Cream or balm | Can be applied in small amounts to a defined area. | Work it evenly and buff or wipe as directed to avoid a heavy feel. |
| Oil-based product | May be intended for particular unfinished or traditionally treated leather. | Do not assume compatibility; appearance and feel can change, so follow the product and tack maker guidance. |
| No conditioner yet | A sound, clean surface may need inspection and storage rather than another application. | Do not condition automatically if the leather does not need it or directions advise against it. |
Before choosing a format, consider where you will use it. A large saddle panel may be easier to work in small sections with a product that spreads predictably. Narrow straps, keepers, and areas near buckles require a controlled application so product does not collect in creases. Reins deserve particular attention because residue can affect grip. A convenient format is useful only if it helps you apply the right amount and remove excess.
Product shopping is also a chance to check the tack itself. Confirm the item's material description, intended use, and care notes before adding anything to a routine. The Martin Woolskin oil pad product page is one example of a leather-care supply listing to review for its specific product details; do not treat that item as interchangeable with a conditioner. Hooves and Paws is a family-owned online retailer serving horse, dog, and cat owners since 1994, with a focus on curated supplies and personal service.
Common conditioning mistakes to avoid
Applying conditioner to dirty leather: Dirt and grit can be rubbed into the surface. Remove loose debris and clean the leather appropriately first.
Using too much at once: A heavy layer can leave residue and change the feel of tack. Start small, spread it thinly, and remove excess as directed.
Skipping a patch test: Conditioner may darken or otherwise change the appearance of some leather. Test an inconspicuous area and wait for it to dry before treating visible surfaces.
Mixing products: Applying several cleaners, oils, or conditioners together can create unexpected results. Use products in the sequence and combination stated by their makers.
Trying to repair structural damage with conditioner: Cracks, broken stitching, stretched holes, and failed hardware can affect safety. Stop using questionable tack and seek a repair assessment.
Putting tack away before it is dry: Dampness trapped in storage can contribute to odor or other deterioration. Give cleaned or conditioned tack suitable time to dry in a ventilated location.
Assuming all leather is alike: Tack can include different leather finishes and non-leather components. Treat each surface according to its own product and maker guidance.
Using an improvised household product: A product intended for furniture, shoes, or general household use may not be suitable for tack. Do not infer that it is safe from a familiar ingredient or a similar appearance. Look for directions that fit the specific leather and use, and ask the maker when in doubt.
When should tack be repaired or replaced?
Conditioner is for routine care of sound leather, not for restoring strength. Stop and seek a qualified assessment if a strap is deeply cracked, stitching is separating, a hole is stretched or tearing, a buckle is damaged, or a component feels weaker than it should. These problems may worsen under tension. Do not ride in equipment that you believe could fail.
Persistent mold, a strong unusual odor, sticky surfaces, or a finish that flakes or transfers color also calls for more than another coat of conditioner. Avoid experimenting with aggressive cleaners or household products. Ask the tack maker, a knowledgeable saddler, or another qualified leather-care professional for advice about the specific item.
During inspection, pay special attention to places where straps carry tension or change direction around hardware. Look at both sides of a strap, not only the part that is easiest to see while it is hanging. Check whether stitching is intact and whether holes have become elongated or started to tear toward an edge. A clean appearance does not prove that the material underneath is sound, so appearance alone should never be used to clear damaged equipment for riding.
Separate routine surface care from repair decisions. A small cosmetic scuff may be something to discuss with a leather-care professional, while a failing billet, girth strap, or bridle component can create an immediate safety concern. When you are uncertain, remove the item from use until someone qualified has assessed it. Keep a note of the affected part so a repair professional can examine the exact area rather than guessing from a general description.
Shop horse tack and care supplies today
Frequently Asked Questions
How often should I condition horse tack?
There is no universal schedule. Consider how often the tack is used, what conditions it encounters, the leather's appearance and feel, and the manufacturer's care guidance. Clean and inspect regularly, then condition only when appropriate for that leather and product.
Can I use any leather conditioner on a horse bridle?
No. Check whether the product is intended for the bridle's leather type and finish. Test an inconspicuous area first, use a small amount, and follow the label. Ask the bridle maker if the material or finish is uncertain.
Should I condition tack before or after cleaning?
Remove dust and grime first, and use a suitable cleaner if needed. Let the leather dry as directed, then apply conditioner only if it is appropriate. Conditioner should not be used to cover dirt or applied to wet leather.
Will conditioner fix cracked leather?
Do not rely on conditioner to repair cracks, broken stitching, stretched holes, or damaged hardware. These may affect the safety of the tack. Stop using questionable equipment and get it assessed by a qualified repair professional.
Can conditioner make reins slippery?
Excess product or residue can change how leather feels in the hand. Apply sparingly, wipe off excess, and let the reins dry fully before use. If the grip still feels slippery, follow the product directions and do not ride until the reins feel secure.
Can I use household oil on horse tack?
Do not assume a household oil is suitable for tack. It may not be designed for the leather's finish or the equipment's use. Choose a product with clear leather-care directions, test it first, and follow the tack maker's guidance.
What is the safest way to store conditioned tack?
Let the tack dry fully, then store it clean in a dry, ventilated place away from prolonged heat or direct sunlight. Avoid crushing it or leaving it in a damp pile, and check the condition of the leather and hardware before use.
Thoughtful product selection and light, consistent care can keep sound leather easier to inspect and ready for use, while helping you spot problems that need professional attention.


