


Choosing the right roping reins length in feet begins with understanding what a seller’s number describes. One listing may give the length of each separate rein, while another may give the total length of a loop. The measurement is only a starting point: your hand position, rein style, and how you manage slack matter too.
What does roping reins length mean?
Quick Summary
Before comparing numbers, identify the start and end points and whether the seller means one side or a full loop. Measurements taken by different methods are not directly comparable.
Roping reins may be made as two separate pieces or as a continuous loop, and the naming conventions are not universal. With separate reins, a listed length might refer to one rein from its bit connection to its end. With a loop, the number could describe the entire circumference or the distance along one side. A product listing should clarify this. If it does not, ask before ordering rather than infer from the number alone.
Check whether the measurement includes a snap, buckle, or other attachment. Those details change the reported figure without necessarily changing the usable reach in your hand. For a fair comparison, record the start point, end point, whether the piece was relaxed, and whether hardware was included.
In general, follow the material without stretching it. Leather and other flexible materials can lengthen under tension, so pulling hard can produce a misleading figure. If a manufacturer supplies a measuring method, use that method for that product.
How many feet long should roping reins be?
There is no one length that fits every horse and rider. The right choice depends on your usual hand position, how you hold or gather the reins, the horse’s build, the bridle setup, and your riding routine. A shorter pair may leave less material to manage, while a longer pair offers more material to handle. Neither is automatically better.
Start with a reference pair you already use comfortably. Lay it out and measure it using the same method you expect the seller to use. Write down the result and how you measured it. If your current pair is damaged or an unusual style, treat the measurement as a clue, not a prescription. Compare the construction and intended use as well.
If you do not have a reference pair, avoid choosing from a bare number. Ask an experienced instructor or tack professional to help you assess how you hold the reins and how much slack you can manage. A product’s stated dimensions can tell you what it is, but cannot account for every rider’s habits.
Compare length choices by use and handling
The following table is a decision aid, not a universal sizing chart. It compares a candidate pair with your current comfortable pair. It does not assign exact feet because product styles and measuring methods vary.
| Candidate compared with your pair | Possible handling difference | Fit question to check |
|---|---|---|
| Shorter | Less slack may be available to gather or reposition. | Can you keep your familiar hand position and make ordinary adjustments without reaching? |
| About the same length | Reach may feel familiar, though material or width can still change the feel. | Are the style, grip, attachment, and measurement method also comparable? |
| Longer | More material may need to be held or managed. | Can you control the extra slack without tangling or distraction? |
To use the table, first compare like measurements. If your current pair is separate reins and the new item is a loop, do not compare a single side measurement with the loop’s full circumference. Ask the seller for clarification, or compare the usable distance from the bit connection to the point where your hand normally holds the rein.
Then think about the activity and your normal routine. You may want a different feel for different work, but a measurement alone does not establish that a rein is suitable for a discipline or horse. Follow your instructor’s guidance and the product maker’s intended-use notes.
Shop This Post

Featured in this article
Professional's Choice Esponja con cuerda - Esponja de baño para colgar y secar
$17.01
Shop Now →
How can you measure reins at home?
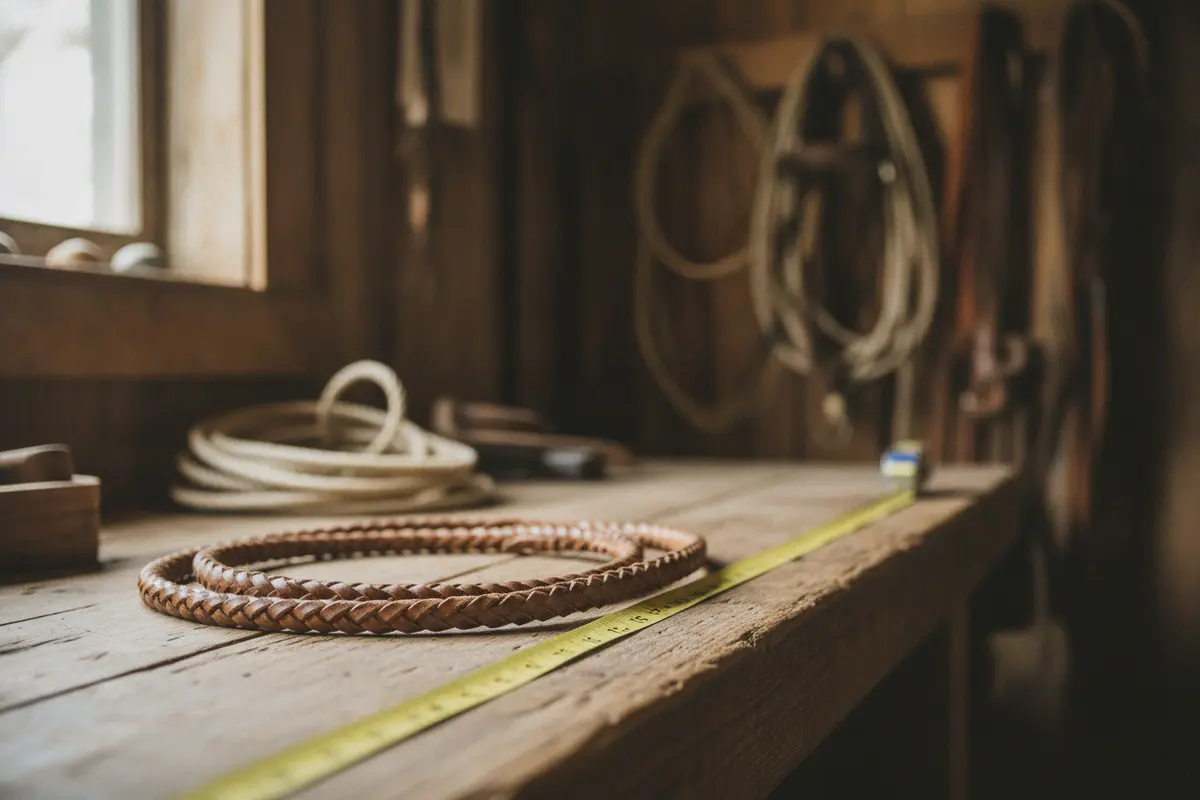
A consistent home measurement can help you compare a familiar pair with a listing. Use a flexible tape measure on a clean, flat surface. Do not pull the rein taut or measure it while twisted.
- Separate and untwist. Lay the reins flat so each length follows its natural path. Check for folds or twists that could shorten the measurement.
- Choose the reference points. For a separate rein, start where it attaches at the bit and finish at the rein end. If the product’s specified method uses another point, note that separately.
- Measure each side. Record both sides of a separate pair. If they differ, recheck the setup and note the difference rather than averaging it away.
- Record the style. Mark whether the item is a pair or loop. For a loop, write down whether you measured the full circumference or only one side.
- Note what is included. State whether snaps, buckles, or other hardware are part of the measurement.
- Compare the same way. Use the listing’s description or ask the seller to clarify its method before deciding whether the dimensions suit you.
For example, suppose your relaxed separate reins measure a certain distance from bit connection to end. A listing that gives the circumference of a loop cannot be compared by simply looking for the same number. First determine what portion of the loop would run from the bit to your hand in your setup, and verify the seller’s convention. Do not assume a conversion based on product style.
Which details matter besides length?
Key Takeaway
Length is one part of a rein’s fit. Construction, material, width, grip, and attachments also affect how it feels and whether it suits your setup.
Consider these details before buying:
- Rein style: Separate reins and loops are handled differently and may be measured differently. Compare the actual design, not just the label.
- Material and care: Think about how the material feels in your hands and what cleaning or conditioning it requires. Follow the maker’s care guidance.
- Width and surface: A rein can feel different in your hands because of its width, texture, or finish even when its length is familiar. If possible, compare these features in person or review the product specifications.
- Attachment: Check the bit-end connection and hardware against your bridle arrangement. Confirm that it fastens securely and is compatible with your setup.
- Wear: Inspect stitching, edges, fasteners, and areas that bend or rub. Do not rely on tack with visible damage or uncertain attachments.
- Intended use: Follow the product description and seek knowledgeable guidance if you are unsure whether a particular style is appropriate.
For a concrete example of how product dimensions may be presented, review the Weaver Leather Flat Barrel Reins listing. It describes a particular barrel rein product; it does not establish a standard roping rein length or mean the styles are interchangeable. Use the page as an example of checking item-specific details, not as a sizing rule.
For broader western tack comparisons, browse the western performance tack collection. Consider the exact description of each item rather than assuming that products grouped together have the same construction or use.
Fit checks to make before faster work
After attaching a new pair, check it on the ground first. Confirm the reins are fastened securely, not twisted, and in sound condition. Then, in a safe and controlled setting, see whether they feel manageable at your usual hand position. If you are new to the equipment or unsure about fit, ask a qualified instructor or experienced horse person to observe.
- Can you hold your normal position without reaching unusually far or shortening your hands?
- Can you take up and release the reins without awkward gathering?
- Do the ends stay out of the way rather than dragging, tangling, or distracting you?
- Can you make ordinary adjustments while maintaining comfortable, consistent contact?
- Do the bit connections remain secure and sit as intended when you move?
Begin with simple, familiar work at a walk. If the reins slip, interfere with control, or create a distraction, stop in a safe place and reassess. Do not use unfamiliar equipment first in a demanding situation or at speed. A rein that seems convenient while standing may feel quite different once the horse is moving. For broader horsemanship and riding resources, consult the United States Equestrian Federation; seek direct instruction for your horse and discipline rather than treating a general guide as a substitute for hands-on coaching.
A practical first-ride sequence
Use a repeatable sequence so you can tell whether a change in rein length is helping or simply feels unfamiliar. First inspect the pair on the ground. Check the bit connections, stitching, edges, and any wear where the rein bends. Attach both sides as directed and confirm there is no twist. If the reins have adjustable connections, make sure the fastening is secure before mounting.
Once mounted in an enclosed, familiar area, settle into your normal position before judging reach. Hold the reins as you ordinarily would rather than changing your grip to make a new pair seem to fit. Walk on a straight line, then make a few uncomplicated turns and transitions that you and your horse know well. Notice whether the rein ends stay clear and whether you can make small adjustments without gathering awkwardly. If you feel rushed or need to look down repeatedly to manage the material, stop and reassess.
Do not make several equipment changes at once if you are trying to identify a length preference. Keeping your familiar bridle arrangement and routine makes it easier to notice what the reins themselves change. This is not a test of performance. It is a cautious handling check, and you should return to your established tack if control or comfort is in doubt.
Keep a simple comparison record
A short note can make a future purchase easier. Record the rein style, relaxed measurement method, material, width, attachment type, and how the pair felt during basic work. Avoid writing only “too long” or “too short.” A useful note is specific, such as “loop style, full circumference noted separately, extra slack gathered at my usual hand position.” The detail helps you compare a later listing accurately and explain your preference to a tack professional.
If you are comparing two products, change only the length when possible, and keep the other characteristics in mind. A thicker or grippier rein may feel more substantial and can change how much material you comfortably hold. Therefore, a difference in feel does not always mean the measured length is the cause. Include the construction and hand feel in your notes instead of treating a single number as the whole answer.
Fit is not only a matter of rider comfort. You need to be able to manage the reins consistently and safely. If a different length changes your reach or prompts you to gather excess material, return to a familiar setup and seek hands-on advice before trying again.
Common sizing mistakes to avoid
- Comparing different conventions. A full loop and one separate rein are not the same measurement. Confirm exactly what a number represents.
- Stretching the material. Tension can distort a home measurement. Let the rein lie naturally.
- Choosing by the horse’s size alone. Your hand position, construction, and rein management matter too.
- Assuming longer means more versatile. Extra material can be harder to manage if it interferes with your usual routine.
- Ignoring width and feel. A similar length can still feel unfamiliar if the material, surface, or width changes.
- Testing too aggressively. Learn the feel in a controlled setting before using new tack for demanding work.
Frequently Asked Questions
Is there a standard roping reins length in feet?
No single standard works for every horse and rider. Measurement conventions also differ, so confirm whether the stated size refers to one side, a pair, or a loop circumference before comparing products.
Should I measure one rein or both together?
For separate reins, measure and record each side from its attachment point to its end. For a loop, establish whether you are recording the full circumference or one side. Write down the method alongside the number.
What if the product listing does not explain its measurement?
Ask the seller what the start and end points are, whether hardware is included, and whether the number describes one side or the whole item. Do not order based on an uncertain comparison if length is important to your fit.
Can barrel reins be used as roping reins?
Do not assume that different styles are interchangeable. Compare construction and intended use, and ask an experienced instructor or tack professional about your specific setup.
What if I am between two lengths?
Compare each candidate with a pair you already handle comfortably, using matching measurement methods. Think about how much slack you can manage and get hands-on guidance if you remain uncertain.
How should I check a new pair before riding?
Inspect its condition and attachments, secure it correctly, and check for twists while still on the ground. Then begin with simple work in a safe area and stop if the reins interfere with control.
Shop western performance tack today
When you compare the same measurement method and check the reins in a calm, controlled setting, you can make a more informed choice about length, feel, and fit.


