


Waterproof bell boots for turnout may be worth considering when a horse needs heel coverage in a wet or muddy paddock. The useful question is not only whether a boot sheds water, but whether it fits, stays put, and can be removed and checked easily. Bell boots are equipment, not treatment, and they do not replace regular hoof and skin checks.
What can bell boots do in wet turnout?
Bell boots cover the back of the hoof and the heel bulbs. They are commonly used when a horse risks striking its own heel with the opposite hoof, a movement often called overreaching. In turnout, coverage may also reduce direct contact between mud and the covered area. It does not make the hoof or skin waterproof, and it cannot prevent every scrape, impact, or injury.
Think of water resistance as a material feature, not a promise that skin will stay dry. Remove the boots and inspect the area after turnout.
If the horse pulls shoes, forges, or clips its heels, ask a farrier or veterinarian whether bell boots suit its needs. The answer can depend on hoof shape, shoes, movement, sensitivity, and the paddock. Do not use a boot to cover a wound or hide swelling.
How do you choose a pair for mud and rain?
Start by defining the job. A horse in a damp but firm paddock faces different conditions from one in deep mud where boots can catch or be pulled. Consider the following features together rather than relying on a product label alone.
| Feature | What to inspect | Why it matters in turnout |
|---|---|---|
| Coverage | Heel bulbs are covered; boot does not drag | Provides the intended area of protection without interfering with movement |
| Fit and shape | No pinching, large gaps, or folded edges | Grit and movement can make poor fit uncomfortable |
| Closure | Fastener is secure and easy to open for checks | A loose boot may twist or come off; a damaged fastener may not hold |
| Material | Interior is smooth; surface and seams can be cleaned as directed | Mud or sand trapped inside can irritate skin |
| Condition | No cracks, sharp edges, or worn closures | Damage can cause rubbing or failure during use |
| Care directions | Manufacturer specifies cleaning and intended use | Water resistance does not establish suitability for prolonged turnout |
A pull-on style may feel simple to fit, while a fastening style may be easier to open and inspect. Neither is best for every horse. Choose a design that matches the horse’s hoof and the maker’s sizing directions. If your horse has a history of rubbing, prioritize a smooth interior and a quick way to inspect the skin.
Before ordering, compare the product’s stated use with your actual conditions. “Waterproof” can describe how an outer surface handles water, but seams, openings, and prolonged wet contact can still matter. Check the care label for restrictions and do not assume all materials tolerate the same cleaners or drying methods. Browse horse leg protection options as a starting point, while remembering that products covering different areas are not interchangeable.
How should the boot fit?
Fit it on a clean, dry lower leg and follow the manufacturer’s instructions. The boot should cover the heel bulbs while sitting evenly. It should not press into the coronet band or pastern, pinch skin, or hang low enough to catch the ground. Fasten it securely without overtightening.
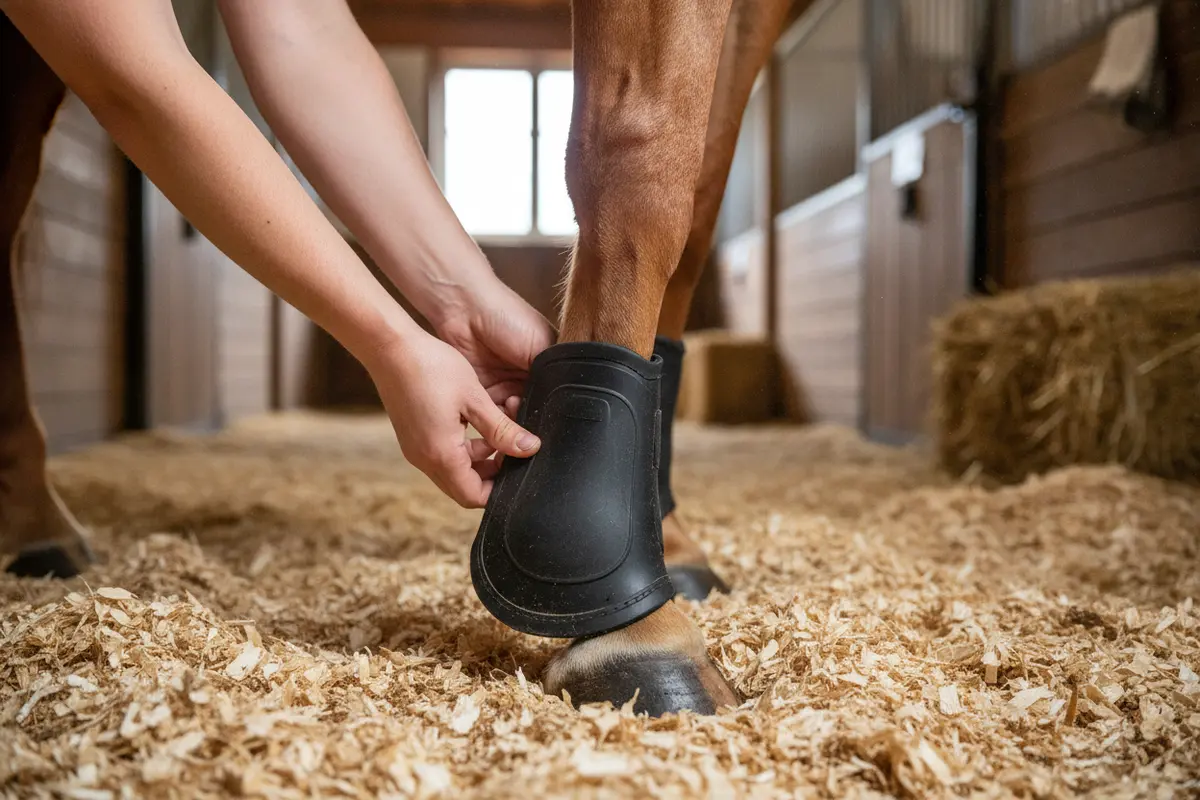
- Clean the hoof and lower leg. Check for grit, packed mud, and existing irritation.
- Position the boot according to the maker’s directions, with the closure oriented as intended.
- Run a hand around the edge. Smooth folds and remove trapped hair or debris.
- Walk the horse briefly on safe footing. Watch for twisting, slipping, or an altered step.
- Remove the pair after the first short use and inspect the skin before extending wear.
Do not assume sizes transfer between brands or styles. If a boot rotates, leaves rub marks, comes off repeatedly, or seems to affect movement, stop using it while you reassess the fit. A softer material does not compensate for an incorrect shape. Ask a knowledgeable tack professional, farrier, or veterinarian for guidance if you cannot get a stable, comfortable fit.
Shop This Post

Featured in this article
Campanas protectoras Professional’s Choice Ballistic BB25 - Nailon DuPont, diseño antigiro y forro UltraShock
$38.99
Shop Now →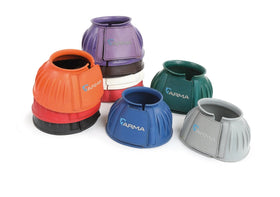

Build a before-and-after turnout check
A repeatable routine catches small problems before they become reasons to keep using a poor-fitting boot. Before turnout, inspect both hooves and lower legs, not just the side that looks dirty. After turnout, remove the boots promptly enough to check for moisture and debris.
Before turnout
- Pick out the hooves and look for packed mud, stones, cracks, or a loose shoe.
- Check the skin around the heel bulbs and coronet for tenderness, scabs, or swelling.
- Inspect the boot’s inside and edges, then check closures for wear.
- Fit each boot on the correct leg and confirm it sits evenly.
After turnout
- Remove each boot and compare the two legs for dampness, heat, grit, or redness.
- Look for a shifted closure, a torn edge, or mud packed inside.
- Clean the boots before residue hardens, following the product directions.
- Let them dry fully before putting them away or using them again.
If the same leg develops irritation, record the conditions, duration, and which boot was worn. A short note can help identify a repeated fit or footing issue. Do not simply tighten the closure or add a liner without checking whether the manufacturer allows it and whether the change creates pressure.
When should you remove the boots and ask for help?
Remove the boots and examine the leg if you notice heat, tenderness, swelling, broken skin, or an unusual change in gait. Contact a veterinarian for an injury, persistent lameness, or signs that concern you. Bell boots are not wound dressings and should not be used to conceal a problem.
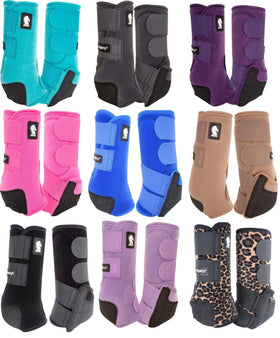
Deep mud can tug at a boot, and small debris can collect under an edge. If the boots become heavy, shift, or repeatedly come off, turnout may not be an appropriate use for that pair. Follow the manufacturer’s limits. For brushing protection on a different part of the leg, see brushing boots; they serve a different purpose and do not replace bell boots.
A product example can help you understand available formats, but it is not a substitute for fit assessment. Review a bell boot option alongside its current specifications and care instructions. If your horse has a recurring hoof or skin issue, ask your care team what protection is appropriate.
For broader horse-health guidance, the American Association of Equine Practitioners provides owner resources. Use a veterinarian for individual injury or health concerns; general equipment advice cannot diagnose a specific horse.
Clean and dry boots without damaging them
Brush off loose dirt, then rinse away mud with clean water. If the maker permits it, use mild soap and a soft cloth for stubborn residue. Avoid solvents or strong cleaners unless the care directions explicitly allow them. Pay attention to seams, edges, and closures, where grit can remain after the outside looks clean.
- Open closures and remove detachable liners only as directed.
- Rinse grit from seams, edges, and fasteners.
- Wipe the inside and check for hair, sand, rough spots, or cracks.
- Air-dry completely before storage or reuse.
- Store in a clean, ventilated place with closures laid flat or fastened as directed.
Do not dry boots against a heater or in intense direct heat unless the manufacturer says it is safe. Heat can affect some materials and closures. A boot that looks clean may still be worn or damaged, so inspect it after cleaning rather than assuming washing restores its condition.
Plan turnout use around the horse, not just the weather
Rain alone does not determine whether bell boots are useful. Think through the horse’s history and the turnout setup. A horse that repeatedly catches a heel may have a different need from a horse with no such pattern. Consider whether shoes are worn, whether the horse moves in a group, how rough the footing is, and whether the boots can be checked during the day. If turnout lasts many hours and nobody can inspect the horse, be especially cautious about leaving equipment on when its fit or behavior is uncertain.
Make a short plan for the first few uses. Begin when you can check the horse again soon, rather than introducing a new pair just before an extended period away from supervision. Note how the boots sit at the start, then compare them after a walk and after turnout. If they shift, collect debris, or leave marks, stop and reassess. Repeatedly putting them back on without correcting the cause can turn a small fit concern into ongoing irritation.
Also consider whether the horse is accustomed to wearing this style. A horse may react to unfamiliar gear by rubbing, kicking, or changing its movement. Introduce equipment calmly and observe the horse in a safe setting. Do not leave a horse unattended with new gear until you have checked that it stays in place and causes no obvious discomfort.
How do boot options differ?
There is no single construction that works for every hoof or paddock. Compare likely trade-offs before buying, then check the actual product’s stated care and use directions. The table is a decision aid, not a claim that one style is universally superior.
| Option | Potential advantage | Questions to ask |
|---|---|---|
| Pull-on design | Simple profile with no strap to fasten | Can it be put on without forcing it, and does the shape stay stable? |
| Hook-and-loop closure | Can be opened for fitting and inspection | Does the closure remain secure when dirty, and can it be cleaned as directed? |
| Soft or flexible material | May conform around the hoof | Does it retain moisture or grit against the skin, and is the edge smooth? |
| More structured material | May hold its shape during use | Does the shape match the hoof, and are there firm edges that could rub? |
Whichever design you consider, check the fit on the horse rather than judging by a photograph. Read sizing instructions for that exact product. If between sizes, do not assume that choosing the larger size is automatically safer: excess movement can allow rotation, while a smaller size may pinch. Seek product-specific fitting help if the recommended size is unclear.
Keep a small care and replacement checklist
A consistent routine makes it easier to tell whether a boot is still suitable. Keep the pair together and inspect both after cleaning, so a damaged closure or rough edge is not missed. Check for thinning material, cracks, stretched fasteners, seams that have started to separate, and changes in shape. Replace or retire a boot that no longer holds securely or has an edge that could rub. Do not try to repair it with an improvised strap or adhesive unless the maker recommends that repair.
It can help to record a few observations during the first week: date, approximate wear period, footing condition, whether the boot shifted, and how the skin looked when it came off. This is not a medical record, but it can reveal a pattern. For instance, if one boot shifts whenever the ground is soft, the fit or style may be unsuitable for those conditions. If redness appears only after longer wear, duration may be a factor. Stop use when you find irritation rather than waiting for the next scheduled check.
When storing boots between uses, make sure they are fully dry and free of mud. Keep them away from sharp tools, direct heat, and places where closures can snag. Before the next turnout, look again rather than relying on memory. A boot cleaned last time can still collect dust or become damaged in storage.
Use a simple decision process for changing conditions
Turnout changes from day to day. The paddock may be firm in the morning and soft after rain, or the horse may spend longer outside than usual. Make the decision based on the horse and the actual conditions, not on the word “waterproof.”
- Firm, dry footing: Ask whether the horse needs heel coverage at all. Avoid adding equipment without a clear reason.
- Damp ground: Check whether the boot stays in position and whether moisture collects inside during the planned wear period.
- Sticky or deep mud: Consider the risk of the boot being pulled or shifting. Follow the product’s intended-use guidance and inspect soon after use.
- New irritation: Stop use, check for debris and fit issues, and seek professional advice when symptoms persist or are significant.
For example, if a horse returns with clean-looking boots but damp skin and fine grit near an edge, the right response is not to leave them on longer. Clean and dry the area, check whether the boot is rubbing or holding moisture, and reassess before the next turnout. If the skin is broken or the horse is sore, ask a veterinarian rather than experimenting with a different fit.
Frequently Asked Questions
Do waterproof bell boots keep a horse’s heels dry?
Not necessarily. Water can enter at openings or seams, and moisture can remain against skin. Remove the boots and inspect the area after turnout.
Can bell boots stay on for a full day outside?
Follow the product directions and your care professional’s advice. Check the horse regularly, and remove the boots if they are wet, dirty, damaged, shifted, or causing irritation.
Should bell boots feel tight?
They should stay in place without pinching or restricting movement. Use the maker’s fitting guidance and reassess if the boot slips or leaves marks.
Can I put bell boots over a wound?
No. They are not wound treatment or dressings. Remove the boot and seek veterinary advice for broken skin, swelling, heat, pain, or lameness.
How often should I clean turnout bell boots?
Inspect them whenever you remove them and clean away mud or grit before it builds up. Let them dry fully before reuse, and check for wear each time.
Are bell boots the same as brushing boots?
No. They cover different areas and serve different purposes. Choose equipment for the protection needed, and do not treat one style as a substitute for another.
Shop Horse Leg Protection Today
Appropriate turnout gear starts with a clear purpose, a comfortable fit, and regular checks. Remove, clean, dry, and inspect each boot so you can spot problems before the next use.


