


Choosing the right curb bit can feel like a huge decision, but it’s one of the most important you'll make for clear communication with your horse. Proper bit selection is about more than just rider control; it’s about your horse’s comfort and your shared confidence. The correct curb bit refines your cues, enhances your horse’s performance, and can make every ride feel more connected. This guide breaks down the entire process, giving you expert tips to find the perfect match. We'll cover the basics, explore different types, and walk through fitting, so you can choose with clarity.
Curb Bits Explained: How They Work and Why They Matter
Selecting the right curb bit is a vital step in achieving effective horse and rider communication. Before exploring types and selection, it is important to understand how a curb bit works, its components, benefits, and common misconceptions. This section will give you a strong foundation on curb bit function and use.
What Is a Curb Bit?
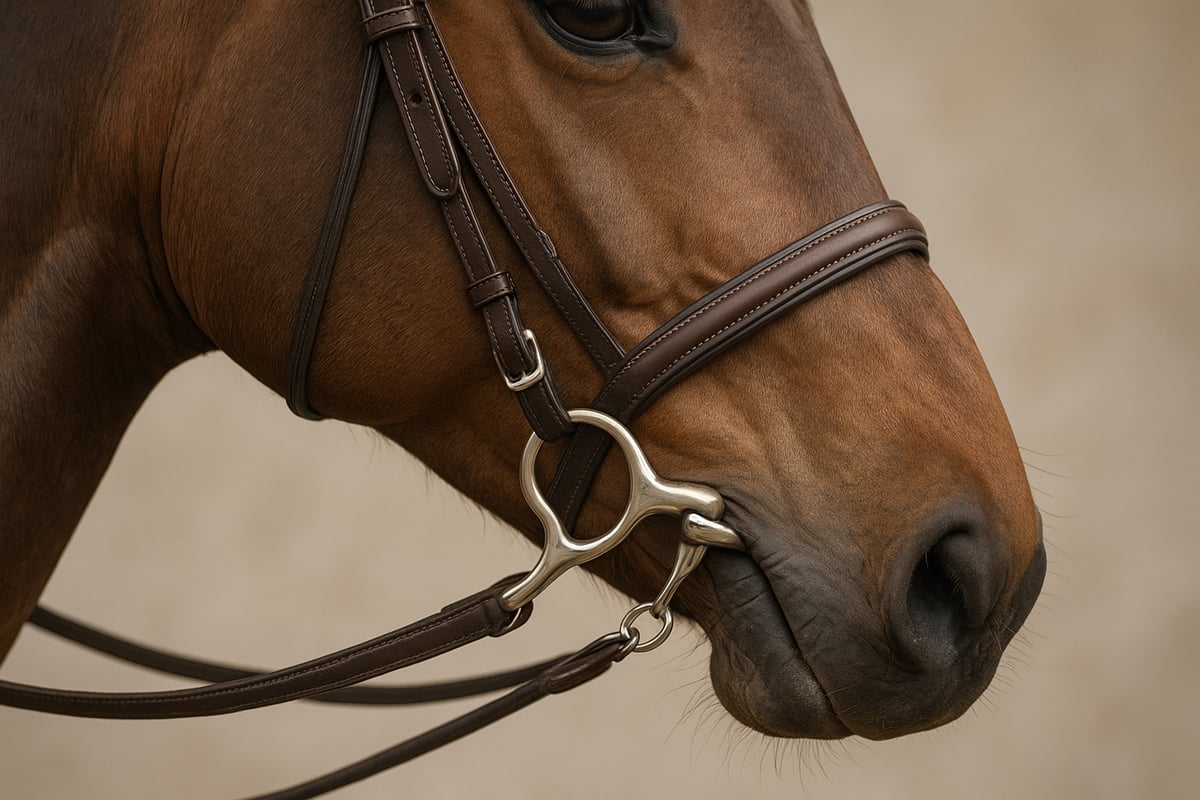
A curb bit is a type of horse bit designed to communicate with the horse through leverage rather than direct pressure. Used in both Western and English riding, the curb bit features shanks that multiply the rider's rein movement, giving more precise control. Unlike snaffle bits, which act directly on the corners of the mouth, curb bits use leverage to apply pressure to the horse's poll, chin, and mouth. The curb strap or chain beneath the chin is essential for proper function, as it stabilizes the bit and distributes pressure. For example, in ranch riding, the curb bit provides subtle cues for lateral movement, while in arena performance, it allows for refined transitions. For more on function and mechanics, see the Curb Bit Mechanics and Usage guide.
A Look at the Parts of a Curb Bit
Understanding curb bit anatomy helps you select the right model for your horse. The main parts include shanks (vertical arms extending below the mouth), the mouthpiece (bar or ported section inside the mouth), port (central arch for tongue relief), curb strap or chain (under the chin), and cheekpieces (connect to the bridle). Each part targets specific pressure points:
| Part | Pressure Point |
|---|---|
| Shanks | Poll, chin |
| Mouthpiece | Bars, tongue |
| Port | Tongue |
| Curb strap | Chin groove |
Shank length affects leverage, with longer shanks increasing pressure. Mouthpiece design, such as a solid versus a ported style, changes how the curb bit feels to the horse. For example, a ported mouthpiece offers more tongue relief, while a solid bar creates even pressure.
The Pros and Cons of Curb Bits
The curb bit offers several advantages when used correctly. Benefits include:
- Enhanced communication through leverage
- Greater refinement for advanced maneuvers
- Suitability for finished horses in show or ranch work
However, there are drawbacks. If misused, a curb bit can be harsh and is not recommended for inexperienced horses or riders. Industry studies report that misuse can lead to discomfort or behavioral issues. For example, a study found horses responded more promptly to cues with a properly fitted curb bit, but showed resistance when the bit was too severe or poorly adjusted.
Is It Time for a Curb Bit?
The curb bit is appropriate for various disciplines, including Western, dressage, trail, and show events. Riders should consider their skill level and the horse’s training. Typically, a curb bit is introduced after the horse is responsive to a snaffle. Professional trainers often recommend waiting until the horse is at least five years old and shows readiness for refined cues. For instance, transitioning from a snaffle to a curb bit usually occurs over several months, with close observation of the horse's comfort and responsiveness.
Common Curb Bit Myths, Busted
There are several myths about the curb bit. One common belief is that all curb bits are harsh, but in reality, severity depends on the bit’s design and the rider’s hands. Another misconception is that curb bits are suitable only for experienced horses. Experts clarify that, with proper selection and training, a curb bit can be gentle and effective. Equine behaviorists have shown that bit severity is influenced more by misuse than by the bit type itself. Data indicate that a well-chosen curb bit, matched to the horse and rider, promotes welfare and communication.
A Rider's Guide to Curb Bit Types and Materials
Selecting the right curb bit requires understanding the variety of designs, materials, and purposes available today. Each element, from the bit’s construction to its intended use, directly impacts your horse’s comfort and performance. Let us break down the essentials.
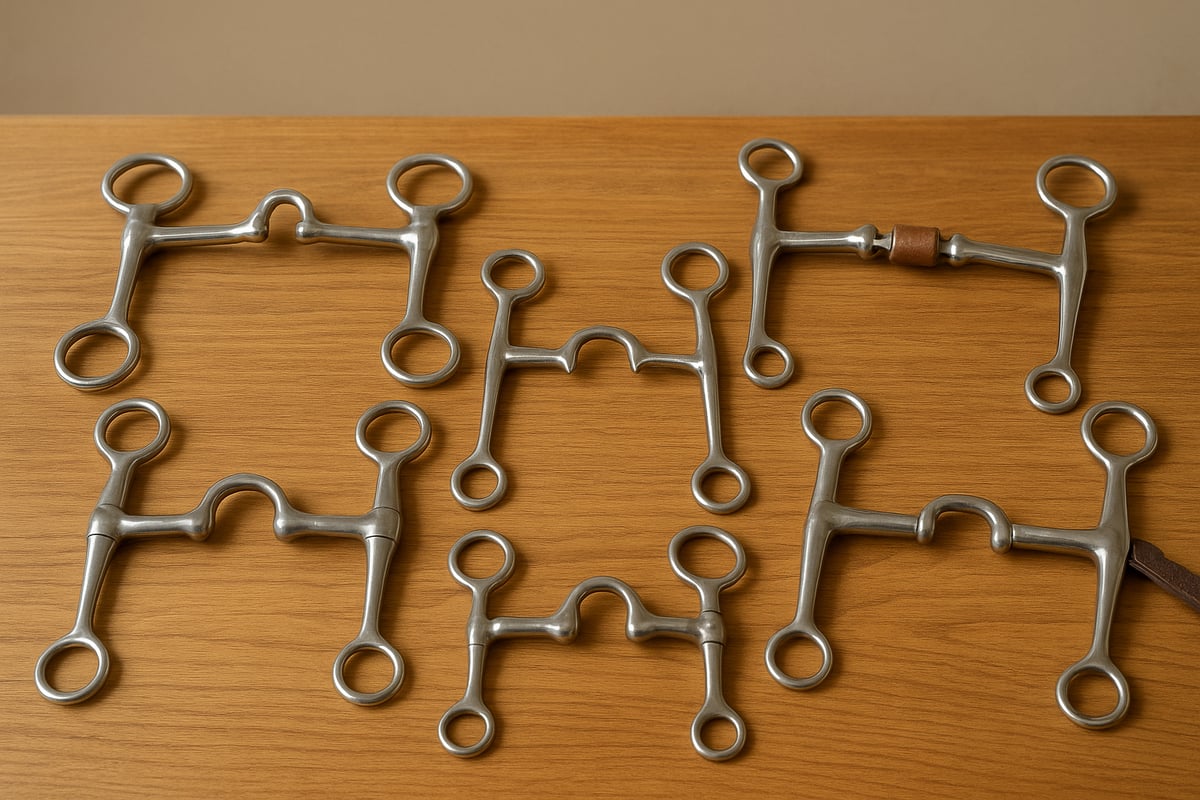
Exploring the Most Common Curb Bit Designs
Curb bit designs vary widely, each tailored to specific riding styles and horse needs. The Tom Thumb curb bit is a favorite among Western riders for its versatility in everyday work and competition. Grazing bits feature swept-back shanks, allowing horses to lower their heads comfortably. Correction bits incorporate jointed or hinged mouthpieces for nuanced cues during advanced training. Ported curb bits provide tongue relief, while spade bits offer maximum leverage for experienced hands.
Here’s a quick comparison table:
| Bit Type | Key Feature | Common Use |
|---|---|---|
| Tom Thumb | Short shank, jointed | All-around Western |
| Grazing | Swept-back shank | Trail, ranch |
| Correction | Hinged mouthpiece | Training, correction |
| Ported | Raised center (port) | Finished horses |
| Spade | Tall, ornate port | Advanced, show |
For a broader overview of bit types and their applications, see this Guide to Horse Bits Overview.
Western Curb Bits
Western curb bits are a staple in disciplines from reining to trail riding. Characterized by their shanks, these bits work through leverage, allowing riders to use subtle rein cues for communication, which is ideal for neck reining. You'll often see styles like the Grazing bit, with its swept-back shanks that let a horse graze more easily, or the Tom Thumb, a popular transitional bit. The primary goal of a Western curb bit is to achieve refinement and responsiveness in a well-trained horse. When selecting one, consider the shank length and mouthpiece style, as these elements determine the amount of pressure applied. The right piece of Western tack complements your horse's training and your riding style, creating a partnership built on clear signals.
English Curb Bits
In English disciplines, particularly upper-level dressage, curb bits are used to refine communication and encourage collection. A common example is the Weymouth bit, which is used with a bradoon snaffle to form a double bridle. An English curb bit uses lever action to apply gentle pressure on the poll and chin groove, which encourages the horse to flex at the poll and carry itself in a more rounded frame. Because this leverage multiplies the rider's rein aids, these bits are considered stronger than a standard snaffle and are reserved for experienced riders with independent hands and horses that understand the cues. Proper use requires precision and feel to maintain a soft, consistent contact with the horse's mouth.
Driving Bits
Driving bits are a specialized type of curb bit designed for horses pulling a cart or carriage. The most common design is the Liverpool bit, which features straight shanks with multiple slots for the reins. This design is highly practical, as it allows the driver to choose the amount of leverage needed. Placing the reins in the lowest slot provides the most leverage, while the highest slot acts almost like a snaffle. This adjustability is crucial for drivers who need to communicate effectively over the long lines and manage the momentum of a horse and carriage. The leverage helps provide the control needed to safely guide a horse in various situations, from a quiet country lane to a bustling show environment.
How Bit Material Affects Your Horse
The material of a curb bit influences both its durability and your horse’s reaction. Stainless steel is popular for its rust resistance and strength, making it a long-lasting choice. Copper inlays can encourage salivation, softening the horse’s mouth and improving acceptance of the curb bit. Sweet iron, which develops a light patina over time, also stimulates salivation and is favored by many trainers for sensitive horses.
Synthetic curb bits, while less traditional, are lightweight and easy to maintain. When choosing a curb bit, consider the maintenance needs and how your horse responds to different metals. A well-chosen material helps ensure clear communication and lasting comfort.
Decoding Curb Bit Mouthpieces
Mouthpiece design is crucial to the function of a curb bit. Solid mouthpieces provide steady, even pressure across the bars and tongue, ideal for horses that prefer consistent contact. Jointed mouthpieces add flexibility, allowing for more independent rein cues but may increase pressure on the tongue.
Ported mouthpieces, with a raised center, relieve tongue pressure and can aid horses with low palates or larger tongues. Roller mouthpieces, featuring a small rotating barrel, are often used for nervous or busy-mouthed horses as they provide a distraction and promote relaxation. Selecting the right mouthpiece for your curb bit depends on your horse’s anatomy and training requirements.
The Impact of Jointed Mouthpieces
Many riders are drawn to jointed mouthpieces because they offer a level of flexibility that solid mouthpieces just can't match. Unlike a solid bar that applies consistent pressure, a jointed bit allows you to use each rein independently. This design is common across many types of horse tack and is great for giving subtle, specific cues, especially when working on advanced movements or needing to isolate a signal to one side. However, this flexibility comes with a major consideration. A single-jointed mouthpiece can create a "nutcracker" effect, folding and putting pointed pressure on the horse's tongue and the roof of their mouth if not used with soft hands. The effectiveness of a jointed bit really comes down to the rider's skill and feel. It's a fantastic tool for clear communication, but it requires a gentle touch to ensure you're having a productive conversation, not a painful one.
How Shank Length and Style Change the Signal
Shank length determines the leverage and response of a curb bit. Short shanks offer mild leverage, making them suitable for sensitive or green horses. Medium and long shanks increase leverage, amplifying rein cues for advanced or finished horses. The style of the cheekpiece also matters. S-shaped shanks provide a slower action, while straight shanks deliver immediate response. Swept-back cheeks are often preferred for arena work, where subtle communication is key.
Matching the shank style of your curb bit to your riding discipline and your horse’s sensitivity ensures effective, humane control.
The Role of the Purchase
When we talk about shanks, it's helpful to break them down into two parts. The "purchase" is the section of the shank that sits above the mouthpiece, where the bridle's cheekpiece attaches. The length of the purchase determines how quickly the bit engages. A shorter purchase results in a faster response; as soon as you apply rein pressure, the bit acts on the poll and chin groove. In contrast, a longer purchase creates a slower, more delayed action. This gives your horse a moment longer to process the cue before the full leverage comes into play. Understanding this relationship helps you choose a bit that matches your horse's responsiveness and your own timing with the reins.
Shank Shape and Severity
The length of the shank below the mouthpiece is the most significant factor in a curb bit's leverage. Think of it like a lever: the longer the shank, the more force is applied from the same amount of rein pressure. This means longer shanks create a more severe bit, while shorter shanks are milder and require more direct rein input from the rider. It’s crucial to match shank length to your horse’s training level and sensitivity. A well-trained horse may respond to the slightest cue from a longer shank, while a less experienced horse might do better with a milder, shorter-shanked bit. You can explore a variety of options in our full horse tack collection to find the right fit.
How Shanks Create a "Warning Signal"
Some curb bits are designed to give the horse a subtle "warning signal" before the pressure fully engages. This feature is often found in bits with loose-jawed or swiveling shanks, or those with rein rings that can rotate. When you pick up the reins, this initial movement allows the shank to shift slightly without immediately tightening the curb strap or rotating the mouthpiece. This small pre-signal gives your horse a chance to anticipate the cue and respond to a lighter touch. According to equine experts, this can greatly improve communication, turning a potential correction into a quiet conversation between you and your horse.
A Quick Look at Specialty and Training Bits
Specialty curb bits fill unique roles in training and competition. Correction bits help address specific issues, such as resistance or one-sidedness, by allowing independent movement of each shank. Transition curb bits are designed to help horses move smoothly from a snaffle to a full curb bit, often with milder mouthpieces and shorter shanks.
Show curb bits are crafted for visual appeal as well as performance, featuring decorative accents and precise balance. Selecting a specialty curb bit should be based on your horse’s current training stage and the specific challenges you aim to address, always prioritizing comfort and clear communication.
Shop This Post

Featured in this article
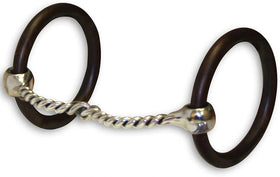
AV Bob Avila Double Ring Snaffle Horse Bit - Sweet Iron Mouthpiece, 3" Rings - Multiple Sizes
$165.00
Shop Now →

How to Choose the Right Curb Bit for Your Horse
Selecting the ideal curb bit in 2025 requires a thoughtful, structured approach. By following these seven expert steps, you can ensure both your horse’s comfort and your own riding success.
Step 1: Consider Your Horse's Training and Temperament
Begin your curb bit selection by evaluating your horse’s unique characteristics. Consider age, training level, mouth conformation, and temperament. Young or green horses often benefit from milder bits, while finished horses may respond well to more refined curb bit cues.
Watch for signs of discomfort, such as head tossing, gaping, or reluctance to accept the bit. These behaviors may indicate that the current curb bit is unsuitable or incorrectly fitted. Always prioritize your horse’s comfort and readiness before making any changes.
Compare how your horse responded to previous bits. If your horse is moving from a snaffle, assess their willingness to accept new aids. This groundwork ensures the curb bit enhances, not hinders, your communication.
Assessing Horse Readiness
Before you even think about adding a curb bit to your cart, take a hard look at your horse's current training. A curb bit is a tool for refinement, not a foundational training aid. Your horse should already be well-schooled in a snaffle, demonstrating a solid understanding of your cues. Look for a horse that is balanced, relaxed, and strong, carrying itself well without leaning on your hands for support. They should respond promptly to your leg and seat aids, showing early signs of collection. If your horse is still working through basic responsiveness or balance issues, it’s not yet time for a curb bit. When in doubt, the best move is always to consult an experienced trainer who can provide an objective assessment of your horse's readiness.
Assessing Rider Readiness
Now, it’s time for some honest self-reflection. Are you ready for a curb bit? The effectiveness and kindness of this tool depend entirely on the person holding the reins. You must have steady, independent hands that can give subtle cues without relying on the reins for balance. Your primary method of control should come from your seat and legs, not your hands. It's also crucial to understand that a curb bit is not a quick fix for behavioral problems or a substitute for proper training. It won't stop a horse that bolts or correct gaps in its education. Using a curb bit requires a deep understanding of its mechanics and a commitment to gentle, precise communication. If you're ready to move to this next level of refinement, you can explore a variety of high-quality horse tack to find the perfect fit.
Step 2: Match the Bit to Your Riding Discipline
Next, clarify your primary riding discipline and specific goals. The ideal curb bit for Western pleasure might differ from what’s best for trail riding, dressage, or ranch work. Each discipline often has unique requirements regarding curb bit design and function.
For example, show horses may require a decorative curb bit that meets competition rules, while working ranch horses benefit from practical, durable designs. Consider if you need subtle cues for advanced maneuvers or a bit that promotes relaxation on long rides.
Matching your curb bit to your discipline ensures your equipment supports both performance and compliance with any relevant regulations.
Step 3: Learn About Leverage and Pressure Points
Understanding bit severity is essential for making informed curb bit choices. The length of the shank and the design of the mouthpiece directly affect the amount of leverage applied. Longer shanks amplify rein pressure, increasing severity, while shorter shanks offer milder control.
Pair the bit’s leverage with your horse’s sensitivity and your own skill level. Sensitive-mouthed horses generally need a gentler curb bit, while experienced riders may use more leverage for precise cues.
Evaluate whether your horse responds calmly to rein pressure or shows resistance. Adjust your selection to avoid excessive severity and promote clear, humane communication.
A Specific Leverage Example
To make this tangible, let’s compare two common scenarios. Imagine a curb bit with long shanks, often seen in advanced Western disciplines. When you apply just a few ounces of pressure on the reins, the long shanks act as levers, multiplying that force. This creates a clear signal at multiple points: the poll, the chin groove, and the bars of the mouth. This amplification is not about force; it’s about refinement. It allows a rider with quiet hands to communicate precise cues for complex maneuvers using minimal rein movement. This is why it’s essential that the rider has developed an independent seat and understands how to give subtle aids.
On the other hand, a curb bit with shorter shanks provides significantly less leverage. The communication is more direct, feeling closer to a 1:1 ratio between your hand and the horse's mouth. This design is often better for horses transitioning from a snaffle or for disciplines where less refinement is needed. Choosing a bit with too much leverage for a horse that isn't ready can cause confusion and resistance. The goal is always clear communication, which is why it's so important to understand the mechanics of leverage when you're selecting from the wide variety of horse tack available for your partner.
Step 4: Pick the Right Mouthpiece and Shank Combo
Choosing the correct mouthpiece and shank pairing maximizes the effectiveness of your curb bit. Mouthpiece designs such as solid, ported, or roller styles distribute pressure differently across the horse’s mouth.
Ported mouthpieces can provide tongue relief for horses with low palates or those needing extra comfort. Jointed or roller mouthpieces may suit horses prone to nervousness or busy mouths.
Match the shank style to your riding needs—straight shanks for direct cues, swept-back for softer transitions. Always consider your horse’s anatomy, ensuring the curb bit fits their mouth shape for optimal communication.
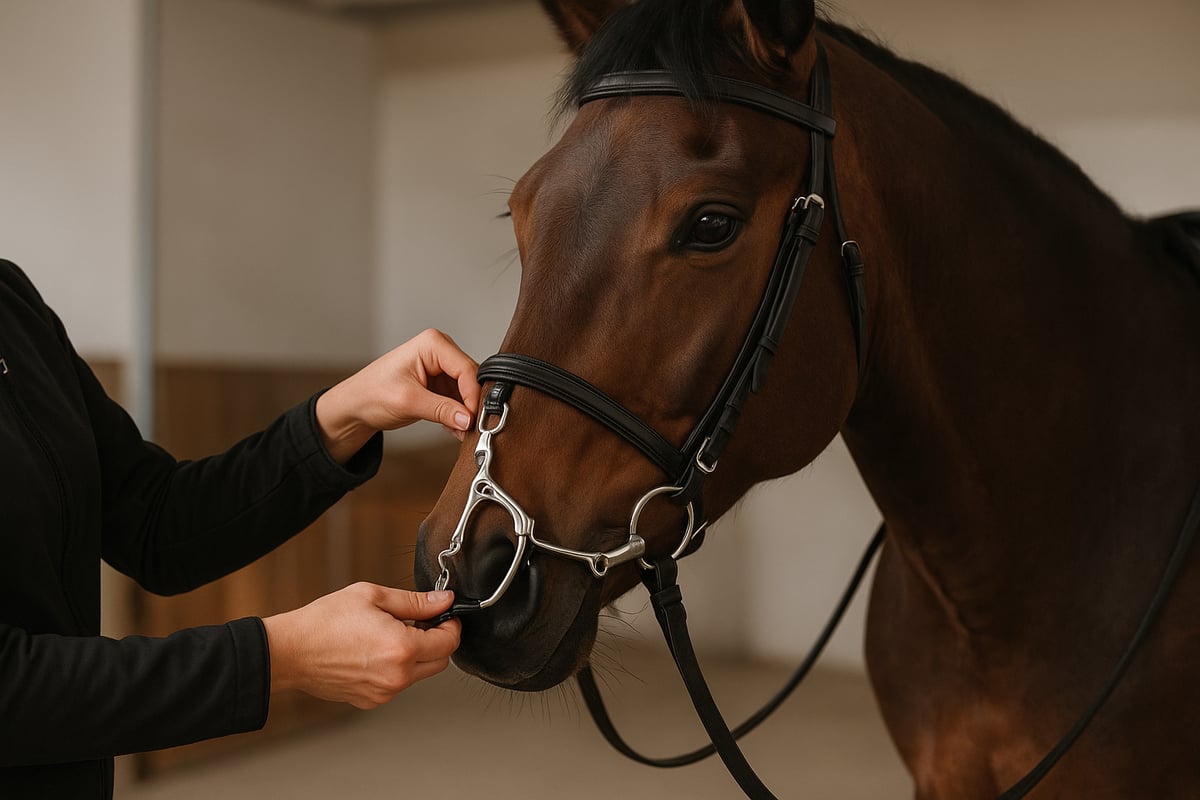
Step 5: Get the Sizing and Fit Just Right
Proper fit is critical for comfort and performance. Measure your horse’s mouth to determine the correct curb bit size. The bit should rest comfortably at the corners of the mouth without pinching or excessive movement.
Adjust the curb strap or chain so it lies flat, engaging only when needed. Too tight or too loose can cause discomfort or reduce effectiveness. Common signs of poor fit include pinching, head shaking, or refusal to accept the bit.
For a detailed sizing guide, consult How to Measure for a Bit to ensure your curb bit is adjusted according to industry best practices.
The 45-Degree Rule for Curb Chain Adjustment
One of the most reliable guidelines for adjusting your curb bit is the 45-degree rule. This principle states that the curb chain should only make contact with your horse’s chin groove when the shanks rotate forward about 45 degrees. This built-in delay acts as a subtle warning signal, giving your horse a moment to respond to the initial rein cue before the full leverage of the bit engages. To check this, gently pull back on the reins and watch the angle of the shanks. If the chain tightens too soon, the action will be abrupt and harsh. If it engages too late, your cues will be ineffective. Proper adjustment ensures the bit functions as a clear communication tool, not a source of discomfort.
The Two-Finger Rule for Curb Chain Spacing
A simple way to check the looseness of your curb chain is with the two-finger rule. After you’ve attached the chain, you should be able to comfortably slide two fingers, stacked flat, between the chain and your horse’s chin. This spacing is crucial for preventing constant, unnecessary pressure, which can be painful and lead to resistance. A chain that’s too tight makes the bit’s action severe and immediate, while a chain that’s too loose will fail to engage properly, allowing the bit to rotate too far in the horse’s mouth. This rule provides an excellent starting point for a comfortable and effective fit, though you may need to make small adjustments based on your horse’s unique anatomy.
Proper Bit Placement in the Mouth
Unlike snaffles, curb bits are typically positioned slightly lower in the horse's mouth. This placement is intentional, as it allows the mouthpiece to act on the bars of the mouth, which are thinner and more sensitive in that lower area. While this can increase the bit's severity if used with heavy hands, it also allows for more refined and precise communication. The bit should rest comfortably in the interdental space—the gap between the incisors and molars—without making contact with the teeth. The goal is a stable, quiet position that allows the bit to function correctly without causing irritation or interfering with your horse’s comfort.
Using a Lip Strap Correctly
A lip strap is a small but important accessory for any curb bit. This thin strap serves two key functions: it helps keep the curb chain correctly positioned in the chin groove, and it prevents a clever horse from grabbing the shanks with its lips or mouth. The lip strap should be threaded through the designated ring on the curb chain and then buckled to the small loops on each shank. It’s important to leave it loose enough that it doesn’t interfere with the bit’s action. It should have visible slack when the reins are relaxed but be just snug enough to prevent the shanks from being pulled too far forward. Using quality horse tack ensures these small components are durable and reliable.
Sizing a Curb for a Double Bridle
When you’re using a double bridle, which combines a curb bit (a Weymouth) with a snaffle (a bradoon), getting the sizing right for both is essential. The curb bit should always be slightly narrower than the bradoon—usually by about a half-centimeter. This is because the two bits sit at different places in the horse’s mouth. The bradoon sits higher and in a wider part of the mouth, while the curb rests lower where the jaw is narrower. Choosing a slightly smaller curb bit ensures it fits this narrower space correctly, preventing it from sliding side-to-side and ensuring both bits can work together harmoniously without pinching or causing discomfort.
Step 6: Introduce the New Bit and Watch for Feedback
Introduce the new curb bit gradually. Begin with short sessions, observing your horse’s response and comfort closely. Look for relaxed chewing, calm demeanor, and willingness to accept rein aids.
Monitor for any behavioral changes, such as resistance or evasion, which may signal a need for adjustment. If issues persist, consider swapping to a different curb bit style or consulting a professional for guidance.
Trainer tips include rewarding positive responses and allowing your horse time to acclimate. Patience and observation are key to a successful transition.
Step 7: Keep Your Curb Bit Clean and Safe
Routine maintenance extends the lifespan and safety of your curb bit. Clean the bit after each ride to remove residue and saliva, preventing corrosion. Store in a dry, safe location to avoid rust and unnecessary wear.
Inspect regularly for sharp edges, loose parts, or signs of deterioration. Replace your curb bit if you notice cracks, extensive rust, or if the fit has changed due to wear.
A simple maintenance checklist includes cleaning, checking all joints and straps, and confirming proper adjustment before every ride. This diligence ensures your curb bit remains a reliable communication tool.
Using a Curb Bit Safely and Effectively
Selecting and using a curb bit responsibly is essential for both horse welfare and rider success. With the right approach, you can communicate clearly, promote comfort, and build lasting trust with your horse. Below are expert strategies to ensure safe and effective curb bit use in any discipline.
Communicating Clearly Through the Reins
Effective rein handling is crucial when riding with a curb bit. Always use light, steady hands to avoid applying excessive leverage, which can cause discomfort or confusion for your horse. The curb bit amplifies your signals, so subtle cues are best.
Practice holding the reins with your fingers relaxed and wrists straight. Keep your elbows close to your body, allowing for gentle, direct contact. Avoid jerking or pulling suddenly, as this can transmit harsh pressure.
- Use split or romal reins for Western curb bits
- Hold reins in one hand for advanced maneuvers
- Release pressure immediately after the cue
Correct rein technique ensures your horse responds willingly and maintains trust in the curb bit.
How to Introduce Your Horse to a Curb Bit
Introducing a horse to a curb bit should be a gradual process. Begin with short sessions, allowing your horse to become accustomed to the new feel and action. Start by letting your horse wear the curb bit in a relaxed environment, then progress to light groundwork and, eventually, mounted work.
Look for signs of acceptance, such as a relaxed jaw and willingness to follow cues. If resistance appears, return to a milder bit or consult a professional. For more guidance on bit introduction, see Choosing the Right Bit for Your Horse.
- Use positive reinforcement to encourage acceptance
- Progress slowly, increasing difficulty only when your horse is ready
- Never rush the transition from snaffle to curb bit
Patience and consistency are key to a successful curb bit transition.
A Step-by-Step Transition Plan
Moving your horse to a curb bit is a significant step in your training, and it’s one that calls for patience and a clear plan. A gradual approach is the kindest and most effective way to help your horse understand and accept the new equipment. Rushing the process can create confusion and resistance, so taking your time is key. Here’s a simple, step-by-step guide to make the switch a positive experience for both of you.
- Assess Readiness: Before introducing a curb bit, honestly evaluate your horse's current training. Your horse should be balanced, responsive in a snaffle, and move willingly off your leg and seat aids without leaning on your hands. A solid foundation is essential, as a curb bit is designed to refine cues, not create them from scratch.
- Familiarization First: The initial introduction should be completely low-pressure. Start by letting your horse wear the new curb bit in a relaxed setting, like the grooming stall, for a few short sessions. This gives them a chance to get used to the weight and feel in their mouth without any rein pressure involved.
- A Gradual Introduction to Riding: For your first few rides, let the curb reins hang loose and guide your horse with only the snaffle reins. This allows your horse to adjust to carrying the bit while you ride, keeping your communication clear and simple through the familiar feel of the snaffle.
- Monitor Your Horse's Feedback: Pay close attention to your horse’s reaction. A relaxed jaw, soft chewing, and a calm attitude are all positive signs of acceptance. If you notice discomfort, such as head tossing or a gaping mouth, it’s a signal to slow down, check the fit, or go back a step.
- Ensure a Proper Fit: A well-fitting bit is critical for your horse's comfort. Double-check that the mouthpiece is the correct width and that the curb chain is adjusted properly. It should lie flat in the chin groove and only engage when you apply rein pressure, with enough room for about two fingers to fit between the chain and your horse's chin.
- Use Positive Reinforcement: Throughout this process, reward your horse for their effort. When they show acceptance or respond correctly to a light cue, immediately release the pressure and offer a soft pat or a kind word. This helps build a positive association with the new bit.
- Patience is Key: Remember that every horse learns at a different pace. This transition could take a few weeks or a few months. There’s no set timeline, so be patient and consistent. A successful transition builds trust and sets the stage for more refined communication with all of your horse tack.
What to Do When You Run Into Problems
Common problems with a curb bit include head tossing, gaping mouth, or resistance. These behaviors may indicate discomfort, poor fit, or confusion about cues. Always inspect the bit for sharp edges or improper adjustment before each ride.
If issues persist, consider whether the mouthpiece or shank style is appropriate for your horse. Sometimes, switching to a different curb bit design or returning to a simpler bit can resolve the problem.
- Assess for pinching or pressure points
- Adjust the curb strap for correct tension
- Consult a trainer if problems continue
Quick troubleshooting ensures your horse’s comfort and maximizes the benefits of the curb bit.
Understanding the Risks of Misuse
While a curb bit is an excellent tool for refined communication, its effectiveness hinges on proper use. The same leverage that allows for subtle cues can become a source of severe discomfort or injury when handled incorrectly. Understanding the potential risks is not about fear, but about responsible horsemanship. It empowers you to use the bit with the respect and care your horse deserves, ensuring your equipment strengthens your partnership rather than harming it. Being aware of these risks helps you prioritize your horse's well-being and make informed decisions about your tack and technique.
Potential for Severe Injury
The leverage design of a curb bit means that the pressure you apply to the reins is multiplied. In inexperienced or heavy hands, this can translate into extreme force on the sensitive structures of your horse's mouth. Misuse can lead to bruising, cuts, and in severe cases, damage to the bars of the mouth or even a fractured jaw. This is why it's so important to ride with soft, quiet hands and to ensure both you and your horse are ready for this level of communication. Choosing well-made horse tack from trusted sources also ensures there are no manufacturing defects that could contribute to injury.
Dangers of an Improperly Adjusted Curb Chain
The curb chain or strap is not just an accessory; it's a critical component that completes the bit's function. Its adjustment determines how and when the leverage engages. If the chain is too tight, the bit's action becomes immediate and harsh, giving your horse no warning before the pressure is applied. If it's too loose, the bit will rotate too far in the horse's mouth before the chain engages, causing discomfort and an unclear signal. You can learn more about the mechanics from this guide on curb bits. Finding that sweet spot—typically allowing for two fingers of space—is essential for the bit to work as intended: humanely and effectively.
Why You Should Work with a Trainer or Bit Fitter
Professional input can make a significant difference in your curb bit experience. Certified bit fitters and experienced trainers can assess your horse’s mouth, recommend suitable bit styles, and ensure proper adjustment.
A custom fit reduces the risk of discomfort and enhances communication. Trainers can also provide hands-on instruction for rein handling and transitioning horses to a curb bit.
- Schedule regular bit fit assessments
- Seek advice for persistent behavioral issues
- Choose trainers familiar with your riding discipline
Expert guidance supports both safety and performance when using a curb bit.
Know the Rules: Curb Bits in the Show Ring
Before entering any competition, verify the legal requirements for curb bit use in your discipline. Each association, such as AQHA, NRHA, or USEF, specifies acceptable curb bit types, shank lengths, and mouthpiece designs.
Non-compliance can result in disqualification or penalties. Always check the latest rulebooks and consult show stewards if you are unsure about your curb bit choice.
- Review association guidelines annually
- Ensure your curb bit meets all specifications
- Label and organize bits for easy show-day checks
Following legal requirements protects your eligibility and upholds horse welfare standards.
Shank Length Regulations
Shank length is a key factor in how much leverage a curb bit applies, which is why most competitive organizations have strict rules about it. Longer shanks increase the pressure on the horse's poll and chin, so to ensure fairness and protect horse welfare, the total shank length is typically limited to 8.5 inches from top to bottom. This measurement includes the entire cheekpiece of the bit. Because the rules can differ slightly between associations, it's always a smart move to double-check your specific discipline's rulebook before a show. When you're shopping, you can find a wide range of competition-approved bits in our horse tack selection, designed to meet these important standards.
What's New in the World of Curb Bits?
The curb bit market is rapidly evolving, with new developments shaping how riders approach horse comfort, communication, and sustainability. In 2025, riders have more choices than ever, thanks to cutting-edge research, innovative materials, and a growing focus on ethical horse care. Staying updated on these trends will help you select a curb bit that meets both your horse’s needs and modern standards.
New Twists on Classic Bit Design
Bit manufacturers are investing in research to improve the curb bit’s ergonomics and effectiveness. In 2025, expect to see more bits featuring advanced alloys, pressure-distributing mouthpieces, and anatomical shaping for better fit. Smart curb bit technology is emerging, allowing riders to monitor rein tension and bit pressure in real time. According to the Comparison of Rein Forces in Snaffle and Double Bridles, understanding rein force dynamics is crucial for refining bit design and ensuring clear horse communication. These innovations make the curb bit safer and more comfortable for both novice and experienced riders.
The Rise of Sustainable and Eco-Friendly Bits
Sustainability is now a top priority for many riders seeking a curb bit. Brands are using recycled metals, responsibly sourced copper, and biodegradable synthetics to reduce environmental impact. Eco-friendly curb bit options are not only durable but also promote horse health by using hypoallergenic materials. Awareness of welfare concerns with bit use is driving demand for bits that minimize discomfort and maximize ethical standards. Riders can now choose products that align with their values without sacrificing performance or longevity.
Creating a Custom Bit for Your Horse
Personalized curb bit options are gaining popularity across all disciplines. Riders can now order custom-fitted bits tailored to their horse’s unique mouth anatomy, ensuring optimal comfort and control. Decorative elements, such as engraved shanks or inlaid stones, add a touch of individuality for show and parade use. Bespoke curb bit services also allow for adjustments in shank length, port height, and mouthpiece material. This trend not only enhances function but also lets riders express their style while prioritizing horse welfare.
What's Popular? A Look at Rider Favorites
Recent market data reveals a shift toward ergonomic and copper-inlaid curb bit models in both Western and English riding. Riders increasingly value bits that combine traditional craftsmanship with modern technology, such as pressure-mapping and adjustable features. A table below summarizes the top curb bit trends for 2025:
| Trend | Rider Preference (%) | Key Benefit |
|---|---|---|
| Ergonomic Design | 38 | Enhanced comfort |
| Copper Inlays | 27 | Softer mouth feel |
| Eco-Friendly Models | 20 | Sustainability |
| Smart Technology | 15 | Real-time feedback |
As the curb bit landscape evolves, staying informed about these trends will help you make the best choice for your horse and riding goals.
Frequently Asked Questions About Curb Bits
Choosing a curb bit often comes with questions about safety, suitability, and care. Below, we answer the most common concerns riders have when selecting and using a curb bit.
How do I know if a curb bit is too harsh for my horse?
Recognizing if a curb bit is too harsh for your horse is essential for their welfare and your communication. Key signs include head tossing, gaping mouth, pinning ears, or attempts to evade the bit during rides. You may also notice resistance to rein cues, a tense jaw, or a reluctance to accept the bridle.
To ensure your curb bit is appropriate, regularly check for:
- Redness or sores at the corners of the mouth
- Behavioral changes under saddle
- Difficulty in bending or stopping
Experts suggest that if any discomfort appears, switch to a milder option or consult a professional. For more guidance on bit selection and horse comfort, review the Selecting the Proper Bit resource for in-depth recommendations.
Can I use a curb bit on a young or inexperienced horse?
Using a curb bit on a young or inexperienced horse requires caution. Typically, green horses start with a snaffle bit, which allows for simpler direct pressure and clear communication. Introducing a curb bit too soon can create confusion or resistance.
Best practices include:
- Waiting until the horse responds reliably to basic cues
- Ensuring positive experiences with less severe bits first
- Gradually transitioning, using a combination or transition bit if needed
Alternatives for young horses include soft snaffles or gentle training bits. Only move to a curb bit when your horse consistently demonstrates readiness and understanding of rein aids.
How often should I replace my curb bit?
The lifespan of a curb bit depends on its material, frequency of use, and maintenance. Stainless steel bits tend to last longer, while copper or sweet iron may wear more quickly. Regular inspections are crucial to spot any sharp edges, cracks, or rust that could harm your horse.
Follow these inspection tips:
- Examine for signs of wear after each cleaning
- Replace immediately if you find rough spots or structural damage
- Adhere to industry guidelines, which often recommend replacing a well-used curb bit every few years, or sooner if issues arise
Routine care and prompt replacement help maintain effective communication and protect your horse's mouth.
Now that you have a clear understanding of curb bit styles, fitting, and the latest innovations for 2025, you’re in a strong position to make the best choice for your horse’s comfort and performance. At Hooves and Paws, we know how much your horse’s well being matters and how important it is to have quality equipment you can trust. If you’re ready to put these expert tips into action, you can explore a carefully selected range of curb bits and equestrian products—plus enjoy free US shipping and flexible payment options. Take the next step and Buy Now.
Key Takeaways
- A Curb Bit Refines, It Doesn't Force: This tool is for enhancing communication with a trained horse, not for creating control where it's lacking. Its effectiveness depends entirely on a rider's soft hands and the horse's solid foundation in a snaffle.
- Match the Parts to the Purpose: The right curb bit is a combination of the correct mouthpiece, shank style, and material. Choose these components based on your horse's mouth shape, your riding discipline, and your specific training goals.
- Fit and Introduction Dictate Success: How you fit and introduce the bit is just as important as which one you choose. Use the 45-degree and two-finger rules for adjustment, and always transition your horse to a new bit with patience to ensure their comfort and confidence.


