
If your horse tosses his head or feels disconnected through the reins, the fix often starts with your hands. Many common riding frustrations trace right back to them. Busy, tense, or uneven hands create static on the line, making it hard for your horse to understand what you’re asking. A quiet hand and a responsive horse are built on a correct and confident grip. This guide breaks down exactly how to hold split reins properly. We’ll help you build the right muscle memory for a steady, consistent connection and a much happier partner.
Key Takeaways
- Choose Split Reins for Versatility: Their two-piece design is the Western standard for a reason; it provides direct, independent communication with your horse, making it the ideal choice for training, trail riding, and most competitions.
- Master a Quiet and Secure Hold: The foundation of clear communication is a relaxed grip. Place your index finger between the reins and use your thumb as an anchor on top to create a steady point of contact without creating tension.
- Practice Off the Horse to Build Confidence: You can develop essential muscle memory without being in the saddle. Use simple drills, like adjusting reins tied to a chair, to make your hand movements fluid and second nature for your next ride.
What Are Split Reins (And Why Use Them)?
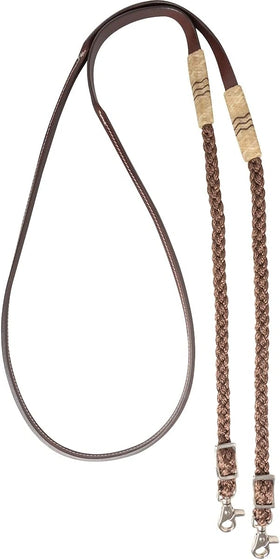
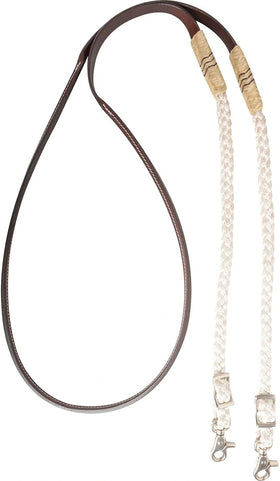
If you’ve ever watched a Western movie or spent time at a ranch, you’ve seen split reins. They are the most common type of reins in Western riding and are exactly what they sound like: two long, separate strips of material, usually leather. Each rein typically measures between seven and eight feet long, giving you plenty of length to work with. Unlike other rein styles that are connected, this separated design is intentional. It allows for a specific type of communication with your horse, offering a direct line from your hand to each side of the bit.
This design makes them incredibly versatile for a wide range of disciplines. Whether you're training a young horse or competing in a horsemanship class, split reins provide the flexibility you need. The extra length, often called the "tail," hangs down on each side of the horse's neck. While it might seem like a lot to manage at first, learning to handle that tail is a fundamental part of becoming a skilled Western rider. Finding the right pair is the first step, and it's worth investing in quality leather horse tack that feels good in your hands and is built to last through countless rides.
Split vs. Closed Reins: What's the Difference?
The most obvious difference between split reins and closed reins is their construction. As we've covered, split reins are two separate pieces. Closed reins, sometimes called loop reins, are a single, continuous loop of material. This fundamental difference changes how you handle them and what they're best used for.
The two-piece design of split reins allows for more flexibility and independent control. You can use each hand to give subtle, separate cues to either side of the horse's mouth. This is especially helpful in training or any discipline requiring precise movements. Closed reins, on the other hand, are often favored in English riding, barrel racing, or for trail riders who don't want to risk dropping one rein and losing contact with their horse completely.
How Do Split Reins Compare to Romal Reins?
Romal reins are another style you might see in the Western world, but they serve a more specialized purpose. Like split reins, they start as two distinct reins. However, they are joined together and attached to a single, long extension called a romal. The rider holds the reins in one hand and the romal in the other.
This style is traditionally used with curb bits and is required in certain Western show classes, particularly reining and cowhorse events. Romal reins are designed for one-handed neck reining on a finished horse. In contrast, split reins are far more versatile and are the standard for most other Western riding styles, from everyday pleasure riding to trail and horsemanship competitions. For most riders, split reins are the practical, all-around choice.
When Are Split Reins the Right Choice?
So, when is it the right time to use split reins? The short answer is: most of the time in Western riding. They are the standard and even encouraged in a majority of Western competitions, including reining, cutting, pleasure, trail, and horsemanship. Their versatility makes them a staple in any Western tack room.
Split reins are an especially good choice when you're riding with a snaffle bit because they are designed to be used with two hands. This setup is ideal for training young horses or for any situation where you need to use direct reining cues. The ability to use both hands independently provides clear, direct communication, helping you guide your horse with precision and build a solid foundation of understanding between you both.
Choosing Your Rein Material
The material of your split reins plays a huge role in how they feel in your hands and how you connect with your horse. It’s not just about looks; it affects your grip, the rein's weight, and how much upkeep is required. The two most common choices you'll find are classic leather and soft cotton. While personal preference is a big factor, understanding the practical differences between them will help you pick the right tool for the job. Think about the type of riding you do, the climate you're in, and how much time you want to spend on tack care. This choice directly impacts your comfort and control in the saddle.
Leather vs. Cotton Reins
Leather is the traditional choice for a reason. It offers a timeless, professional look that’s right at home in the show ring and on the trail. High-quality leather horse tack is incredibly durable and, with the right care, can last a lifetime. Leather split reins also have a key safety advantage; if you drop one, it's less likely to get tangled in your horse's legs compared to a looped rein. The main consideration with leather is the maintenance. To keep them soft, supple, and safe from cracking, you’ll need to clean and oil them regularly. For many riders, this ritual is a small price to pay for the classic feel and longevity that only leather can provide.
If you prioritize a soft feel and a secure grip right out of the box, cotton reins are an excellent option. They are often more pliable than new leather and require virtually no break-in period. Their texture provides a fantastic grip, which is a huge plus, especially if your hands tend to sweat or you're riding in humid conditions. Cotton reins are also much lower maintenance than their leather counterparts. However, they can absorb moisture, making them feel heavy in the rain, and may not have the same long-term durability as a well-cared-for set of leather reins. For everyday training and trail riding, many people find the comfort and easy grip of cotton reins hard to beat.
Why Proper Rein Handling Matters
Your reins are more than just a steering wheel; they're a direct line of communication to one of the most sensitive parts of your horse. Every movement, from a slight squeeze to an unintentional jiggle, travels down that line and sends a message. This is why mastering how you hold your reins is fundamental to good horsemanship. It directly impacts your horse's comfort, willingness to listen, and overall performance. When your hands are quiet, steady, and clear, you create a conversation. When they're tense, busy, or inconsistent, you create noise that confuses and frustrates your partner.
Proper rein handling is the foundation for building trust and a responsive connection. It allows you to give subtle cues that your horse can easily understand, leading to smoother transitions, more precise movements, and a more enjoyable ride for both of you. Think of it as the difference between mumbling and speaking clearly. By learning to manage your reins effectively, you're not just gaining better control; you're showing your horse that you're a trustworthy leader with a gentle hand. Investing in quality horse tack that feels balanced and comfortable in your hands can make a world of difference in achieving that steady, confident contact.
The Relationship Between Hand and Leg Cues
Great riding is a full-body conversation, and your hands and legs need to be on the same page. If your hands are doing all the talking, your horse will eventually tune out your other aids. As experts at the American Quarter Horse Association note, proper rein management is essential to keep the horse responding to your leg cues. This means your hands should guide and refine the energy that your legs create. Your legs ask the horse to move forward, and your hands provide a soft, consistent contact for that energy to flow into.
When this balance is off—for example, if you're constantly pulling back while kicking forward—you're essentially hitting the gas and the brakes at the same time. This creates a tense, confused horse that may become dull to both your leg and hand cues. The goal is to use your legs as the primary motivator and your hands as the director. A quiet, correct rein hold allows your horse to focus on your seat and leg aids, resulting in a more responsive partner who moves with confidence and understanding.
Communicating Clearly for a Better Ride
Clarity is kindness when it comes to communicating with your horse. Tension is the biggest enemy of clear communication, and it often starts in our own bodies. If your shoulders are tight and your grip is rigid, that tension travels straight down the reins to your horse's sensitive mouth, creating anxiety and resistance. The foundation of clear communication is a relaxed grip. A quiet hand provides a steady, reliable point of contact that your horse can learn to trust, making them more receptive to your signals and less likely to anticipate or react with fear.
When your hands are soft and still, even the smallest cue can be felt and understood. A slight closing of your fingers or a gentle lift of the rein becomes a clear request rather than getting lost in a sea of unintentional noise. This consistency builds your horse's confidence, encouraging them to listen for your guidance instead of bracing against it. Ultimately, a better ride comes from a better conversation, and that conversation starts with a quiet, confident, and clear connection through the reins.
How to Hold Split Reins Correctly
Holding split reins might look complicated, but it's all about creating a clear line of communication with your horse. A correct, relaxed grip allows you to give subtle cues without confusing or frustrating your partner. It’s a foundational skill for any Western rider. Once you have quality horse tack, mastering your rein hold is the next step toward a confident ride. The goal is to be both secure and sensitive, and it all starts with how you position your hand. Let's walk through the four key steps to get it right.
Step 1: Place Your Index Finger
To start, gather both reins into one hand, which is typically your non-dominant hand. The simplest and most effective way to keep them organized is to place your index finger between the two leather strips. This separation prevents the reins from slipping or twisting, giving you independent control over each one. Think of your index finger as a divider that helps you send clear, distinct signals to your horse. This small adjustment makes a huge difference in your ability to communicate precisely, whether you're asking for a turn or a change in speed.
Step 2: Secure Your Grip with Your Thumb
With your index finger separating the reins, gently close your hand into a fist. Your thumb should rest firmly on top of the reins, pinning them against your index finger. This creates a secure lock without requiring a death grip. Your palm can face up or down, but many riders find a palm-up position more natural and relaxed. The key is to use your thumb as the anchor. This grip is strong enough to maintain control but soft enough to feel the subtle responses from your horse through the reins.
Step 3: Keep Your Wrists Straight and Relaxed
A relaxed wrist is essential for soft hands and clear cues. As you form your fist, allow the reins to exit from the bottom of your hand, between your ring finger and pinky. This position helps keep your wrist straight and in line with your forearm, preventing you from breaking your wrist or creating unnecessary tension. A straight, supple wrist acts like a shock absorber, allowing your arm to move with the horse’s motion while your hand stays quiet and steady. This alignment is crucial for delivering gentle, effective signals.
Step 4: Find the Correct Hand Position
Your rein hand should rest comfortably in front of your saddle’s pommel, also known as the horn. This central position helps you stay balanced and keeps your cues consistent. Holding your hand too high, low, or off to one side can throw off your horse and send mixed signals. By keeping your hand centered and just above the pommel, you create a stable base of operations. From here, you can make small, deliberate movements to guide your horse without using your whole arm, leading to a more refined and responsive ride.
Techniques for Better Split Rein Control
Once you've got the basic grip down, you can start exploring different techniques for handling your split reins. These methods aren't just for show; they're practical skills that improve your communication, control, and connection with your horse. Think of them as different tools in your riding toolkit. Learning when and how to use each one will make you a more confident and effective rider, ready for the trail or the arena.
Perfecting the One-Handed Hold
In Western riding, you'll often see riders using just one hand. This isn't just for looks; it's a technique called "neck reining" that allows for precise communication while keeping you relaxed in the saddle. Holding the reins in one hand frees up your other hand for work on the ranch, like opening a gate, or simply for maintaining better balance. The key is to guide your horse with gentle pressure from the rein against their neck, not by pulling. It’s a subtle conversation between you and your horse, and mastering it is a huge step in your riding journey. It all starts with a quality set of leather split reins that feel good in your hand.
The Pinky Finger Divider Method
For riders looking to refine their one-handed communication, the pinky finger divider method is an excellent technique to practice. Instead of bringing the reins over your index finger, you’ll feed them up from the bottom of your hand, using your pinky to separate the two strips. Once your pinky is in place, simply close your hand into a soft fist and use your thumb as an anchor on top. This grip allows for incredibly subtle adjustments. You can make tiny changes to one rein with a slight movement of your pinky, keeping your hand quiet and your signals clear. It’s a fantastic way to develop a softer feel and works best with flexible, high-quality horse tack that lets you feel every response from your horse.
When and How to Use the Bridge Hold
The bridge hold is another fantastic technique, especially when you're riding with a snaffle bit. To create a "bridge," you simply fold or cross the tail end of the reins over your horse's neck in front of you. This method is great for a few reasons. It keeps the ends of your reins from dangling where they could get snagged, and it provides a bit more stability and security for the rider. It also helps you maintain a more consistent feel on your horse's mouth. It’s a simple adjustment that can make a big difference in managing your reins effectively, giving you one less thing to worry about while you ride.
Mastering the Two-Handed "X" Hold
When you're training a young horse or need more direct communication, the two-handed hold is your best friend. To get into this position, you'll cross the reins over your horse's neck so the ends are on opposite sides. When you pick them up, one in each hand, the reins should form an "X" shape in front of you. This setup gives you a direct line to each side of the bit, allowing for clear and independent cues. It’s the ideal way to guide your horse through precise movements or correct any unwanted habits. This hold makes it easy to shorten or lengthen your reins as needed, giving you the control to build a responsive and confident partner.
Adapting Your Hold to the Task
A skilled rider knows that there isn't a single, perfect way to hold the reins for every situation. The best technique often depends on the task at hand. For relaxed trail riding or ranch work, the one-handed neck reining hold is practical and efficient. But if you're navigating a tricky obstacle or need extra stability, you might switch to a two-handed hold or use a bridge. The key is to be a thinking rider who can adjust your approach based on what you and your horse are doing. Having versatile horse tack is important, but knowing how to use it effectively in different contexts is what truly makes a difference in your ride.
Get Started with Neck Reining
Neck reining is the foundation of one-handed riding. Instead of pulling a rein to the side to ask for a turn, you lay the outside rein against your horse's neck. Your horse feels that light pressure and moves away from it, initiating the turn. It’s a more advanced cue that relies on your horse being responsive and well-trained. In many Western riding competitions, pulling on a rein with your free hand isn't even allowed, so it's a critical skill to develop. Learning the fundamentals of neck reining builds a more refined communication style and shows a true partnership between you and your horse.
How to Manage Rein Length and Tension
Finding the right rein length is a constant adjustment, but it's essential for good communication. You want a soft drape in the reins, but not so much slack that you lose contact or have to pull way back to give a cue. A good rule of thumb is to keep the tail ends of the reins falling on the same side as the hand holding them to keep things tidy. Whether you hold both reins in one hand with your index finger in between or use a bridge, the goal is to maintain a consistent, light tension. This allows your horse to feel your subtle cues without feeling restricted or uncomfortable.
Give Clearer Cues with Lighter Hands
Above all, always aim for a light touch. Your hands are a direct line of communication to your horse's sensitive mouth, and heavy hands can cause discomfort, anxiety, and resistance. Think of your reins as a way to whisper, not shout. A light, steady contact keeps your horse comfortable, confident, and listening for your next signal. This gentle approach fosters trust and responsiveness, making your rides more enjoyable for both of you. A horse that trusts your hands is a horse that is willing to be your partner. Using flexible, high-quality horse tack can also help you maintain that soft connection.
Holding Reins for Different Riding Disciplines
Once you’ve mastered the basic one-handed hold for your split reins, you can start adapting it to fit different situations. The way you handle your reins isn't a one-size-fits-all skill; it changes based on your riding discipline, the type of bit you're using, and even the specific rules of a competition. Think of the fundamental grip as your home base. From there, you can make small adjustments that have a big impact on your performance and your horse's responsiveness. Whether you're navigating a tricky trail or competing in a show ring, knowing the correct rein hold for the occasion is a mark of a thoughtful and skilled rider. It shows you understand the nuances of communication and are dedicated to working in harmony with your horse. Having the right horse tack is the first step, but knowing how to use it effectively is what truly builds a partnership.
Contrasting English and Western Rein Holds
While both English and Western riders strive for a connection with their horse, their methods of holding the reins are quite different. English disciplines typically involve holding one rein in each hand, maintaining a direct and steady line of contact with both sides of the horse's mouth. This two-handed approach allows for constant, subtle communication. In contrast, Western riding often progresses to a one-handed hold for neck reining. The design of split reins is perfect for this, as the two separate pieces offer flexibility and independent control during the training process. Once a horse is finished, the rider can steer with one hand by laying the rein against the horse's neck, freeing up the other hand for tasks that might come up on a ranch.
Specific Holds for the Show Ring
When you step into the show ring, how you hold your reins goes from a personal preference to a set of rules. According to experts, your rein hold is incredibly important in competition and can be the difference between placing well or being disqualified. Each class, from reining to Western pleasure, has specific guidelines that judges expect you to follow. These rules aren't arbitrary; they're based on the traditions and functional requirements of each discipline. Adhering to the correct form demonstrates your knowledge and respect for the sport, and it ensures you're communicating with your horse in the expected manner. Before you compete, always be sure to study the specific requirements for your class.
Western Pleasure and Reining
In classes like Western Pleasure and Reining, the ideal is a horse that appears to be riding on its own with minimal input from the rider. To achieve this look, you'll typically use your non-dominant hand, placing your index finger between the two reins. Your thumb and middle finger then secure the reins just behind the horse's neck. This grip allows for very subtle cues, making your communication almost invisible to onlookers. The goal is to show a relaxed, responsive horse that is in tune with your slightest command, and this precise hold is the key to making that happen.
Gaited Horse Competitions
For gaited horse classes, the rider's posture and hand position are all about showcasing the horse's unique, smooth gait. The proper form requires you to sit up straight and keep your hands within a small, imaginary six-by-six-inch box in front of the saddle horn. Your palms should face each other with your thumbs pointing up. This steady, contained position prevents you from interfering with the horse's natural movement. Your job is to be a quiet, stable frame that allows your horse's talent and training to shine through, and this specific rein hold helps you do just that.
Working Cow Horse with Romal Reins
If you're competing in a working cow horse or other traditional vaquero-style class, you'll likely be using romal reins. The rules for holding these are very specific. You must hold the connected reins in one hand, with your hand closed and your thumb pointing straight up. The romal, which is the long, single extension, is held in your other hand. The end of the romal, or "popper," should rest on your hip on the opposite side of your body. This traditional hold is a nod to the history of the discipline and is a strict requirement in the show pen.
Roping
In a fast-paced event like roping, your rein hold is all about function and safety. You need to maintain control of your horse while leaving your dominant hand completely free to handle the rope. To do this, you'll grip the reins in your non-roping hand, often securing them between your middle and ring fingers. This allows you to steer and stop your horse effectively with one hand, all while you're focused on the cow. It’s a practical grip that ensures you can manage your horse's speed and position without getting your reins tangled up with your rope.
Common Mistakes When Holding Split Reins
Learning to use split reins is a skill that takes time and patience, so don't worry if it doesn't feel natural right away. Every rider has been there. Becoming aware of the most common slip-ups is the first step toward building correct habits and developing a better connection with your horse. Let's walk through a few things to watch out for as you practice.
Finding the Right Amount of Grip
Finding the right amount of pressure is key. A white-knuckle grip makes your arms and shoulders tense, which travels right down the reins to your horse’s sensitive mouth. This can make your horse uncomfortable and less responsive to your cues. On the other hand, holding the reins too loosely can cause you to drop them or lose contact when you need it most. Think of your grip as firm but gentle, like you’re holding a small bird. You want to feel a light, consistent connection that allows for clear communication without being harsh. A good pair of riding gloves can also help you maintain a steady, comfortable grip on your horse tack.
Are You Accidentally Dropping Your Reins?
Split reins are long, and managing the extra length, or "bight," can be tricky for new riders. A common mistake is accidentally letting one of the rein ends fall. A dropped rein is more than just an inconvenience; it can be dangerous if it gets tangled in your horse’s legs or caught on an obstacle, potentially causing a spook. To avoid this, always keep the ends of your reins organized. When riding one-handed, make sure the bight is held securely with your rein hand and lays neatly on the same side of your horse’s neck. This simple habit will keep you and your horse much safer on the trail or in the arena.
How to Avoid Uneven Rein Tension
Keeping your reins at an equal length is one of the biggest challenges, especially when you start riding one-handed. If one rein is shorter than the other, you’ll send mixed signals to your horse, which can cause confusion, head tilting, or drifting to one side. Your goal is to maintain balanced contact so your cues are clear and precise. Get in the habit of glancing down occasionally to check that your reins have the same amount of slack. Practicing in a controlled environment like an arena allows you to focus on the feel of your reins and make small adjustments until an even hold becomes second nature.
Never Tie Your Reins in a Knot
It can be tempting, especially when you’re starting out, to tie the ends of your split reins in a knot to keep from dropping them. While the intention is good, this habit actually works against you and can be unsafe. Tying your reins creates a rigid, unyielding connection that makes it impossible to give the soft, independent cues your horse relies on. Instead of a clear signal, your horse feels constant, confusing pressure. This can lead to head tossing, resistance, and a general breakdown in communication, turning a potentially great ride into a frustrating one for both of you.
More importantly, a knot poses a serious safety risk. If one of your reins gets snagged on a tree branch or a gate, a knot prevents it from pulling free, which could cause a dangerous wreck. A knotted rein that’s dropped also creates a perfect loop for a horse to step through, leading to a panic situation. The correct and safe alternative is to learn how to manage the rein tails properly. By keeping the ends organized and held securely in your rein hand, you maintain control without creating a hazard. This simple discipline is a fundamental part of horsemanship that keeps you and your partner safe.
Why Quiet Hands Are Key
Many beginners have "busy hands," meaning they move them around too much while riding. Constant, unnecessary movement creates a lot of noise for your horse, making it difficult for them to distinguish a real cue from random motion. Your hand position should feel stable and quiet, acting as a steady point of contact. Your primary cues should come from your seat and legs, with your hands offering subtle refinements. A great way to practice this is to imagine a small, invisible box just in front of your saddle horn. Try to keep your rein hand inside that box, only moving it deliberately when you need to give a cue.
Improving Your Hand-to-Hand Coordination
As you progress to riding one-handed, you’ll rely on neck reining to steer. A frequent mistake is reverting to direct reining (pulling the rein in the direction you want to go) or trying to guide with your free hand. In Western disciplines, one-handed riding means you use neck reining exclusively for direction. This involves laying the outside rein against your horse’s neck to signal a turn. It’s a subtle art that requires coordination and trust. Before you go fully one-handed, spend plenty of time riding with two hands to build a solid foundation and teach your horse to respond to the pressure of the rein on its neck.
Practice Drills to Perfect Your Hold
Learning to handle split reins can feel awkward at first, but like any new skill, it just takes practice. The key is building muscle memory so your hands know exactly what to do without you having to think about it. The good news is you don’t always have to be in the saddle to get better. Consistent practice, both on and off your horse, will help you develop the dexterity and confidence needed to use your reins effectively. Soon enough, the movements will feel like second nature.
Before you start, make sure you have a quality set of reins. Investing in good horse tack makes a real difference in your connection with your horse. Once you have your gear, you can use these simple exercises to sharpen your skills and become a more confident rider.
Practice at Home (No Horse Needed!)
Some of the most effective practice happens on solid ground. Working on your rein handling skills off the horse allows you to focus completely on the mechanics without worrying about guiding your horse at the same time. It’s the perfect way to isolate your hand movements and get comfortable with adjusting rein length and tension. The more you practice holding reins correctly, the more natural it will feel when you’re actually riding. Think of it as homework that pays off big time in the arena.
Try the "Saddle Horn" Chair Drill
Here’s a simple drill you can do right in your living room. Sit in a chair and tie your split reins together at the bit ends. You can loop them around your foot or a bridle hanging on a hook. From there, practice adjusting the reins. Work on shortening and loosening them with one hand, just as you would in the saddle. This exercise is fantastic because it helps you build finger strength and muscle memory for those small, precise movements that are so important for clear communication with your horse.
Use Tape as a Visual Guide
If you struggle to keep your reins even, this trick is for you. Take a small piece of electrical tape and wrap it around each rein, about three and a half to four feet down from the bit. This gives you a physical marker that helps you feel where your hands should be. As you ride or practice, you can quickly check if your hands are aligned and your reins are the same length. It’s a simple but incredibly effective way to develop a consistent feel and prevent one rein from becoming longer than the other.
Improve Your Feel with the Rock Trick
Do you find your reins slipping through your fingers? Try the rock trick. Find two small, smooth rocks, one for each hand, and hold them in your palms while you ride. This simple addition makes you much more aware of keeping your hands closed and your reins at the proper length. It’s not about creating a death grip, but rather about encouraging a steady, consistent contact. This technique is a great way to train your hands to maintain a soft but secure grip without even thinking about it.
Why Repetition Builds Muscle Memory
Ultimately, all these drills are about one thing: repetition. Every time you practice adjusting your reins in a chair or use tape to check your hand position, you’re creating pathways in your brain and muscles. This is how you build the muscle memory that makes handling split reins feel effortless. Consistent practice is what transforms conscious, clunky movements into the fluid, intuitive cues of an experienced rider. Keep at it, and soon your hands will know just what to do.
Frequently Asked Questions
Why are split reins the standard for Western riding? Split reins are the go-to in the Western world because they offer incredible versatility. Their two-piece design gives you a direct line of communication to each side of your horse's mouth, which is perfect for training young horses or asking for precise movements in disciplines like horsemanship and reining. This setup is the foundation for teaching a horse to respond to subtle cues, which is a core principle of Western riding.
I'm just starting out. Should I learn to ride with one hand or two? It's always best to start with two hands. Riding with a hand on each rein allows you to use direct cues, which is the clearest way to communicate with your horse as you both learn. This builds a solid foundation of understanding. Once you and your horse are comfortable and responsive, you can transition to holding both reins in one hand and begin practicing the more advanced skill of neck reining.
What's the best way to keep from dropping my reins? Dropping a rein can be frustrating and unsafe, but there are a few ways to prevent it. The "bridge hold," where you cross the tails of the reins over your horse's neck, is a great technique for keeping everything secure and organized. Also, make a habit of always keeping the ends of the reins, called the bight, held securely with your rein hand so they aren't dangling loosely.
How can I tell if I'm holding my reins too tight? You can often feel tension in your own body first. If your knuckles are white, your wrists are stiff, or your shoulders feel tight, you're likely gripping too hard. Your horse will also give you signs, like tensing its jaw, tossing its head, or becoming less responsive. The goal is a soft, consistent connection, like a friendly handshake, not a death grip.
Can I use split reins for trail riding? Yes, you absolutely can, and many people do. They work wonderfully on the trail. The main thing to be mindful of is managing the long ends so they don't get snagged on branches or brush. Using a bridge hold or simply being conscious of keeping the rein tails neatly on one side of your horse's neck will help keep you safe and tangle-free while you enjoy your ride.