


From your horse’s perspective, a clear, quiet request is always better than a confusing, loud one. When used properly, spurs can actually make your aids quieter and more precise, preventing the need for constant leg pressure. Instead of a broad squeeze, a light touch from a spur can ask for a specific response, creating a more responsive and willing partner. Understanding how to use equestrian spurs correctly is about building trust and making your cues almost invisible. We’ll cover how to choose the right pair of spurs and spur straps, fit them properly, and apply pressure with the all-important immediate release.
Key Takeaways
- Refine, Don't Force: Spurs are for adding clarity and precision to leg cues your horse already knows. They are not a shortcut for training or a tool for punishment, but a way to have a more nuanced conversation.
- Check Your Foundation First: Before adding spurs, ensure you have a solid, independent seat and your horse reliably responds to your leg aids. Spurs should never be used to fix a wobbly leg or a training gap.
- Always Ask, Then Release: The correct technique is to first ask with your calf, then apply a light spur touch only if needed. The most important step is to immediately release all pressure the instant your horse responds, as this is their reward and how they learn.
What Are Spurs and How Do They Work?
Spurs are metal tools worn on a rider's boots, designed to refine and clarify leg aids. They aren't for kicking, punishing, or making a horse go faster. Instead, think of them as a way to have a more nuanced conversation with your horse. A light touch from a spur can ask for a specific movement, like a side-pass or better collection, that a broader leg cue might not communicate as clearly. Using them correctly requires an independent seat and quiet legs; otherwise, you risk accidentally jabbing your horse and causing confusion, fear, or even resentment. The goal is to use the lightest touch possible to get a response.
It's important to remember that spurs are an advanced tool, not a beginner's accessory. As world champion roper Trevor Brazile notes, spurs are a tool that should be used correctly, and not every rider needs them. Before you even consider adding them to your gear, your riding foundation must be solid. This means you can maintain your balance and leg position at all gaits without gripping with your heels. When used properly, equestrian spurs can help you achieve a higher level of communication, but they should always be an extension of a good leg cue, not a replacement for it. They are for refinement, not force.
Common types of spurs
You'll generally encounter three main types of spurs: knob, ball, and rowel. Knob spurs, sometimes called dummy spurs, have a blunt, rounded end. They are very mild and provide a soft, broad point of contact, making them a great starting point for riders new to using spurs or for sensitive horses. Ball spurs feature a small, rolling ball at the end of the shank. This design allows the spur to roll along the horse's side without dragging, offering gentle and smooth pressure that many horses respond well to. Finally, rowel spurs have a small, spinning wheel at the end, which comes in many different designs that affect its severity.
Western vs. English spurs
The most noticeable difference between Western and English spurs is how they attach to your boots. As the experts at Grewal Equestrian point out, English spur straps are thin and thread through slots, while Western straps are wider and use buttons. These styles aren't interchangeable because they are designed for different boots and riding disciplines. Western spurs often have longer shanks and more decorative details, fitting the style of Western tack. English spurs are typically shorter and more subtle, designed for close-contact riding where the rider's leg is already near the horse's side. Choosing the right style ensures a proper fit and function for your specific needs.
Understanding rowel designs
The rowel is the spinning wheel on a spur, and its design is the biggest factor in the spur's intensity. It might seem counterintuitive, but a rowel with more points is generally milder. A 10-point rowel distributes pressure across more points of contact, making the touch softer than a rowel with just a few points. For riders new to rowels, a spur with many small, blunt points is a humane choice. Cloverleaf rowels are also very gentle. The key is to avoid sharp points unless you are a highly advanced rider with a specific purpose. Always check that the rowel spins freely to prevent it from dragging or catching on your horse's skin.
Are You and Your Horse Ready for Spurs?
Before you start shopping for a new pair of spurs, it’s essential to do an honest check-in on your skills and your horse’s training. Spurs are tools for refinement, meant to add clarity to cues your horse already understands. Using them too soon can create confusion, anxiety, and new training problems for you both. True readiness isn't about reaching a certain level; it's about having the right foundation to ensure you can use this tool correctly and humanely.
Signs your riding foundation is solid
Before adding spurs, your own riding needs to be steady and independent. A key sign of readiness is having a strong, balanced seat. This means you can comfortably walk, trot, and canter without needing to hold onto the saddle or grip with your legs for stability. Your hands, seat, and legs should work independently of each other. If you can give a hand cue without your legs moving, or apply leg pressure without pulling on the reins, you're on the right track. This independence is critical because it ensures any spur contact you make is intentional, not an accidental result of a wobbly leg.
How to tell if your horse is ready
Your horse’s readiness is just as important as your own. A horse that is ready for spurs is one that is confident and responsive to your basic cues. Your horse should have a solid foundation in both groundwork and riding exercises and should not be easily spooked or prone to overreacting. A great test is to see if your horse willingly moves forward off your leg and can move its hindquarters away from your bare heel. If your horse doesn't understand or respond to these basic leg aids, adding a spur will only create confusion. The goal is to refine a cue, not force a response.
Why you should address training gaps first
Using spurs to fix a training problem often backfires. If you have a tendency to grip with your legs, you might accidentally jab your horse, which can cause it to jump, bolt, or kick out. This kind of accidental spur use can be frightening for the horse and dangerous for you. Over time, even unintentional pokes can teach your horse to ignore your leg cues altogether, making it less responsive. It's far better to work with a trainer to close any gaps first. Once you have a solid foundation, you can choose a pair of spurs that will help you communicate with more precision.
How to Choose the Right Spurs
Walking into a tack shop and seeing a wall of spurs can feel overwhelming. With so many styles, lengths, and rowel designs, how do you know where to start? The key is to remember that a spur is a tool for refinement, not force. Choosing the right one is less about what looks impressive and more about what provides the clearest, gentlest cue for your horse. Your goal is to find a pair that complements your leg aids, matches your riding discipline, and fits you and your horse comfortably. Let's break down what to look for so you can make a confident and responsible choice.
Consider spur length, rowel type, and size
It’s a common mistake to think a sharper-looking spur is more effective. In reality, the opposite is often true. When it comes to rowels (the small, spinning wheels on some spurs), a design with more points or teeth actually distributes pressure more widely, making it a milder option. A rowel with fewer, more spaced-out points will be more severe. If you’re new to using spurs, a simple, blunt knob or a rowel with many points is a great place to start. Also, pay attention to the material. Look for lightweight yet strong steel that won’t bend or break, ensuring both durability and comfort for you.
Match spurs to your riding discipline
The type of riding you do will heavily influence your spur choice. English and Western disciplines have different traditions and functional needs. For example, you won’t see a cutting horse spur in a dressage ring. If you’re just starting out or are unsure how your horse will react, it’s always best to begin with the mildest option available, like a simple knob spur. These are less intimidating for the horse and allow you to introduce the aid gradually. The fit of the band around your heel matters, too. Some riders find that narrower bands offer a more comfortable and secure fit on their boots.
What to look for in spur straps
Your spurs are only as good as the straps that hold them in place. A quality strap ensures your spur stays in the correct position on your boot, preventing it from slipping down or shifting around while you ride. Look for durable materials like leather with reliable hardware, such as stainless steel or brass buckles that won’t rust or break. The fit is crucial; a strap that’s too loose will cause the spur to slide, and one that’s too tight will be uncomfortable and can damage your boots. When you’re ready to find the perfect pair, you can explore a variety of quality spurs and spur straps to find the right match for your needs.
Shop This Post

Featured in this article
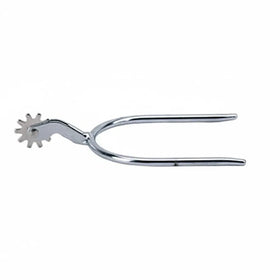
Weaver Leather Women's 21st Century Stainless Steel Spurs - 1" Shank, 3/4" Band
$56.99
Shop Now →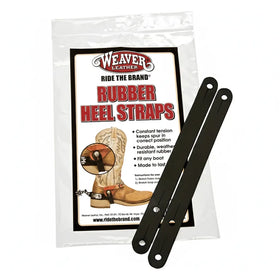

How to Fit Spurs on Your Riding Boots
A proper fit is essential for using spurs effectively and humanely. When your
Position spurs correctly on your boot
First, make sure you have the correct spur on the correct boot. Most English spurs are designed for a specific side. As a general rule, the longer arm of the U-shaped spur goes on the outside of your boot, which helps it sit flush against your heel. Place the spur on the spur rest, which is that small ledge on the back of your riding boots. The most important detail here is the angle of the spur’s neck. It should point slightly downward toward the ground, not straight back or upward. This angle ensures you must intentionally lift your heel to make contact, preventing accidental pokes and giving you more precise control.
Check spur strap fit and placement
With your spurs in position, it’s time to secure them. The goal is a snug fit that feels secure without being restrictive. The strap should be tight enough that the spur doesn’t jiggle or slide on your heel, but not so tight that it pinches your ankle. A great way to test this is the one-finger rule: you should be able to slide one finger between the strap and your boot with a little effort. When you fasten the strap, make sure the buckle faces the outside of your boot. This prevents it from rubbing against your horse or saddle. Tucking the end of the strap into its keeper keeps everything tidy and safe.
Double-check the fit before you ride
Before you get on your horse, take a moment to test the fit. Walk around a few steps and bend your ankles. The spurs should stay firmly in place on the spur rest without shifting or digging into your foot. This is also a good time to give everything a final look. Confirm the buckle is secure and the extra length of the strap is tucked away so it can’t get caught on anything. Finally, glance down one last time to ensure the neck of each spur is still pointing slightly downward. This quick check helps you enter the ring with confidence, knowing your equipment is safe and properly adjusted.
How to Apply Spur Pressure Correctly
Using spurs correctly is all about clear, quiet communication. It’s a conversation, not a command. The goal is to refine your leg aids, not replace them. Think of it as escalating your "ask" in stages, from a whisper to a firm request, and always being ready to reward the slightest try. Using the right spurs and spur straps is only half the equation; the other half is knowing how and when to apply pressure with feel and timing. When you get this right, you build a more responsive and willing partner in your horse.
Start with your calf, not your spur
Your spur should never be the first point of contact. Your primary cue always comes from your lower leg. Before you even think about touching your horse with a spur, apply a gentle squeeze or press with your calf. This is your initial "ask." If your horse responds, great! Your job is done. If not, the spur is then used to reinforce that same leg cue. As world champion roper Trevor Brazile explains, you should always start with a gentle cue from your calf. The spur simply adds clarity to a request your horse may have missed or ignored, turning a vague signal into a specific one.
Give your horse time to respond
Patience is a virtue, especially in the saddle. After you apply a cue, whether it's from your calf or a spur, you need to give your horse a moment to process it. A good rule of thumb is to wait about two seconds for a response before you consider increasing the pressure. Horses aren't machines; they need time to feel the cue, understand the question, and organize their bodies to answer correctly. Instantly repeating or escalating the cue can create panic and confusion, teaching your horse to tune you out. Giving them that brief pause shows confidence and allows them to learn without feeling rushed or trapped.
Release pressure immediately
This is the most important part of the equation. The instant your horse responds correctly, even if it’s just a small try in the right direction, you must release the pressure. Take your leg and spur away completely. This immediate release is the horse’s reward. It’s how they learn what you’re asking for. The release teaches them that responding to the cue makes the pressure disappear, which is a powerful motivator. This pressure-and-release system is the foundation of good horsemanship. It builds trust and creates a horse that is light, willing, and looking for the right answer because they know relief is coming.
How much pressure is enough?
Knowing how to escalate your cues appropriately is key to effective communication. The goal is to use the lightest cue possible to get the desired response. According to the experts at Downunder Horsemanship, there are four stages of pressure you can use. Always start at stage one and only move to the next if your horse doesn’t respond.
- Press with your calf: Your initial, gentle request.
- Touch with the spur: If the calf is ignored, gently touch your horse’s side with the spur. Don't jab, just make contact.
- Roll the spur: If the touch is ignored, turn your toe out slightly and roll the spur up your horse’s side.
- Kick with the spur: This is a last resort for a very unresponsive horse. It’s not a hard kick, but a rhythmic tap until the horse moves.
Most horses quickly learn to respond to the first or second stage, making your aids almost invisible.
When to Introduce Spurs to a Horse
Deciding when to introduce spurs is a big step that hinges on your horse’s training and your own skill as a rider. Spurs are not a fix for a horse that won’t go forward; they are a tool for refinement. Think of them as a way to have a quieter, more precise conversation with a horse that already understands the basics of your leg cues. If your horse is well-trained but has started to get a little dull or delayed in responding to your leg, it might be time. Introducing them correctly is key to ensuring they remain a tool for clear communication, not intimidation.
Read your horse's early responses
The ideal candidate for spurs is a horse that understands your leg aids but has started to ignore them. Maybe you find yourself using more and more leg pressure to get a response that used to be easy. According to horsemanship expert Clinton Anderson, spurs can help when a horse gets lazy or ignores your leg cues, making it more responsive. It’s about adding clarity, not volume. If your horse tenses up, gets scared, or bolts from a simple leg cue, they are not ready. The goal is to find that sweet spot where the spur provides a subtle reminder, not a startling command.
Progress gradually and with patience
When you first use spurs, patience is your best friend. The golden rule is to always ask with your calf first. If you don’t get the response you want, then you can gently roll your spur into your horse’s side. Give your horse about two seconds to process and respond to the cue. The instant your horse tries, even if the response isn't perfect, release the pressure. This immediate release is the reward and teaches them what you want. The ultimate goal is to use spurs less and less over time, not to rely on them constantly.
Use ground exercises to build familiarity
Before you ever get in the saddle with a new pair of spurs and spur straps, let your horse feel them from the ground. This is a simple safety measure that prevents misunderstandings. You can gently rub the spur along your horse’s side and belly where your leg would be, letting them get used to the feel in a low-pressure situation. A great ground exercise is the "Poke and Flex," where you ask your horse to bend its head to its side. If it resists, a gentle poke with the spur behind the elbow can encourage the correct response, helping your horse associate the spur with a gentle request rather than a harsh correction.
Common Spur Mistakes to Avoid
Using spurs effectively is about finesse, not force. They are a tool for refining your communication, but when used incorrectly, they can cause confusion, pain, and even set your training back. The best riders know that horsemanship is a journey of continuous learning, and a big part of that is recognizing and avoiding common pitfalls. Before you even think about strapping on a pair of spurs, make sure you can steer clear of these five frequent mistakes. Doing so will protect your relationship with your horse and ensure you’re using this tool for its intended purpose: subtle, clear communication.
Gripping with your legs
If you rely on gripping with your legs to stay balanced, you are not ready for spurs. A rider must have an independent seat and a quiet leg to use spurs correctly. When you grip tightly, you lose the ability to apply a deliberate, precise cue. Instead, the spur is in constant, unintentional contact with your horse’s sides. This can be painful and confusing for the horse, leading it to become anxious, jumpy, or dull to your leg aids. Before you add spurs, focus on developing a secure seat that allows your legs to hang loosely and move independently.
Using spurs as punishment
This is a hard and fast rule: spurs are never for punishment. They are not meant to make a horse go faster, startle it into action, or correct a behavioral issue. Using a spur out of anger or frustration will only damage your horse’s trust in you. It creates fear and resentment, which are the enemies of good training. Remember, spurs are designed to help you ask for more specific movements, like softening, bending, or moving a part of the body with more precision. They are a tool for clarification, not coercion.
Relying on spurs for training shortcuts
There are no shortcuts in good horsemanship. It can be tempting to think spurs will solve a training problem, but they are not a substitute for patience and correct foundational work. Using spurs correctly means teaching your horse to respond to the lightest possible cue, not resorting to constant kicking. If your horse isn't moving off your leg, the answer is to go back and reinforce that basic aid, not to add a sharper tool. While finding the right pair of spurs and spur straps is part of the process, they are meant to refine a response, not create one from scratch.
Forgetting to release pressure
In horse training, the release of pressure is just as important as its application. The release is what tells your horse it has given the correct answer. When you apply a spur cue, you must release the pressure the instant your horse responds. If you keep the pressure on, your horse has no incentive to react. Over time, this constant, unreleased pressure will teach your horse to ignore the cue altogether, making it "dead-sided" and unresponsive. The ultimate goal is to use the spur less and less as your horse becomes more attuned to your lighter leg aids.
Ignoring your horse's sensitivity
Every horse is an individual, and some are far more sensitive than others. A cue that gets a subtle response from one horse might cause another to overreact. Pay close attention to your horse’s body language. Signs of discomfort or anxiety include pinning ears, swishing the tail, tensing the body, or even bucking or kicking out. If you accidentally jab your horse, it might jump or run off. It’s your job as a rider to listen to your horse, adjust your aids to its sensitivity level, and always prioritize its comfort and confidence.
Putting Your Horse's Welfare First
Using any training aid requires a serious commitment to your horse’s comfort and trust, and spurs are no exception. When used correctly, they are a subtle tool for refined communication, helping you and your horse achieve a higher level of partnership. When used poorly, however, they can cause pain, fear, and damage the relationship you’ve worked so hard to build. Your horse’s physical and emotional well-being should always be your top priority. This means being honest about your own skills as a rider and paying close attention to how your horse is responding to every cue. A good horseperson knows that the most important tools in their kit are patience, consistency, and a deep respect for the animal. They understand that true horsemanship is a journey of continuous learning, for both horse and rider. Before you ever strap on a pair of spurs, take a moment to check your intentions. Make sure they are rooted in the goal of clearer communication and a stronger partnership, not in taking shortcuts or using force. The trust your horse places in you is precious, and it's your job to protect it above all else.
Use spurs for communication, not coercion
Think of spurs as a way to whisper, not to shout. They are an extension of your leg, designed to add precision to your cues, not to create them. The goal is to use a light touch to ask your horse to bend, soften, or move a specific part of its body with more accuracy. Spurs should never be used to make a horse go faster, to correct a training problem, or as a form of punishment. The most important part of the cue is the release of pressure. The moment your horse responds correctly, you must immediately remove the pressure. This release is how your horse learns and understands what you’re asking, turning a potentially negative tool into a positive and effective method of communication.
Watch for signs of discomfort
Your horse will tell you if your spurs are causing problems. Pay close attention to signs of irritation or anxiety, such as pinning ears, swishing the tail, tensing the body, or even kicking out. If you accidentally jab your horse by gripping with your legs, it might jump forward, bolt, or become anxious. Over time, constant, unintentional contact can also have the opposite effect, causing your horse to ignore your leg aids altogether. This is often called becoming "dead-sided." A responsive and willing partner is a happy partner, so always watch for and address any signs of discomfort immediately. If you see them, it’s a clear signal to reassess your riding and perhaps put the spurs away until your leg is more stable.
Know when to put the spurs away
The mark of a great rider isn't wearing spurs, but knowing when not to. If you have an unsteady lower leg or a tendency to grip with your heels for balance, you should not wear spurs. Using them without independent leg control is unfair and can be painful for your horse. Even experienced riders should have days where they ride without spurs to ensure their foundational cues are still effective and their horse remains responsive to a light leg. Choosing the right spurs and spur straps is only half the equation; true horsemanship lies in knowing that sometimes, the best tool is the one you leave in the tack room. Your horse will thank you for your honesty and self-awareness.
Find Your Perfect Pair of Spurs and Straps
Now that you understand how to choose, fit, and use spurs with a light touch, you’re ready to find the pair that works best for you and your horse. Selecting the right equipment is a key part of responsible horsemanship, and it’s all about finding the perfect balance between clear communication and your horse’s comfort. Think of spurs as a tool for refinement, not force.
When you start looking, keep your discipline and your horse’s individual sensitivity at the front of your mind. A short, blunt-end spur might be all that’s needed for a sensitive horse, while a small, smooth-edged rowel can offer a more distinct cue for a horse that needs a clearer signal. The goal is always to use the mildest tool that allows you to communicate effectively. A well-chosen spur lets you whisper your aids instead of shouting them.
Don’t overlook the importance of the straps, either. They are just as critical as the spurs themselves. Whether you choose classic leather for its traditional look and feel or a durable synthetic material for easy care, the primary goal is a secure fit. The straps should hold the spur firmly in place on your boot without slipping or shifting. Investing in quality, well-made spurs and spur straps is an investment in your horse’s comfort and your own effectiveness as a rider. Finding the right match will help you build a more responsive and trusting partnership in the saddle.
Related Articles
- Horse Spurs 101: The Ultimate Buyer's Guide
- How to Fit English Spurs on Boots: A Rider's Guide
- English Spurs with Rowels: A Complete Guide
Frequently Asked Questions
Are spurs cruel to the horse? Spurs themselves are not cruel; it all comes down to the hands, or rather the legs, of the rider using them. When used correctly, they are a tool for subtle communication, like having a more specific conversation with your horse. However, if used for punishment, with an unsteady leg, or to force a response, they can absolutely cause pain and fear. The responsibility for using them humanely always rests with the rider.
My horse is slow and ignores my leg. Will spurs make him go faster? This is a common question, but spurs are not a gas pedal. If your horse is not responding to your basic leg cues, adding a spur will likely create more confusion and anxiety, not a willing forward movement. A horse that seems "lazy" often has a gap in its training or doesn't understand the question. It's much more effective to go back and solidify your horse's response to your leg without spurs first.
As a beginner rider, when should I start using spurs? Honestly, if you're still developing your balance and a steady leg, you should not be wearing spurs. A key sign of readiness is having an independent seat, which means you can move your hands and seat without your legs moving unintentionally. Using spurs before you have this stability often leads to accidental jabbing, which can make a horse anxious or teach it to ignore your leg altogether. Focus on your foundation first.
With so many options, which type of spur is the gentlest to start with? When you and your horse are truly ready, it's always best to start with the mildest option available. A knob spur, sometimes called a "dummy" spur, has a simple, blunt end and is a great choice for a first pair. If you are considering a rowel, remember that a wheel with many small, blunt points distributes pressure more gently than a rowel with only a few large points.
What is the single most important part of applying a spur cue? The release. The instant your horse gives you the correct response, you must immediately take the pressure away. The release is your horse's reward and how it learns what you are asking for. Without an immediate release, the spur is just constant, nagging pressure, and your horse will eventually learn to ignore it. This pressure-and-release system is the foundation of building a light and responsive partner.


