


Feeling like your horse is a little heavy on the forehand? Or maybe you're seeking more precise communication for those tricky combinations in the ring. When your training progresses, your equipment sometimes needs to as well. This is where the elevator bit horse combination often comes into the conversation. It's a tool designed to encourage your horse to lift through the shoulder and shift its weight back. But is it right for you? This guide breaks down everything you need to know—from selecting the right one to fitting it properly and using it safely for peak performance.
Dive into the evolution of elevator bits, explore their types and functions, and follow step-by-step fitting instructions. Learn best practices for safety and discover advanced riding techniques tailored for the modern equestrian landscape.
Whether you seek improved horse welfare, finer communication, or mastery of the latest trends, this guide equips you with practical strategies to elevate your riding experience.
What Is an Elevator Bit and How Does It Work?
Elevator bits have become a focal point in equestrian circles, offering riders advanced control and communication. To appreciate their unique benefits and potential, it is essential to understand their function, design, and evolution. This section unpacks the elevator bit’s mechanics, historical development, key variants, how they interact with the horse, and the main pros and cons.
What Is an Elevator Bit?
An elevator bit is a specialized type of horse bit designed to offer enhanced leverage and precise communication between rider and horse. Unlike traditional snaffle or curb bits, which primarily apply direct or indirect pressure, the elevator bit incorporates shanks, a distinctive mouthpiece, and multiple rein positions.
This design allows riders to adjust the amount of leverage and pressure applied, making it suitable for horses needing extra control or refinement. The elevator bit’s unique configuration sets it apart from other bits, providing greater versatility in handling various equestrian disciplines.
A Brief History of the Elevator Bit
The elevator bit has roots in both English and Western riding traditions, evolving over centuries. Early versions were crafted from simple metals, but advances in materials and manufacturing have transformed them by 2026.
Modern elevator bit designs benefit from research into equine biomechanics, leading to improved ergonomics and horse comfort. Innovations such as stainless steel, copper inlays, and custom mouthpieces reflect a growing commitment to horse welfare and performance, influenced by the latest studies and rider feedback.
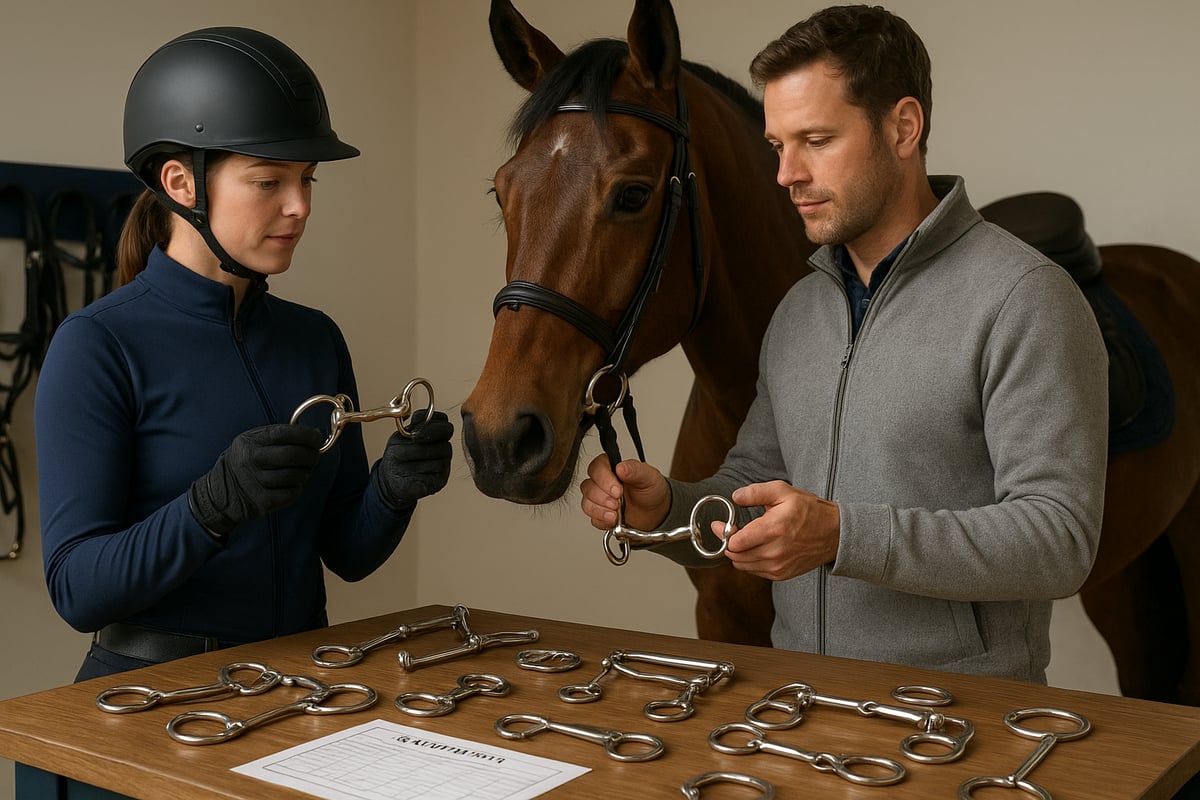
Breaking Down the Different Types of Elevator Bits
Elevator bits come in several popular models, including 2-ring, 3-ring, and 4-ring versions. Each model offers varying degrees of leverage and rein attachment options.
Mouthpiece designs also vary, with choices such as jointed, ported, twisted, and even roller variations. The most common materials for elevator bit construction are stainless steel, sweet iron, and copper, each impacting durability, taste, and the horse’s acceptance differently.
A quick comparison table:
| Model | Mouthpiece Options | Common Materials |
|---|---|---|
| 2-ring | Jointed, Ported | Stainless steel |
| 3-ring | Twisted, Roller | Sweet iron, Copper |
| 4-ring | Double Joint, Ported | Stainless steel |
The Mechanics: Pressure Points and Leverage
The elevator bit operates on a principle of leverage, amplifying the rider’s rein signals to the horse’s poll, mouth, and chin. Depending on rein placement, pressure can be distributed more strongly to specific areas, which is why elevator bits are often compared to gag bits or pelhams.
Scientific studies have shown that elevator bits can create concentrated pressure points, making correct fitting and gentle handling crucial. For a deeper understanding of how bit design and pressure affect horse welfare, the article Equine Welfare in Equestrian Sports offers valuable research-based insights.
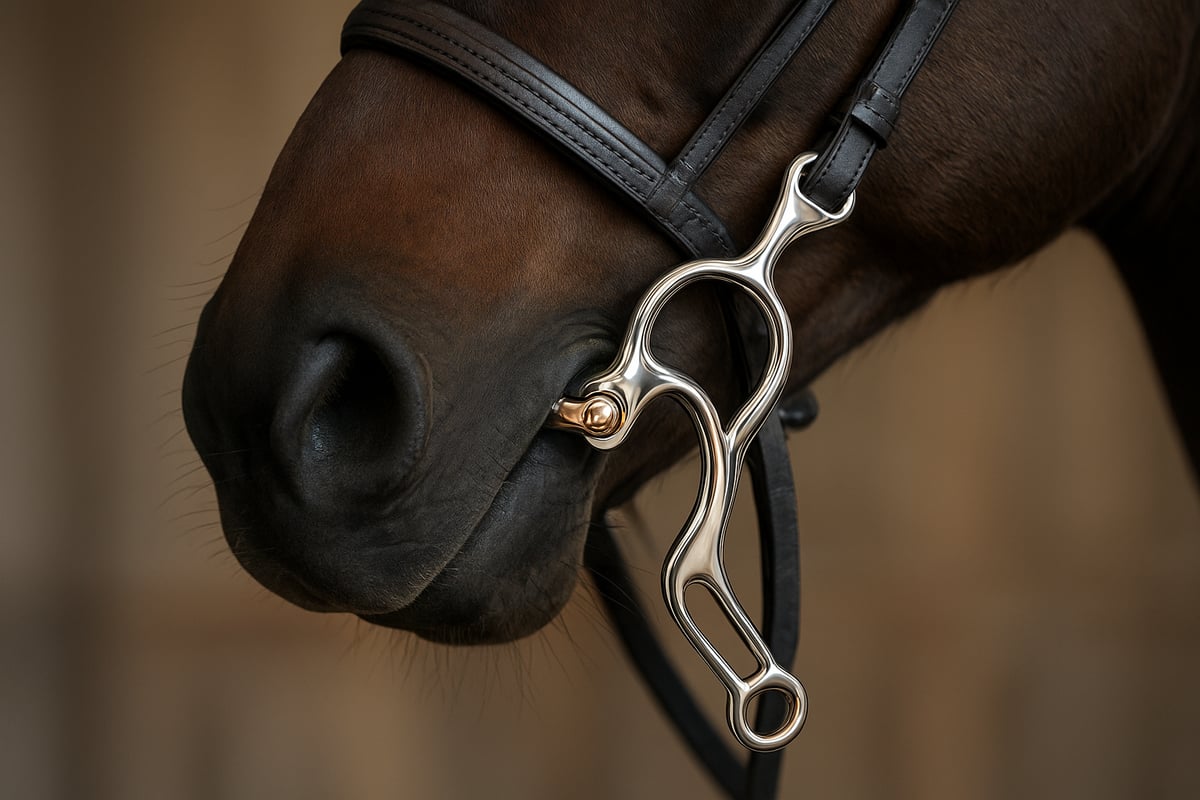
How the "Lifter" Effect Works
The elevator bit gets its name from the distinct "lifting" effect it can have on a horse's head and shoulders. This action comes from its clever use of leverage. When a rider applies rein pressure, the bit amplifies that signal, distributing it across the horse's poll, mouth, and chin. The multiple rings on the bit's shanks allow the rider to choose the degree of leverage. Attaching the reins to a lower ring increases the poll pressure and lifting action, encouraging the horse to raise its front end and shift its balance back. This design gives riders a tool to refine communication and ask for more collection without needing to use excessive force, making it a popular choice for horses that tend to be heavy on the forehand.
Elevator Bits vs. Other Common Leverage Bits
It’s easy to group all leverage bits together, but the elevator bit has a unique feel and function that sets it apart. Because it operates using leverage, it’s often compared to gag bits and pelhams, but the way it applies pressure is quite different. Understanding these distinctions is key to choosing the right piece of equipment for your horse and your specific discipline. Each type of bit communicates with the horse in a slightly different way, and what works for one horse-and-rider pair might not be the best fit for another. Let's break down how the elevator bit stacks up against some other common options you'll find in the tack room.
Comparison to Gag Bits
While both elevator and gag bits are designed to create a lifting action, they achieve it through different mechanics. A traditional gag bit works by sliding the mouthpiece up the cheekpieces, which results in more direct and often significant pressure on the horse's poll and the corners of its mouth. This can create a very pronounced lift. In contrast, the elevator bit provides a more controlled and gradual application of pressure. Its action is less of a direct slide and more of a pivot, which many riders find offers a clearer, more nuanced signal. For this reason, an elevator bit is often considered a milder alternative for horses that need a lift but are sensitive to the stronger action of a gag.
Comparison to Baucher and Curb Bits
Other bits like Pelhams and curb bits also use leverage, but again, the feel is different. A Pelham combines a snaffle and a curb action into one mouthpiece and uses a curb chain to limit the rotation and apply pressure to the chin groove. This generally results in less poll pressure than a gag bit. The elevator bit, however, offers a unique middle ground. It provides more leverage than a Baucher (which has a minimal lifting effect) but without the direct curb action of a Pelham. This balanced design makes it a versatile piece of horse tack suitable for various disciplines, from show jumping to barrel racing, where riders need both lift and control.
Weighing the Pros and Cons of Elevator Bits
The elevator bit provides significant advantages for riders seeking improved control, especially with strong or forward horses. Benefits include better head carriage, responsiveness, and adaptability across disciplines.
However, risks exist. Misuse or harsh handling can cause discomfort, mouth injury, or resistance in the horse. Elevator bits are recommended when extra control is needed, but should be avoided for inexperienced riders or sensitive horses. Choosing and fitting the right elevator bit is essential for safety and optimal results.
Choosing the Right Elevator Bit for Your Horse
Selecting the ideal elevator bit for your horse is a nuanced process that blends science, experience, and the unique needs of each partnership. Riders in 2026 must consider not only tradition but also the latest research and innovations in bit design. This section guides you step by step, ensuring your choice supports both control and comfort.
Consider Your Horse's Needs and Temperament
Before choosing an elevator bit, assess your horse’s age, level of training, and overall temperament. Young or inexperienced horses may react differently to leverage, while mature, seasoned competitors might benefit from the refined cues an elevator bit provides.
Look for signs your horse could benefit from an elevator bit:
- Difficulty maintaining balance or head carriage
- Strong, forward behavior needing more control
- Resistance to traditional snaffle or curb bits
Consulting resources like Choosing the Right Bit for Your Horse can help clarify these decisions, offering further insight into bit selection strategies.
Find the Right Bit for Your Riding Discipline
Each riding discipline has its own demands and regulations concerning elevator bit use. Show jumping, eventing, and cross country often see these bits used for enhanced communication and control, especially with energetic or strong horses.
Stay updated on competition rules from organizations such as FEI and USEF, as 2026 brought several updates regarding permissible bit types. Schooling may allow more flexibility, but always prioritize your horse’s welfare and training goals.
Show Jumping and Eventing
In demanding sports like show jumping and eventing, clear communication and precise control are everything. An elevator bit can be a game-changer for riders with strong, forward horses that also have sensitive mouths. The unique design provides leverage that helps encourage the horse to rebalance and "sit on its hocks," shifting its weight to its hindquarters. This improved body position is crucial for navigating tight turns on a jump-off course or maintaining control on a cross-country track. The bit’s lifting action can help raise a horse’s shoulders, making it feel lighter in your hands and more responsive to your aids, which is why it’s a popular piece of horse tack in these competitive arenas.
Cattle Work and Speed Events
While often seen in English disciplines, the principles of an elevator bit are also valuable in Western speed events like barrel racing or during cattle work. In these sports, a horse needs to stay light on its front end to make explosive, sharp turns. The upward lifting action of an elevator bit can help a rider achieve this without resorting to heavy-handed pulling, which could shut down the horse's forward momentum. The controlled leverage allows for quick, subtle cues to rate speed or change direction, keeping the horse responsive and focused on the task at hand. It’s an effective tool for riders who need a bit more finesse and control when the clock is ticking.
Schooling Hunters and Equitation Horses
For hunter and equitation riders, a steady frame and perfect balance are the goals. An elevator bit can be an excellent schooling tool for a horse that tends to lean on the bit or get heavy on its forehand. The added leverage gives the rider a way to gently correct this tendency, encouraging the horse to carry itself in a more balanced and uphill manner. It’s not typically a long-term solution for the show ring in these disciplines, but rather a training aid used to teach the horse the correct feel. By helping the rider re-balance the horse, it can effectively communicate the desired frame and self-carriage, making it a useful piece of equipment in a well-rounded training program.
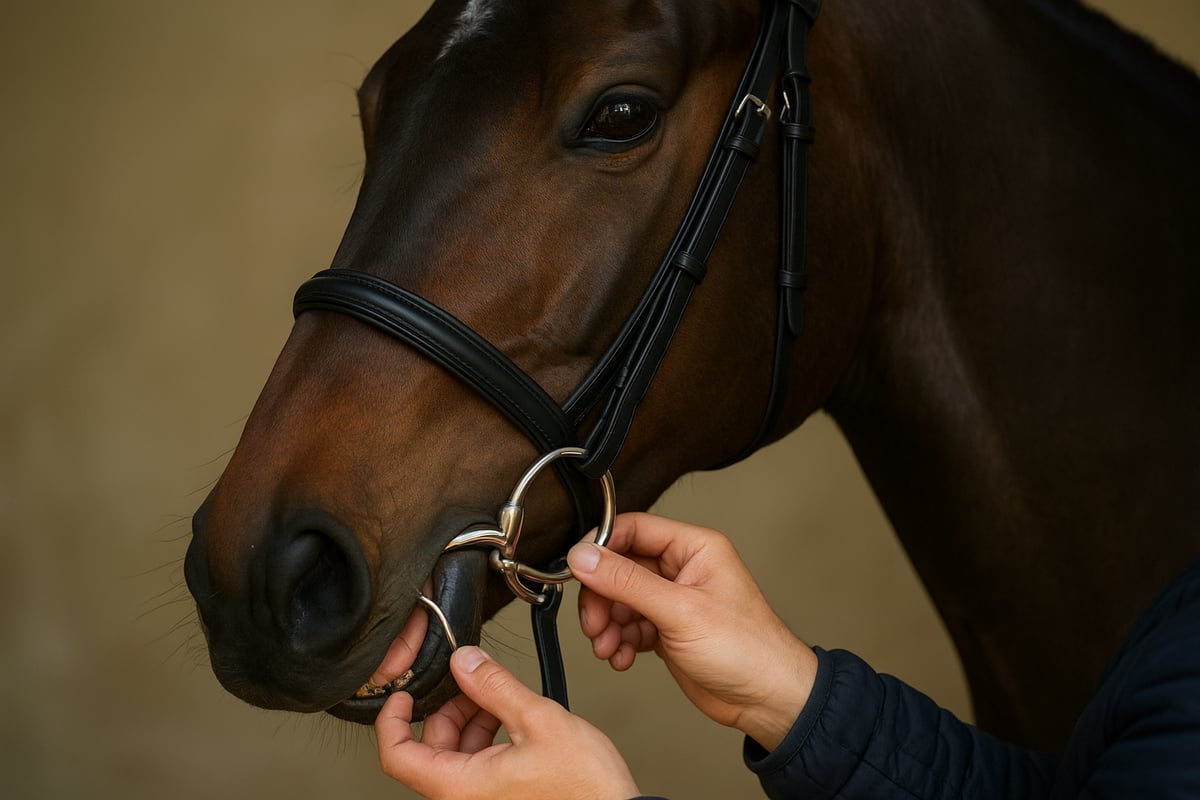
How Do You Find the Right Size and Fit?
Accurate sizing is critical for safety and effectiveness with any elevator bit. Begin by measuring your horse’s mouth width using a bit gauge or soft tape measure. Next, check the cheek length to ensure the bit sits correctly without pinching.
A properly fitted elevator bit should allow one or two small wrinkles at the corners of the mouth and leave enough space for the tongue. Never force a bit that is too narrow or wide—poor fit can lead to discomfort and resistance.
Choosing the Right Mouthpiece for Your Horse
Elevator bits come with a variety of mouthpieces, each influencing pressure and communication differently. Common choices include:
- Single joint: Offers direct pressure, encourages flexion
- Double joint: Reduces nutcracker effect, increases comfort
- Ported: Provides tongue relief for sensitive horses
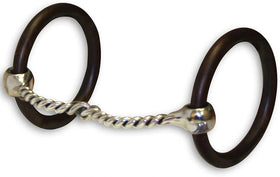
- Twisted: Adds control, but can be harsher
- Roller: Encourages relaxation and salivation
Match the mouthpiece to your horse’s preferences and your riding objectives. Sensitive horses may benefit from smoother, double-jointed options, while stronger horses might need a bit more authority from ported or twisted styles.
Common Mouthpiece Designs
The mouthpiece is the part of the bit that sits inside your horse's mouth, making it your most direct line of communication. The design you choose significantly affects how your cues are received and how comfortable your horse is. A single-jointed mouthpiece, for example, creates a "nutcracker" action when you pull the reins, applying pressure to the tongue and the bars of the mouth. While effective for some horses, others may find it too harsh. A double-jointed mouthpiece is often a gentler alternative. It features a central link, like a lozenge, that conforms more naturally to the horse's mouth, distributing pressure evenly and reducing the chance of pinching.
Other designs offer solutions for more specific needs. A ported mouthpiece has a raised curve in the center to provide tongue relief, which is ideal for horses with large tongues or those sensitive to pressure in that area. For situations requiring a stronger signal, a twisted mouthpiece offers more control, but it’s important to use it with very light hands as it can be severe. Finally, roller mouthpieces feature small, rolling pieces that can help a tense or fussy horse relax its jaw and accept the bit. Understanding these differences is key when browsing horse tack, as it allows you to find the perfect match for your horse's comfort and your riding goals.
Does the Bit Material Really Matter?
The material of your elevator bit affects both comfort and longevity. Consider this comparison:
| Material | Pros | Cons |
|---|---|---|
| Stainless Steel | Durable, easy to clean | Can be cold, less taste |
| Sweet Iron | Encourages salivation, taste | Prone to rust |
| Copper Inlays | Softer, promotes chewing | Wears faster, costly |
Choose a material based on your horse’s sensitivity, maintenance needs, and your budget. Regular cleaning extends the lifespan of any elevator bit.
Popular Brands and Price Points
When you start shopping for an elevator bit, you'll find options from many trusted names in the equestrian community. Brands like Pessoa, Korsteel, and Centaur are well-regarded for their quality craftsmanship and thoughtful designs, offering a variety of styles to suit different horses and riders. The cost can vary quite a bit, generally ranging from about $20 for a basic model to over $200 for a more specialized design from a premium brand. For example, a simple Cheltenham Sliding Gag Bit might be around $40, while a Pessoa® Magic 2-Ring Slow Twist Bit could be closer to $100. Here at Hooves and Paws, we focus on providing a curated selection of high-quality horse tack from brands we trust, ensuring you get great value and performance.
When to Ask a Trainer for Advice
Professional guidance is invaluable when selecting and fitting an elevator bit. Trainers and bit fitters can assess your horse’s needs, recommend suitable models, and ensure proper adjustment.
According to recent data, 78% of riders reported improved performance and comfort after consulting an expert. When in doubt, prioritize your horse’s welfare and seek advice before making a final decision.
Shop This Post

Featured in this article
AV Bob Avila Double Ring Snaffle Horse Bit - Sweet Iron Mouthpiece, 3" Rings - Multiple Sizes
$165.00
Shop Now →

How to Correctly Fit and Adjust an Elevator Bit
A properly fitted elevator bit is essential for your horse’s comfort and performance. Each step, from preparation to troubleshooting, ensures the bit works safely and effectively. Follow this comprehensive guide for optimal results.
Gather Your Tools and Prioritize Safety
Before fitting your elevator bit, gather all necessary equipment. You’ll need a clean bridle, bit guards, and a measuring tape. Ensure the bit is sanitized and free of sharp edges.
Set up in a quiet, well-lit area where your horse feels secure. Calm the horse with gentle handling and check for signs of stress. Safety is paramount, so always stand to the side and avoid sudden movements during the process.
Organize your tools within reach. Having everything ready minimizes distractions and helps keep your horse calm. Proper preparation sets the stage for a smooth elevator bit fitting experience.
Step 1: Measure Your Horse's Mouth
Accurate measurement is key to selecting the right elevator bit size. Use a soft measuring tape to determine your horse’s mouth width, measuring from one corner of the lips to the other.
Check the cheekpiece length as well; it should align with your horse’s facial structure for comfort and stability. For young or sensitive horses, remeasure periodically as their mouths can change over time.
A bit that’s too small may pinch, while one that’s too large can slide and cause discomfort. Correct sizing ensures the elevator bit communicates your cues clearly and safely.
Step 2: Attach the Bit to Your Bridle
Secure the elevator bit to the bridle, ensuring each ring is correctly positioned. Attach the reins according to the desired leverage, with upper rings for milder action and lower rings for increased control.
Bit guards help prevent pinching and keep the bit stable. Adjust cheekpieces so the bit sits evenly in the mouth without pulling on one side. For a detailed overview of bridle types and their compatibility with bits, see the Horse Bridles Explained guide.
Proper attachment is crucial for the elevator bit to function as intended. Double-check each connection before proceeding to the next step.
Using Special Attachments like Gag Cheeks
Some riders use special attachments like gag cheeks to further refine the action of an elevator bit. These cheekpieces are designed to slide, allowing the bit to move upward in the horse's mouth and apply poll pressure before the reins fully engage. This mechanism provides a subtle "warning" to the horse, creating a lifting effect that can help improve head carriage and responsiveness. This setup is often used to gain better control with strong or forward-moving horses that tend to get heavy on the forehand. However, this added leverage requires a rider with soft, experienced hands. Ensuring all your horse tack is correctly fitted is essential, but remember that even the best equipment is only as effective as the person guiding it.
Step 3: Check the Fit on Your Horse
With the elevator bit in place, observe how it rests in your horse’s mouth. The mouthpiece should sit comfortably, creating one or two small wrinkles at the lips without pressing too tightly.
Ensure there is enough tongue space and that the bit is not pinching the corners of the mouth. Watch for excessive salivation, head tossing, or attempts to evade the bit, all of which signal discomfort.
A correctly fitted elevator bit will encourage relaxed chewing and attentive responses. Take time to make small adjustments until your horse appears at ease.
Step 4: Make Adjustments and Test the Response
Start by leading your horse in hand to assess their reaction to the elevator bit. Watch for acceptance, such as relaxed jaw movement and quiet mouth.
Mount and ride at a walk, applying gentle rein pressure to test responsiveness. Adjust rein tension and cheekpiece length as needed, seeking a balance between control and comfort.
Gradually increase the level of work, monitoring your horse’s feedback. Early, careful adjustments help your horse adapt to the elevator bit without stress or confusion.
Is the Fit Off? How to Troubleshoot Common Issues
If your horse resists, shakes its head, or shows signs of evasion, reassess the fit of the elevator bit. Check for sharp edges, incorrect sizing, or improper rein placement.
Persistent problems may indicate the need for a different mouthpiece or professional evaluation. Consult your veterinarian or a bit specialist if discomfort continues.
Addressing issues promptly helps maintain trust and ensures the elevator bit enhances, rather than hinders, your horse’s performance. Regular reviews and adjustments support ongoing comfort and communication.
Using an Elevator Bit Safely and Effectively
Choosing the right approach with an elevator bit is essential for rider safety and horse welfare. As you integrate this tool into your training, follow updated best practices for 2026 to ensure a positive experience for you and your horse.

Is an Elevator Bit Right for Your Horse?
Deciding if an elevator bit is the right choice is a personal journey for you and your horse. It’s not a one-size-fits-all solution, but rather a specific tool for addressing particular challenges in your training or competition. This type of bit can be incredibly effective when used correctly, but it requires a good understanding of its mechanics and a rider with sensitive, independent hands. Before adding one to your collection of horse tack, it’s important to evaluate your horse’s specific tendencies, your riding discipline, and your own skill level. Let’s look at a few common scenarios where an elevator bit might be a helpful addition to your toolkit.
For Horses That Lean or Pull
If you have a horse that tends to get heavy on the forehand, lean on the bit, or pull you out of the saddle, an elevator bit can offer a solution. Its design provides leverage that encourages the horse to lift its head and shoulders, shifting its balance back onto its hindquarters. This can lead to a lighter feel in your hands and improved self-carriage for your horse. For riders in fast-paced disciplines like show jumping or eventing, this added control and responsiveness can be a game-changer, allowing for quicker adjustments before a fence. The goal isn't just to have stronger brakes, but to re-educate the horse to carry itself more effectively, resulting in a more balanced and athletic partner.
As a Transition to More Leverage
The elevator bit is uniquely versatile, making it an excellent transitional tool for horses that need a bit more refinement than a simple snaffle can offer. Thanks to its multiple rings, you can customize the amount of leverage applied. You can start with the reins on the main ring for a mild, snaffle-like effect and then gradually move them to the lower rings as your horse understands the new cues. This adaptability allows you to introduce the concept of poll pressure gently, without overwhelming your horse by jumping straight to a stronger curb bit or pelham. It’s a great way to fine-tune your communication and ask for more sophisticated responses as your training progresses together.
For the Strong but Sensitive Mouth
This might sound like a contradiction, but an elevator bit can sometimes be a good option for a horse that is both powerful and sensitive. A horse that pulls hard against a traditional snaffle can create constant, dull pressure that irritates a sensitive mouth. In these cases, an elevator bit, when used by a skilled rider with soft hands, can provide a quick, clear signal that gets a response without the need for sustained pulling. However, this requires extreme caution. The leverage can be severe if misused, so this is not a tool for inexperienced riders or those with unsteady hands. The key is to use a light touch to give a precise cue, then immediately soften, rewarding the horse for a correct response.
Balancing Leverage with Clear Communication
The elevator bit relies on leverage to amplify rein aids, making communication more precise. Rein placement on various rings adjusts the amount of pressure applied to the poll, mouth, and chin.
To use an elevator bit safely, avoid excessive force and always aim for gentle, clear signals. Overusing leverage can cause discomfort or confusion. Strive for soft hands and regular rein checks to maintain a responsive, relaxed connection.
How to Introduce the Bit to Your Horse
Introducing an elevator bit requires patience and a stepwise approach. Start by letting your horse explore the bit in hand, rewarding calm acceptance. Transition gradually from a familiar snaffle to the elevator bit, using brief, positive sessions.
Consider groundwork first, then progress to mounted work. Monitor your horse’s reactions closely, rewarding relaxation and responsiveness. This steady introduction helps your horse associate the elevator bit with clear, kind communication.
Is Your Horse Comfortable? Signs to Look For
Regularly assess your horse’s comfort when using an elevator bit. Watch for behavioral cues like head tossing, jaw tension, or resistance. Positive signs include steady chewing, soft eyes, and willingness to move forward.
Recent studies, such as those in the Equine Research Report 2024, show that horses introduced to bits gradually display 65% fewer behavioral issues. Use this data to inform your training and prioritize welfare at every stage.
Know the Rules: Legal and Ethical Guidelines
In 2026, elevator bit use is governed by updated competition rules and growing welfare awareness. Check the latest guidelines from organizations such as FEI and USEF before entering events.
Ethical debates address the fine line between effective control and potential discomfort. Always use the elevator bit with the horse’s well-being in mind, and be prepared to justify your equipment choices to officials and peers.
When to Switch or Discontinue Use
Stay alert to persistent problems when using an elevator bit. Ongoing resistance, mouth injuries, or anxiety may signal that it is not the right choice for your horse.
Consider alternatives such as snaffle bits or bitless bridles if issues persist. Consult your trainer or veterinarian for guidance. Your horse’s comfort and safety should always guide your bit selection.
Advanced Riding Techniques with Elevator Bits
Mastering advanced riding techniques with an elevator bit empowers riders to achieve precise communication and control, especially in demanding disciplines. By refining your approach and understanding the subtleties of this equipment, you can unlock new performance levels for both horse and rider.
Refining Your Rein Aids and Hand Position
Proper rein aids are essential when riding with an elevator bit. Unlike standard bits, the elevator bit amplifies subtle movements, making clear and consistent hand positioning crucial for effective communication. Direct rein pressure encourages lateral flexion, while indirect rein aids can help achieve improved collection.
Maintaining soft, elastic contact is key. Riders should keep wrists straight and thumbs on top, using small finger adjustments instead of abrupt pulls. This approach prevents excessive pressure and supports the horse’s head carriage. Practicing transitions with the elevator bit helps riders develop a feel for the right amount of contact.
| Rein Aid Type | Effect with Elevator Bit | Best Use |
|---|---|---|
| Direct Rein | Turns horse’s head/neck | Bending, lateral work |
| Indirect Rein | Aids in collection, balance | Circles, transitions |
Regular practice with these techniques ensures the elevator bit becomes a tool for precision, not force.
Using a Two-Rein Setup
For riders seeking maximum versatility from their elevator bit, a two-rein setup is an excellent option. This involves attaching one rein to the main ring, which functions like a snaffle, and a second rein to one of the lower rings to engage the leverage. This configuration allows you to communicate with incredible nuance. You can rely on the snaffle rein for gentle, direct cues during most of your ride and only engage the leverage rein when you need more collection or control, such as on the approach to a fence or during a downward transition. This setup gives you the ability to apply pressure with precision, ensuring you only use the bit’s full leverage when absolutely necessary, which is a cornerstone of thoughtful horsemanship and quality horse tack.
Adding a Chin or Curb Strap
To further refine the action of an elevator bit, you can add a chin or curb strap. This strap connects to the top rings of the bit and sits in the horse's chin groove. When you engage the leverage rein, the strap tightens, adding chin pressure to the existing poll and mouth pressure. This action prevents the bit from over-rotating in the horse’s mouth and provides a very clear, defined signal to slow down or collect. It’s crucial to adjust the strap correctly—it should be loose enough to fit two fingers between the strap and the horse’s chin when the reins are slack. This ensures the action is not constant and only engages when you apply rein pressure, giving your horse a fair and understandable cue.
Tips for Jumping and Cross-Country
The elevator bit is a favorite in show jumping and cross-country due to its ability to enhance control without sacrificing agility. When approaching fences or technical combinations, the elevator bit allows riders to make quick, effective adjustments to stride and balance.
Top competitors in 2026 often choose this bit for horses that tend to rush fences or become strong on course. The leverage action provides enough braking power to keep the horse responsive, especially in high-adrenaline settings. Riders should always introduce the elevator bit during schooling sessions before using it in competition.
For those interested in exploring a range of jumping bits, the Bit and Curb Collection showcases various options to complement your training program.
Managing Strong or Forward Horses
Horses that are naturally strong or forward-moving can benefit from the strategic use of an elevator bit. This bit offers increased leverage, making it easier to maintain rhythm and responsiveness during fast work or when the horse becomes excitable.
Gradual retraining is essential. Start with short sessions, focusing on transitions and responsiveness to half-halts. Incorporate exercises that encourage relaxation, such as serpentines and downward transitions, to reinforce calm behavior. Success stories from experienced trainers highlight how the elevator bit, when used thoughtfully, transforms horses that previously were difficult to control.
Always monitor your horse’s reactions closely, and adjust your approach as needed to maintain trust and confidence.
Working the Bit into Your Training Program
Integrating an elevator bit into a training program requires careful planning. Use it for specific schooling sessions or problem-solving, rather than as an everyday solution. Alternate between the elevator bit and milder bits to prevent the horse from becoming desensitized.
Combining the elevator bit with other training aids, like martingales or nosebands, can further refine control. However, ensure all equipment is fitted correctly and used ethically. Regularly consult with your trainer to assess progress and make adjustments, using feedback from both horse and rider.
Stay up to date with the latest research and best practices by consulting resources like British Equestrian Research and Insights, which provide data-driven guidance for integrating advanced equipment into your routine.
Common Mistakes and How to Avoid Them
Overuse and misuse are the most common pitfalls with an elevator bit. Excessive leverage, poor rein management, and inconsistent cues can lead to discomfort or resistance in the horse. Riders should avoid using the elevator bit as a shortcut for training issues or as a permanent fix for behavioral problems.
Top trainers recommend regular self-assessment and seeking professional guidance. Focus on clear communication, soft hands, and progressive training steps. By following these principles, riders ensure the elevator bit remains a tool for refinement, not correction.
Commit to ongoing education and mindful practice to get the most out of your elevator bit experience.
What's Next? The Future of Elevator Bits
The world of the elevator bit is advancing rapidly as equestrian technology and rider expectations evolve in 2026. Riders and trainers are seeking bits that offer precision, comfort, and ethical design. Let us explore the most significant innovations shaping the future of elevator bit selection and use.
The Latest in Bit Materials and Design
By 2026, the elevator bit is crafted using advanced alloys and ergonomic designs that enhance both durability and horse comfort. Leading brands have introduced lightweight titanium blends and anti-corrosive coatings, addressing issues of weight and longevity.
Innovations include:
- Shaped mouthpieces for anatomical fit
- Polished, hypoallergenic finishes
- Enhanced balance via computer-aided design
These advancements allow for precise pressure distribution, reducing the risk of pinching or discomfort. Riders now expect each elevator bit to combine strength, safety, and a refined appearance, reflecting the latest in equestrian engineering.
Could Smart Bits Change How We Ride?
Technology is revolutionizing the elevator bit with the introduction of smart sensors and data analytics. New smart bits can monitor pressure points in real time, alerting riders to excessive force or uneven rein contact.
Features include:
- Bluetooth connectivity for live feedback
- Pressure mapping to prevent discomfort
- Data storage for long-term horse welfare tracking
This advancement empowers trainers to adjust technique instantly, supporting more humane and effective communication. The elevator bit, once a static tool, now becomes an interactive bridge between horse and rider, reflecting the digital transformation of equestrian sport.
The Rise of Custom and 3D-Printed Bits
Customization is a defining trend for the elevator bit in 2026. 3D printing has made bespoke bits more accessible, allowing for rapid prototyping and personalized fit for every horse.
Benefits include:
- Tailored dimensions for unique mouth conformation
- Quick adjustments for growing or sensitive horses
- Cost-effective production for small batches
With 3D-printed elevator bit options, riders can address specific training needs without delay. This technology ensures the bit is not only effective but also uniquely suited to the horse’s anatomy, setting a new standard in individualized tack.
A Focus on Sustainable Bit Materials
Sustainability is now a core consideration in elevator bit manufacturing. Companies are choosing recycled metals, eco-friendly packaging, and ethically sourced materials, responding to rider demand for greener options.
Key sustainable practices:
- Use of recycled stainless steel and copper
- Biodegradable packaging solutions
- Transparent supply chains for responsible sourcing
These changes are making the elevator bit a more environmentally conscious choice, appealing to riders who prioritize both performance and planet. As awareness grows, sustainable production is becoming standard in the tack industry.
New Rules and Market Trends to Watch
Regulatory bodies have updated their guidelines for elevator bit use, focusing on horse welfare and fair competition. The FEI and USEF now require clear documentation of bit design and material, while some events mandate pressure-limiting features.
A recent Equestrian Market Research & Industry Insights report highlights:
| 2026 Rule | Impact on Elevator Bit Usage |
|---|---|
| Pressure sensors required in elite events | Increased smart bit adoption |
| Bans on certain mouthpiece types | Shift toward ergonomic, welfare-friendly designs |
Staying informed about these trends ensures riders choose compliant and effective elevator bit options for competition and training.
Rider and Trainer Perspectives: What’s Next?
Riders and trainers are shaping the elevator bit landscape, demanding tools that balance control with compassion. Surveys in 2026 reveal a strong preference for adjustable, data-driven bits and a move away from overly harsh designs.
Predicted trends:
- Growth in demand for smart, customizable elevator bit models
- Integration of bit data into overall horse health monitoring
- Continued collaboration between engineers, veterinarians, and riders
As expectations rise, the elevator bit will continue to evolve, blending tradition with innovation to meet the needs of modern equestrian sport.
Now that you understand the essentials of elevator bits for 2026—how to choose, fit, and use them safely—why not put your new knowledge into practice? At Hooves and Paws, you’ll find a curated selection of quality elevator bits and equestrian gear, all backed by years of expertise and a genuine passion for your horse’s welfare. With free US shipping and flexible payment options, you can equip yourself and your horse confidently for the season ahead. If you’re ready to make the right choice for your riding goals, explore your options and Buy Now.
Frequently Asked Questions
Is an elevator bit considered harsh or severe? Any bit can be harsh in the wrong hands, and because an elevator bit uses leverage, it does have the potential to be severe if used incorrectly. The key is that it amplifies the signals from your hands. For a rider with a soft, steady hand, it can be a tool for clear and subtle communication. However, if a rider is heavy-handed or balances on the reins, that pressure will be magnified and can cause discomfort for the horse. It’s a piece of equipment that requires skill and feel to be used kindly and effectively.
How do I know which ring to attach my reins to? The ring you choose determines the amount of leverage you have. Think of it as a sliding scale of intensity. Attaching the rein to the main, large ring will give you the mildest effect, most similar to a regular snaffle. As you move the rein down to the lower rings, you increase the amount of poll pressure and the lifting action. A great approach is to start with the reins on the main ring to let your horse get used to the feel of the mouthpiece before you introduce any leverage.
My horse is strong, but also has a sensitive mouth. Could an elevator bit still be a good choice? This is a great question because it seems like a contradiction. For some horses, an elevator bit can actually be a more comfortable option. A horse that leans and pulls heavily on a simple snaffle creates constant, dull pressure that can be very irritating to a sensitive mouth. An elevator bit, used with a light touch, allows you to give a quick, clear signal to rebalance without needing to engage in a prolonged pulling match. The key is to use it for a momentary cue and then soften immediately.
Can I use an elevator bit for all my rides? It’s generally best to think of an elevator bit as a specific tool for specific situations rather than an everyday bit. It’s excellent for schooling a horse that gets heavy on the forehand or for providing extra control and rebalancing in higher-energy disciplines like jumping or cross-country. For daily flatwork, it’s often a good idea to ride in a milder bit, like a standard snaffle. This ensures your horse doesn’t become desensitized to the elevator’s action and continues to respond to light aids.
What's the first sign that an elevator bit isn't the right fit for my horse? Your horse will tell you through its behavior. If you notice signs of resistance like head tossing, opening its mouth, or becoming tense through the jaw and neck, that’s a clear signal of discomfort. Some horses might also start rushing or refusing to move forward. These behaviors mean it’s time to stop and reassess. The issue could be the size, the mouthpiece style, or simply that this type of bit isn’t the right match for your horse’s needs or your riding style.
Key Takeaways
- Use it to rebalance, not just to brake: The elevator bit's unique leverage is designed to help a horse that gets heavy on the forehand by encouraging it to lift its shoulders and shift weight to its hindquarters.
- Match the bit to your horse and discipline: There is no single best elevator bit; the right choice depends on your horse's mouth anatomy, temperament, and the specific demands of your sport. A proper fit is crucial for clear communication and comfort.
- Soft hands are non-negotiable: This is a tool for refinement, not force. Because it amplifies your rein aids, it requires a rider with an independent seat and light hands to be effective and fair to the horse.


