


Horse stall mats are a practical flooring option for many barns, but the right choice depends on the existing floor, drainage, stall dimensions, and how the space is used. A mat is not a substitute for a sound base or routine cleaning. This guide explains how to compare flooring, measure and prepare a stall, and care for mats so you can make a considered choice for your horse and facility.
What should horse stall mats do?
Stall mats create a covered surface over a prepared floor. Depending on the flooring beneath them and the mat design, they may help make a stall easier to clean and reduce how much bedding is needed. They can also cover a hard surface, such as concrete, that would otherwise need a substantial bedding layer for day-to-day use. The results depend on installation and management, not just the mat itself.
Think of mats as one part of a stall-floor system. The floor below must be stable and appropriately drained; seams should fit together as intended; and bedding, manure, urine, and spilled water still need regular attention. Mats do not fix a soft, uneven, wet, or poorly draining base. Nor should a buyer assume that every mat is non-slip, waterproof at the seams, or suitable for every stall. Check product instructions and the facility's requirements before purchasing.
Key Takeaway
Choose mats as part of a complete floor plan: start with the base and drainage, then select a mat style and bedding routine that fit the stall and your horse.
Which stall flooring options should you compare?
There is no single floor that fits every barn. Compare the surface you have now with the work required to prepare and maintain each alternative. The table below is a starting point, not a specification for every product or stable.
| Flooring approach | Potential advantages | What to plan for |
|---|---|---|
| Compacted natural base | Can provide a more yielding surface than bare concrete when correctly built and maintained. | May need grading, compaction, and ongoing attention to holes, low spots, and drainage. |
| Concrete with bedding | Provides a firm underlying surface that may be straightforward to sweep before bedding is added. | Hardness and drainage need consideration; bedding depth and stall upkeep remain important. |
| Solid rubber mats over a prepared base | Can cover some disadvantages of concrete and create a continuous working surface when fitted correctly. | Base preparation, mat weight, seam fit, edge stability, cleaning, and water management matter. |
| Interlocking or modular mats | Individual pieces may make handling or fitting certain stall layouts more manageable. | Confirm connectors, seams, edge pieces, and the intended use with the manufacturer. |
Penn State Extension's guide to horse stable flooring materials and drainage notes that thick bedding or solid rubber mats can minimize some disadvantages of concrete. That is a useful reminder to evaluate the floor as a whole. It is not a promise that mats correct an unsuitable base or remove the need for bedding and cleaning.
For a stall already built over concrete, mats may be one option to compare with a bedding-only approach. For a new build or major renovation, discuss the base, slope, drainage route, and materials with a qualified local contractor or stable professional. Consider what happens to water and waste, not just how the surface looks when it is new.
Before deciding, walk the empty stall and make a short condition list. Is the floor firm underfoot? Are there areas where water sits after routine cleaning? Do you see cracks, loose aggregate, or a depression near a wall or drain? Note what you observe, but do not try to diagnose structural or drainage defects from appearance alone. A qualified person can help determine what repairs or grading are appropriate. Taking these notes before shopping gives you useful questions to ask the mat maker and installer.
How do you choose a mat type and size?
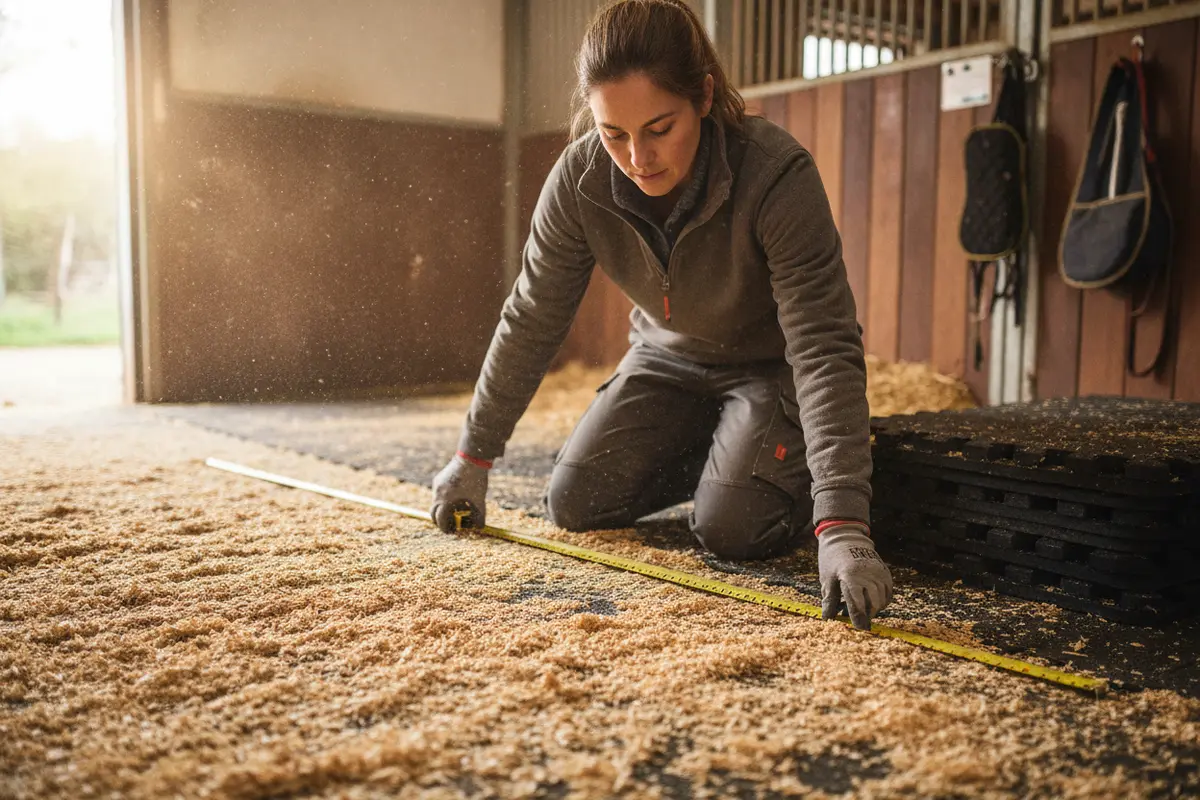
Begin with the stall's actual dimensions and the product's stated dimensions. Stall measurements can differ from nominal plans, and walls or built-in fixtures may affect the usable area. Measure the floor in more than one place. Note posts, doors, drains, partitions, and any irregular corners before calculating how many mats are needed.
- Solid mats: These cover the floor with a broad surface. Compare dimensions, weight, surface texture, and the instructions for trimming or fitting. Do not cut a mat unless the manufacturer allows it and you can do so safely.
- Interlocking mats: These connect at the edges. Check how the connectors are intended to be joined, whether edge pieces are available, and whether a particular layout is recommended.
- Textured surfaces: Texture varies among products. Look at the maker's description and care guidance, and consider how the surface will be cleaned and used. Do not infer traction in every condition from a product photograph.
- Thickness and material: Compare the product's listed construction and intended application. There is no universal thickness that can be recommended without knowing the base, use, and product specifications.
Before ordering, sketch the stall and map the mat layout. Plan where seams will fall and avoid assuming that a small uncovered strip can be ignored. Ask the seller or manufacturer to clarify whether the mats are intended for horse stalls, what base they require, and how they should be secured or joined. Confirm the return and handling requirements too, since heavy flooring can be difficult to move once delivered.
A useful measuring routine is to record the length along both side walls and the width at the front, middle, and back. If those numbers differ, draw the shape rather than choosing a single approximate rectangle. Mark immovable fixtures and identify the door swing so a mat edge will not interfere with it. Then compare the drawing with the product dimensions and the layout recommended by its maker. Ask how the design handles a cut edge or perimeter gap; avoid assuming a narrow offcut can be safely wedged into place.
Also plan the delivery route and installation day. Measure doorways and turns between the unloading point and stall. Decide who can help move the mats, where bedding and tools will be stored temporarily, and how the stall will remain out of use during fitting. These logistics may determine whether a modular option is easier to handle than a few large sheets, even when the final coverage area is similar.
Prepare the stall before installation
A careful inspection before the mats arrive can prevent a frustrating installation. Remove bedding and debris, then inspect the exposed floor. Look for uneven areas, loose material, persistent dampness, standing water, and signs that the floor has shifted. Identify the source of any moisture rather than covering it. If the base needs repair, address that first.
- Measure and record. Write down the stall's length and width, the location of fixtures, and the dimensions of each mat. Use the manufacturer's layout advice to estimate coverage.
- Check the base. It should meet the product's installation instructions. Seek qualified help if the surface is unstable, badly uneven, or has a drainage problem.
- Clear the space. Remove bedding, manure, loose debris, and equipment. Keep horses away from the work area while mats are being moved and fitted.
- Dry and inspect. Follow the manufacturer's directions about moisture and preparation. Avoid trapping debris or an unresolved wet area beneath the flooring.
- Fit and check. Put mats in place in the recommended order. Check that edges lie flat and connections are properly engaged. Recheck the entire surface before returning the stall to use.
Mat installation can involve heavy lifting and sharp tools. Use appropriate help and handling methods, and follow the product's safety instructions. If the instructions call for a particular base or fitting method, do not improvise a different one. When a stall is part of a boarding facility or leased property, obtain permission and confirm the facility's flooring standards before making changes.
After fitting, inspect from several positions rather than only at the doorway. Look along each seam at floor level, press gently at corners to see if they shift, and check that the doorway and any drain remain accessible as intended. Remove the mats and correct the fit if you find a raised lip, rocking section, or trapped material, following the maker's directions. Do not rely on bedding to hide a poorly fitted edge. Before the horse returns, confirm that tools, offcuts, and cleaning materials have been removed and that the surface is ready for use.
Build a bedding and cleaning routine
Mats do not make stall maintenance optional. Bedding continues to absorb moisture and provide a manageable surface, and the amount needed varies with the horse, the stall, the bedding material, and the routine. Follow the advice of your stable manager and the bedding supplier. Remove manure and wet bedding regularly, and check the floor rather than relying on a fixed schedule alone.
During routine cleaning, notice whether urine or wash water is collecting at seams or edges. Lift or move mats only as the manufacturer recommends and only when it is safe to do so. If a persistent odor, damp area, or loose edge appears, investigate the cause. Simply adding more bedding over a wet or dirty spot can conceal a maintenance issue instead of resolving it.
Water buckets and feeders are part of the surrounding stall setup. Keep spills in mind when deciding where to place them, and check that the floor stays manageable around the feeding area. For example, a corner feeder or a bucket strap may be relevant equipment to consider when organizing a stall, but either should be installed and used according to its own instructions. Neither changes the need to inspect the floor and clean spills promptly.
Quick Summary
Keep a simple routine: remove wet bedding and manure, watch for standing water at edges and seams, and investigate recurring dampness instead of covering it with fresh bedding.
Make the routine fit the people who actually clean the stall. For example, if one person removes manure in the morning and another refreshes bedding later, agree on who checks buckets for leaks and who reports a damp area. A small note on a stall chart can record a recurring spill, a seam that shifted, or a mat that was lifted for cleaning. Clear handoffs help prevent a minor issue from being covered repeatedly without anyone following up.
Common horse stall mat mistakes to avoid
- Buying before measuring: Approximate dimensions can leave gaps or create a poor fit. Measure the actual stall and check the product dimensions.
- Covering a problem base: Mats do not make unstable or poorly drained flooring sound. Resolve the underlying issue before installation.
- Assuming mats eliminate bedding: Bedding and cleaning needs depend on the horse, facility, surface, and management routine. Plan for both flooring and bedding.
- Ignoring seams and edges: A gap, raised corner, or connection that has come apart needs attention. Inspect the whole floor and follow the maker's fitting guidance.
- Choosing only by price or appearance: Compare intended use, fit, construction, handling, care, and supplier instructions. A low initial price may not answer whether a product is suitable for the stall.
- Installing without checking policies: Boarding barns and leased properties may have approved materials or installation rules. Confirm before you buy.
When reviewing stable equipment beyond flooring, browse the broader horse supplies collection for horse-care and stable items. A product category is not a substitute for checking that a specific item fits your stall or facility.
Inspect mats and keep them in good condition
Make a quick visual check during daily stall care and a closer inspection when bedding is changed or the stall is empty. Look for shifted pieces, separated seams, raised edges, cracks, surface damage, and moisture beneath or around the mats. Pay special attention after moving a stall divider, changing equipment placement, or noticing a change in how the floor drains.
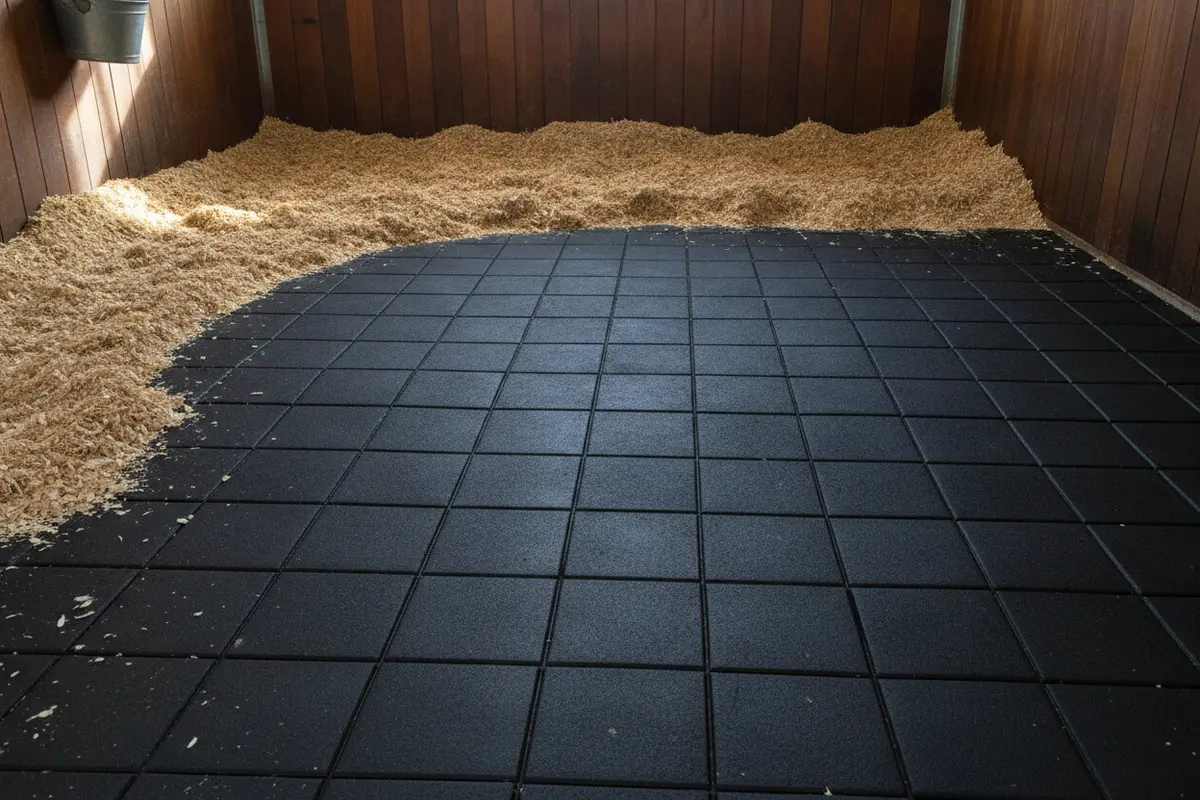
Use cleaning products and methods approved by the mat manufacturer. Some surfaces may be damaged by unsuitable cleaners or tools, so do not assume that a strong chemical or abrasive brush is safe. Rinse or dry the surface as directed, and keep horses out of the area during cleaning until the floor is ready for normal use. If a mat moves, breaks, or no longer lies flat, address it before relying on the surface again.
Keep a simple maintenance note if multiple people care for the stall. Record when a seam first shifted, a damp spot appeared, or a mat was moved for cleaning. This helps the next person notice whether the issue recurs and whether the cause may be a spill, a drainage concern, or a fitting problem. For a persistent flooring or drainage concern, consult a qualified professional familiar with the facility.
Use the inspection to decide what action is needed, not just to check a box. A single spill that dries after cleanup may call for a reminder to secure a bucket. Moisture that returns at the same seam deserves a closer look at the base, the fitting, and the way the stall is cleaned. A cracked mat or lifted edge should be handled according to the manufacturer's repair or replacement guidance. If you cannot verify that a damaged section is safe and stable, keep the area out of use until it is assessed.
Plan the purchase around the whole stall
Before choosing a product, answer these questions: What is the base made of? Does it drain as intended? What are the stall's actual measurements? Does the mat maker approve the product for this use? How will bedding and waste be managed? Who will install and inspect the mats? A clear answer to each can help prevent a purchase that does not fit the stall's needs.
Then compare the complete setup, not just the cost of the mat. Include delivery and handling, any base work, edge or connector pieces, bedding, cleaning time, and future maintenance. Prices and product specifications vary, so use current seller listings and manufacturer information rather than a generic estimate. If you need guidance about a product's construction or intended application, ask before placing the order.
One practical way to compare options is to make a two-column worksheet. On one side, list the current floor and the problems you need to solve, such as difficult sweeping, uneven spots, or frequent wet patches. On the other, list the work and upkeep for each proposed option: base repairs, fitting, bedding, daily cleaning, and periodic inspection. This makes trade-offs visible. If a mat option needs significant base preparation, include that work in the decision rather than treating it as an unrelated future task.
Finally, confirm who is responsible for ongoing care. In a private barn, that may be the owner or a family member. In a boarding setting, the barn manager may set the routine and control repairs. Agreeing on inspection and reporting before installation avoids confusion if an edge moves or moisture appears later. Keep product directions and purchase details where the people caring for the stall can find them.
Frequently Asked Questions
Do horse stall mats replace bedding?
Not automatically. Mats cover the floor, but bedding is still part of many stall routines for moisture management and day-to-day care. The amount and type depend on the horse, flooring, facility practices, and bedding guidance.
Can stall mats go over concrete?
Some solid rubber mats are used over prepared concrete, but check the product instructions and inspect the concrete's condition and drainage first. Mats can minimize some disadvantages of concrete, but do not correct a defective base or eliminate bedding and cleaning needs.
How do I know how many mats to buy?
Measure the usable stall floor, including irregular areas and fixtures, then compare those measurements with the mat dimensions and recommended layout. Confirm the number and placement with the manufacturer's fitting guidance before ordering.
Should stall mats be interlocking or solid?
It depends on the stall layout, product design, base, and how the mats will be handled and maintained. Compare the joining method, edges, dimensions, intended application, and care instructions. There is no one style that fits every stall.
How often should I inspect horse stall mats?
Check them during regular stall care and look more closely when bedding is removed or a problem is noticed. Watch for shifted mats, open seams, raised edges, damage, or moisture, and follow the manufacturer's maintenance directions.
Can I install stall mats myself?
That depends on the product, the condition of the floor, and safe handling requirements. Mats can be heavy, and some installations require base preparation or specific fitting methods. Follow the instructions and seek qualified help if the floor is unstable, drainage is poor, or you cannot move the mats safely.
A well-planned stall floor begins with a sound, well-drained base and continues with correctly fitted mats, suitable bedding, and routine inspection. Compare the full setup before you buy, and follow the product and facility guidance for installation and care.


