


If you are learning how to clean dog's ears at home, start with an inspection rather than a bottle of cleaner. A dog who shakes their head during a routine ear check may be telling you more than "not today." Healthy ears do not always need cleaning. Cleaning an already irritated ear can make discomfort worse. The safest approach is to inspect first, use a dog-specific cleaner, and stop whenever your dog shows pain.
Shop Dog Health Essentials Today
Learning how to clean dog's ears at home means gently cleaning visible debris with an appropriate solution. Never push tools into the canal. Call your veterinarian for redness, swelling, foul odor, discharge, or pain.
Ear care is not a universal weekly chore. Some dogs need occasional grooming support, while others need no routine cleaning at all. Before reaching for supplies, consider your dog's normal ear appearance, recent behavior, and any signs that call for professional guidance.
Why regular ear care matters, and when it does not
Ear care is one part of a dog's grooming routine, but it is not a task every dog needs on a fixed schedule. Some dogs naturally have healthy, clean ears and may never need routine cleaning. Others may need occasional maintenance based on their ear structure, coat, lifestyle, or veterinary guidance. The goal is to keep inspection and cleaning proportionate to your dog's actual needs, not to clean simply because a calendar says it is time.
Check your dog's ears regularly, but clean only when there is visible buildup or a veterinarian has recommended maintenance. Healthy, clean ears may not need cleaning at all. Redness, pain, or inflammation should be assessed by a veterinarian before you use an ear cleaner.
The horizontal canal changes how debris leaves the ear
A dog's ear canal is not a straight tunnel from the opening to the eardrum. It includes a vertical portion and a horizontal portion, which can make it difficult for material trapped deeper in the canal to work its way out naturally. A careful cleaning can help remove accessible buildup. The shape of the canal explains why simply wiping the outer flap may not be enough for a dog who genuinely needs maintenance. The anatomy also makes gentle technique important. Ear care should never involve probing deeply or forcing a tool into the canal.
Inspection comes before routine maintenance
Choose a calm moment to look at the visible part of each ear. Note whether the skin appears comfortable and whether there is a small amount of ordinary debris that can be addressed with an appropriate cleaner. If an ear looks red, inflamed, or painful, pause instead of trying to solve the problem at home. Those signs can reflect an underlying condition, and VCA Hospitals advises consulting a veterinarian before cleaning in that situation: veterinary guidance on ear cleaning in dogs.
Routine maintenance is different from veterinary treatment. Cleaning may remove accessible material, but it does not establish what is causing persistent odor, discharge, swelling, scratching, or head shaking. Do not substitute an over-the-counter cleaner for an examination or prescribed treatment. If your dog shows discomfort during an otherwise gentle cleaning, stop and contact your veterinarian. Over-cleaning can irritate the canal, so a lighter, observation-led approach is safer than repeated cleaning without a clear reason.
What should you gather before cleaning your dog's ears?
A little preparation makes ear cleaning calmer, safer, and easier to stop if your dog becomes uncomfortable. Choose a clean, quiet location with a surface that gives your dog secure footing. Good lighting helps you see the outer ear without trying to explore the canal. Keep every supply within reach before you begin, so you never have to leave your dog unattended or search for an item mid-cleaning.
Gather a dog ear-cleaning solution, cotton balls or gauze, a towel, treats, and a reliable light source. Use a calm location, avoid Q-tips and household remedies, and postpone cleaning if the ears look red, swollen, or painful.
Basic supplies for a clean, controlled setup
| Supply | Purpose |
|---|---|
| Dog ear cleaner | Loosens accessible wax and debris when used as directed. |
| Cotton balls or gauze | Wipes the outer ear and reachable opening. |
| Towel | Catches solution and debris after shaking. |
| Treats | Rewards calm cooperation. |
- Ear cleaner: Use a good-quality dog ear-cleaning product. Follow its label directions, and ask your veterinarian which formula is appropriate for your dog. You can review this dog ear cleanser as one product option.
- Cotton balls or gauze: Keep several pieces ready for wiping the visible parts of the ear. Gauze can be useful when you need a little more control around folds.
- Towel: Ear cleaner may spill, and most dogs will shake after application. A towel protects the surrounding area and gives you an easy way to dry the outer ear afterward.
- Treats: Use small rewards to connect handling with a positive experience. Offer one for allowing you to touch the ear, and continue rewarding calm cooperation.
- Lighting and a calm location: Work where you can see clearly, away from loud noises, children rushing through, or other pets competing for attention.
If you are comparing formulas, our guide to the best pet ear cleaners can help you organize your options. Puppy owners can also review gentle puppy-safe ear cleansers, while remembering that a veterinarian should guide care for a puppy with ear discomfort.
What not to put in your dog's ears
Do not substitute hydrogen peroxide or alcohol for an ear-cleaning solution. These products can irritate an inflamed or ulcerated ear canal. Avoid cotton-tipped applicators, commonly called Q-tips, inside the canal because they can push debris deeper or traumatize the canal or eardrum. Use only cotton balls or gauze at the accessible outer area, and never force your dog's head or ear into position.
Before proceeding, look at the ear opening and observe your dog's behavior. Redness, swelling, inflammation, or pain calls for veterinary guidance before cleaning. This preparation is for routine care, not for diagnosing or treating an ear problem.
Shop Dog Health Essentials Today
Shop This Post

Featured in this article
Zymox Otic Dog Ear Treatment with 0.5% Hydrocortisone for Yeast & Bacterial Infections - 1.25 oz
$22.49
Shop Now →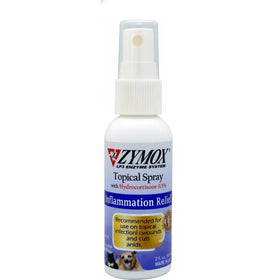
How to clean dog's ears at home safely, step by step
Choose a quiet time when your dog is relaxed, and work somewhere easy to clean. Ear care should feel controlled and predictable, not like a wrestling match. Have a towel and a few favorite treats nearby so you can reward cooperation throughout the process. If the ear looks red, swollen, or painful before you begin, pause and ask your veterinarian whether cleaning is appropriate.
Use a dog ear-cleaning solution as directed, massage gently, let your dog shake, and wipe only the debris you can reach comfortably. Stop if your dog shows pain or distress.
- Settle your dog and position the ear. Sit beside your dog rather than leaning over them. Offer a treat, gently lift the ear flap, and keep your voice calm. For a dog who is nervous, practice touching the ear flap and rewarding stillness before you introduce any liquid. You may want to work outdoors or place a towel under your dog because some solution will spill and your dog may shake.
- Apply the cleaner as directed. Use a quality ear-cleaning solution recommended for dogs, and follow its label directions. For a dog who accepts direct application, place the nozzle at the opening of the ear without forcing it down the canal. Then apply enough solution to fill the canal as directed. Do not use hydrogen peroxide, alcohol, or household remedies unless your veterinarian specifically tells you to. If your dog resists liquid going directly into the ear, saturate cotton pads or cotton balls with the cleaner instead. Cornell University College of Veterinary Medicine describes this as an alternative approach for dogs that do not tolerate direct application: Cornell's at-home ear-cleaning instructions.
- Massage the base of the ear gently. Place your fingers around the base, where the ear meets the head, and massage with light pressure for about 20 to 30 seconds. You should hear a soft, wet movement as the cleaner works through loosened material. Keep the massage gentle and stop immediately if your dog reacts as though the touch hurts.
- Allow a head shake. Move your face and clothing out of the way, then let your dog shake naturally when you release the ear. Shaking helps bring loosened debris and excess solution toward the outer part of the ear. Do not try to restrain the head during this step.
- Wipe visible debris from the outside inward only as far as comfortable. Use a fresh cotton pad, cotton ball, or piece of gauze to wipe the ear flap and the opening of the canal. Work from the inside outward, but go only as far as a finger can easily fit, about one knuckle. Never push a cotton-tipped applicator into the canal. Replace the pad as it collects debris, and do not scrape or dig for material you cannot see.
- Finish calmly and reassess. Wipe away excess cleaner from the ear flap, reward your dog, and give them a break. Stop the session if your dog pulls away repeatedly, cries, scratches frantically, or otherwise seems uncomfortable. Pain during cleaning warrants veterinary guidance rather than another attempt at home. Cleaning can remove surface debris, but it is not a substitute for diagnosing or treating an ear infection.
Repeat the same process on the other ear only if your dog remains comfortable. A clean, calm session is more useful than forcing both ears at once.
How often should you clean a dog's ears?
There is no universal ear-cleaning schedule for every dog. A dog with naturally clean, healthy ears may never need routine cleaning. Another may need a veterinarian-guided plan because of its ear shape, moisture exposure, wax buildup, activity, or history of ear problems. The safest approach is to inspect first, then clean only when there is a clear reason and your veterinarian has approved the approach for your dog.
Check your dog's ears regularly, but do not clean them automatically on a calendar. Follow your veterinarian's guidance, use a dog-specific ear cleaner as directed, and stop if the ears look painful or inflamed.
Let the ears, not the calendar, guide you
During ordinary grooming, look at the visible part of each ear and note whether it appears clean and comfortable. Consider factors that can change your dog's needs, such as floppy or narrow ear canals, frequent swimming or bathing, humid conditions, outdoor activity, and noticeable wax. These factors may make professional guidance more important, but they do not establish a diagnosis or a fixed cleaning interval by themselves.
A veterinarian can help you decide whether your dog needs occasional maintenance, a specific routine, or no routine cleaning at all. Dogs prone to ear problems may benefit from more frequent cleanings, but the timing and product should be based on that dog's history and examination. For veterinary guidance on assessing individual cleaning needs, see VCA's instructions for ear cleaning in dogs.
Why more cleaning is not always better
Healthy ears have protective structures and do not need to be scrubbed simply because a certain number of days has passed. Over-cleaning can irritate the ear canal and contribute to inflammation or infection. Repeatedly removing small amounts of normal wax can also make an otherwise easy grooming task stressful for both you and your dog.
If an ear becomes red, inflamed, painful, unusually odorous, or produces abnormal discharge, do not respond by cleaning more often. Those signs need veterinary guidance before you continue. Pain during cleaning is also a reason to stop. A veterinarian can determine whether cleaning is appropriate and whether a different treatment is needed.
When you are learning how to clean dog's ears at home, make inspection and cooperation part of the routine. Keep sessions calm, follow the product label and your veterinarian's instructions, and record any changes you notice. A thoughtful, individualized schedule is safer than a one-size-fits-all rule.
Which warning signs mean you should stop and call a veterinarian?
Routine cleaning should never become a test of how much discomfort your dog will tolerate. Stop the process and contact your veterinarian if the ear looks red, swollen, or inflamed. Do the same if your dog shows clear pain when you touch the ear, apply cleaner, or massage its base. Veterinary guidance is especially important before cleaning an ear that is already painful or inflamed, because the underlying problem could require an examination rather than more at-home care.
If cleaning causes pain, or you notice redness, swelling, foul odor, abnormal discharge, balance changes, or symptoms that keep returning, stop cleaning and call a veterinarian. Do not try to diagnose the cause at home.
Watch for changes beyond ordinary wax
Call your veterinarian when you notice a foul odor, heavy or abnormal discharge, pus-like material, or a sudden increase in debris. Persistent scratching or head shaking is also a reason to pause. These signs can indicate that your dog needs professional assessment. They are not a reliable basis for choosing a home remedy, changing a cleaner, or using leftover medication.
Pay close attention to behavior as well as appearance. Whining, pulling away, guarding the ear, or resisting gentle handling may signal pain. A head tilt, stumbling, unusual balance, or other change in coordination deserves prompt veterinary attention. Keep your dog comfortable and avoid putting anything further into the ear until you have received guidance.
Recurring symptoms need a plan, not more cleaning
If odor, discharge, scratching, or head shaking returns after cleaning, stop treating the pattern as a routine grooming issue. Repeated symptoms warrant a veterinarian's evaluation and a specific care plan. Over-cleaning can irritate the ear canal and contribute to infection, while cleaning a red, inflamed, or painful ear without guidance may make the experience worse. Cornell University College of Veterinary Medicine likewise advises stopping and consulting a veterinarian if a dog appears painful during cleaning. Read Cornell's ear-cleaning guidance, and review VCA Animal Hospitals' warning signs and safety instructions before resuming routine care.
Common mistakes that make ear cleaning harder
Even a well-intentioned ear-cleaning routine can create problems when the tool, technique, or timing is wrong. Avoid these common mistakes to keep routine care calm and limited to the parts of the ear you can safely see.
Using Q-tips or reaching too far
Cotton-tipped applicators should not go into a dog's ear canal. They can push debris deeper, traumatize the canal, or puncture the eardrum. Instead, use a dog ear-cleaning solution with cotton balls or gauze. Wipe only the visible, reachable areas, working outward. If you cannot remove material easily with a finger-sized pad or ball, stop rather than trying to retrieve it.
That same rule applies to fingers, tweezers, tools, and any other object. A dog's ear canal bends and extends deeper than it appears from the outside. Cleaning at home should never become an attempt to excavate the canal.
Pouring in household remedies
Peroxide, rubbing alcohol, vinegar mixtures, oils, and other kitchen or medicine-cabinet remedies are not interchangeable with a formulated ear cleaner. Hydrogen peroxide and alcohol can irritate an inflamed or ulcerated ear canal. Choose a product intended for canine ears and follow its label directions. If an ear is red, painful, or inflamed, consult your veterinarian before cleaning, as VCA notes that these signs may indicate a condition requiring professional evaluation: VCA Hospitals' ear-cleaning guidance.
Forcing a fearful dog or reusing medication
Restraint and rushing can turn a manageable routine into a struggle. Start with brief handling, rewards, and a quiet room. If your dog pulls away, trembles, snaps, or becomes increasingly distressed, pause and try another day or ask your veterinarian for a safer plan. Never force solution into an ear that causes obvious pain.
Do not use leftover prescription drops, another pet's medication, or an old bottle because the symptoms look familiar. Ear problems can have different causes, and the wrong product may delay appropriate care or irritate the ear further. Medication belongs in a veterinarian-directed treatment plan, not a routine-cleaning kit.
Cleaning too often
More cleaning is not automatically better. Over-cleaning can irritate the ear canal and contribute to infection. Follow a schedule recommended for your dog, and do not clean perfectly healthy, clean ears simply because a calendar says it is time. Stop and seek veterinary guidance if cleaning causes pain, or if you notice persistent redness, swelling, foul odor, discharge, head shaking, or scratching.
Safe home care stays gentle and shallow: use a canine ear cleaner. Wipe only what you can easily reach, reward cooperation, and stop whenever your dog shows pain or distress.
Shop Dog Health Essentials Today
Frequently Asked Questions
Can you clean your own dog's ears at home?
Yes, routine cleaning can be appropriate when the ears look healthy and your veterinarian has recommended it. Use a dog ear-cleaning solution, allow your dog to shake, and wipe only the visible outer areas. If the ears are red, inflamed, painful, or producing unusual discharge, arrange veterinary guidance before cleaning. VCA advises consulting a veterinarian in those situations.
How do you get brown gunk out of a dog's ear?
Use an appropriate dog ear cleaner and cotton balls or gauze, rather than scraping or probing. Apply the cleaner as directed, massage the base of the ear for about 20 to 30 seconds. Let your dog shake, and wipe away loosened debris that you can see. Brown material can have different causes, so persistent buildup, odor, irritation, or discomfort deserves a veterinary examination.
What can I use if I do not have dog ear cleaner?
It is safer to wait and obtain a dog ear-cleaning solution than to substitute household ingredients. Do not use hydrogen peroxide or alcohol, which can irritate an inflamed or ulcerated ear canal. Avoid cotton-tipped applicators inside the canal because they can push debris deeper or cause trauma.
How often should I clean my dog's ears?
There is no universal schedule. Some dogs with naturally healthy, clean ears may never need routine cleaning, while others need a veterinarian-guided plan. Inspect the ears regularly and clean only when needed or directed. Over-cleaning can irritate the canal and may contribute to infection. VCA explains why frequency varies by dog.
What are the warning signs of a dog ear infection?
Contact your veterinarian for pain, redness, swelling, foul odor, abnormal discharge, repeated head shaking, persistent scratching, head tilt, or balance changes. Stop immediately if cleaning causes pain. Home cleaning cannot determine the underlying cause, and some ear problems require an examination and prescribed treatment.
Get started with dependable dog ear care supplies
Safe ear care begins with the right supplies and a calm, gentle approach. When your dog's ears are healthy and routine cleaning is appropriate, carefully chosen essentials can make the process more straightforward for both of you. For dependable products to support routine dog ear and wellness care, shop dog health essentials at Hooves and Paws.


