


A lead rope is a simple piece of horse equipment, but choosing the right one can make routine handling easier to manage. This lead rope guide compares common materials, lengths, snaps, and construction details, then walks through a repeatable check before each use. The best choice is one that suits your horse and task, feels manageable in your hands, and remains in sound condition.
What should a lead rope do?
A lead rope connects a handler to a halter for guided movement and supervised handling. It is not a substitute for attentive horse handling or a purpose-built, appropriately arranged tying system.
A lead rope gives you a way to guide a horse while standing near the shoulder, with some distance between your hand and the halter. A rope that is too short may put your hand close to the horse's head and limit how you can position yourself. A very long rope may drag, snag, or leave extra loops that are hard to control.
Think of it as one part of a handling setup. The halter needs to fit and be in good condition. The snap must connect properly to the halter ring. The handler must also be able to manage the horse and the surroundings. No rope material or hardware can guarantee that a horse will not startle or pull.
Daily leading from a stall to a turnout area may call for a different feel than a supervised groundwork session. For everyday barn use, prioritize a comfortable grip and a length you can keep organized. If your instructor recommends a particular setup for a training exercise, follow that guidance and practice handling the rope before using it with the horse.
Which lead rope material and construction should you compare?
Material affects grip, flexibility, cleaning, and inspection. Compare the actual feel and workmanship, not just the material name or the rope's appearance.
Lead ropes commonly use woven synthetic fibers, cotton or cotton blends, braided rope, or leather. Within each type, diameter, weave, finish, and the way the snap is attached can vary. A short hands-on check helps you decide whether you can hold and manage the particular rope comfortably.
| Construction | Possible advantages | What to inspect | Questions to ask |
|---|---|---|---|
| Woven synthetic | Often easy to wipe or rinse, with a range of textures and stiffness. | Fraying, cuts, rough edges, flattened sections, and stitching near the snap. | Does it stay comfortable in your grip? Are care directions clear? |
| Cotton or cotton blend | May feel soft and flexible in the hand. | Thinning, soil, persistent moisture, mildew, and worn fibers at contact points. | Can it dry fully after getting wet? Does the texture stay manageable? |
| Braided rope | Braid pattern and diameter can give a distinct feel and flexibility. | Unraveling, loose or uneven braid, damaged splice, or a knot that has shifted. | Can you coil or fold the spare length without tangling it? |
| Leather | Has a different feel and requires material-specific care. | Cracks, dry or stretched areas, worn holes, and damaged stitching or fittings. | Are you prepared to clean and condition it as directed? |
These are broad material considerations, not promises about how a particular rope performs. Product details may identify the construction, but they cannot tell you whether the rope feels right in your hands. If possible, handle it before use. Check it with the gloves you normally wear, since gloves can change how much grip and control you feel.
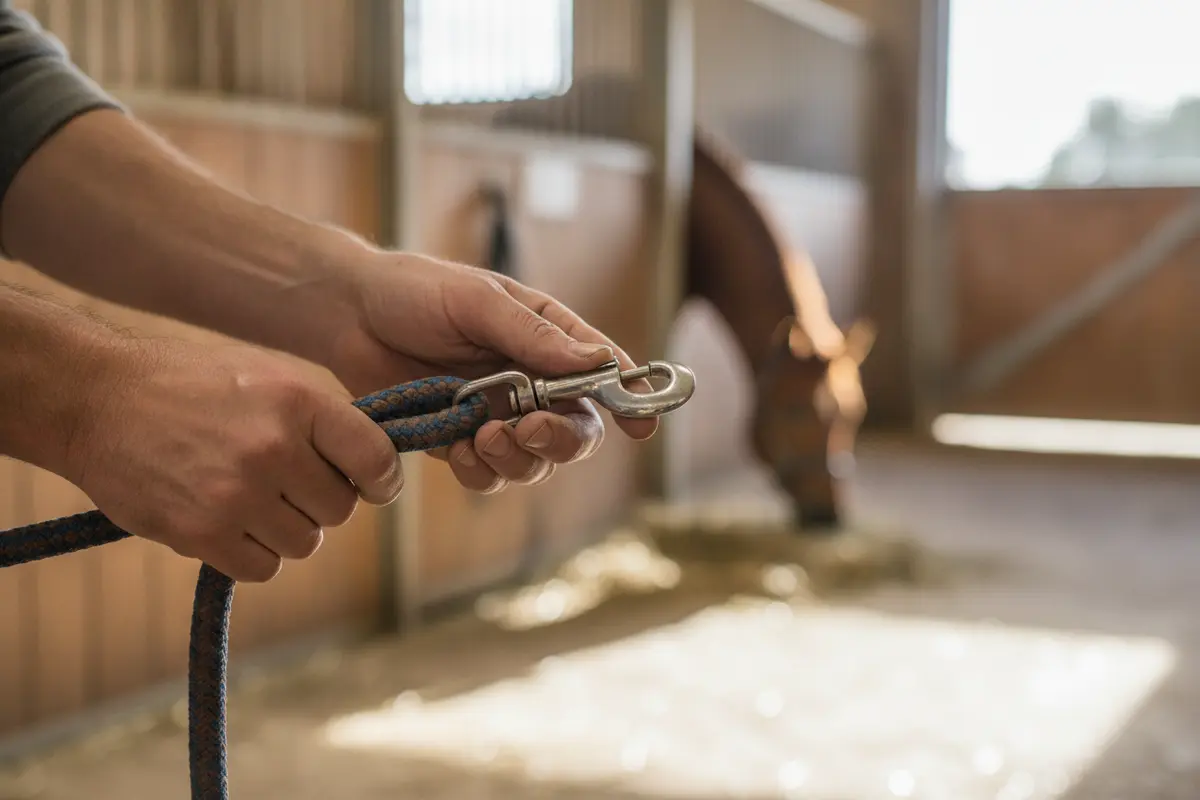
Feel, diameter, and finish matter too
A very smooth rope may slide more readily through a hand than a textured one. A thick rope may be comfortable to grasp yet bulky to fold. A thin rope may be easy to store but uncomfortable to hold for some handlers. Compare the entire length for spots that feel unusually hard, sticky, rough, or uneven.
Look closely where the rope meets the snap. A stitched connection should have intact stitching. A knot or splice should remain secure and show no signs of shifting or unraveling. If the end has a wrap or protective sleeve, check that it has not moved in a way that hides damage underneath. Do not rely on a neat finish as proof that the attachment is sound.
How long should a lead rope be?
Choose a length that gives you room to guide the horse while letting you control the unused portion. The useful length depends on the task, the handler, and the horse, so more length is not automatically better.
There is no single length that suits every horse and handling situation. A shorter lead can be easier to keep out of the way in a busy barn aisle. Extra length may be useful for some supervised exercises, but it also creates more slack to organize and more rope that could trail or tangle.
Before putting a new rope into routine use, practice holding it with the halter attached while the horse is calm and supervised. Stand in a position recommended by an experienced handler, then gather the unused portion in loose, manageable folds. Check that the rope does not drag on the ground and that you can adjust your hold without wrapping it around your fingers, wrist, or body.
For example, imagine leading a horse through a narrow doorway. A large loop of excess rope can catch on a latch or fall near the horse's feet. In an open area, the same amount of slack may seem less noticeable, but it still needs to be controlled. Choose for the tightest, most common route you handle, not just for a spacious aisle.
Do not wind a lead rope around your hand or arm. If the horse surges, a wrapped rope can trap the handler. Keep excess length in folds you can release. If you need a specific length for groundwork, ask an instructor who knows the horse to help select and practice with an appropriate setup.
How do you choose a snap and check hardware?
The snap is a small part with an important role. It should fit the halter ring, open and close smoothly, and remain fully closed when attached. Some snaps are easier for one handler to operate than another, so test the action before relying on the rope.
- Test the gate. Open and close it several times. It should not stick, wobble excessively, or remain partly open.
- Inspect the metal. Set aside hardware that is cracked, bent, deeply corroded, sharply worn, or otherwise damaged.
- Check the connection. Examine the stitching, knot, or splice where the rope meets the snap. Look for movement or separation.
- Try it on the halter. Confirm the snap fits the ring and does not bind or crowd it. Attach it to the designated ring and verify that the gate closes.
- Consider handling. Can you operate the snap without struggling, including when wearing your usual gloves?
Hardware type does not make a rope suitable for every tying situation. A regular leading rope should not be assumed to provide a safe tying arrangement. Follow your barn's established practices and use appropriate equipment. Do not leave a tied horse unattended.
If you are comparing a new lead and halter together, check both as a set rather than assuming every snap fits every ring equally well. You can review the available horse halter styles and confirm the details of a specific item before selecting a combination.
Match the rope to the job before you buy
Start with the task you do most often, then check whether the rope can handle the other routine jobs you expect it to do. This keeps the decision grounded in use rather than color or a product photograph. For a selection of horse supplies, review product descriptions and verify the details that matter to your setup.
- Daily leading: Choose a comfortable grip, manageable length, and snap you can operate confidently. Check that excess rope can be held in safe folds.
- Busy barn or narrow passages: Favor a length you can keep clear of doors, equipment, and the horse's legs. Practice organizing slack before negotiating tight spaces.
- Groundwork: Ask your instructor what length and construction fit the planned exercise. Make sure you can control the extra rope without wrapping it around yourself.
- Wet or dusty conditions: Consider how the material can be cleaned and dried. Check that the grip does not become difficult for you when damp or dirty.
- Several horses or handlers: Keep equipment identifiable and inspect each rope separately. A familiar color does not replace checking its condition and fit.
- Gloved handling: Try opening the snap and folding the rope while wearing the gloves you use in the barn.
Before purchasing, make a small checklist: intended task, practical length, comfortable diameter and texture, snap compatibility, connection quality, and care requirements. If any essential detail is not stated, verify it rather than inferring it from the image. Do not choose a rope because it looks especially strong or assume a heavier snap is automatically safer for the horse.
Work through a realistic use case
Suppose you need one rope for daily leading from a stall to an outdoor area. First picture the route: are there narrow doors, nearby horses, or equipment that can catch a long loose end? That points you toward a rope length you can gather and keep off the ground. Next, consider the handler who will use it most. If the rope feels slick in gloved hands or awkward to fold, it may be difficult to manage consistently even if its material seems durable.
Then check the connection as a complete system. Compare the snap with the halter ring you actually use, rather than assuming that a snap described as standard will be a comfortable fit. Test the gate and look at how the rope is joined to it. Finally, confirm that you know how to clean and dry the material. This small sequence prevents a common mismatch: choosing for the horse's size alone while overlooking the handler, route, halter, and care routine.
A separate rope for a supervised exercise may make sense if the instructions call for a different length or feel. Keep that choice tied to the particular exercise and guidance from a qualified instructor. Do not try to turn one ordinary lead into a tool for every task by simply adding knots, attaching extra hardware, or changing the way it is tied. Use equipment as intended, and ask for knowledgeable help when the job is outside routine leading.
What should you check before leading a horse?
Check the horse, halter, rope, snap, and route together. A good rope cannot compensate for damaged equipment, a poor fit, or a distracting hazard in the path.
Build a consistent check into the moment before you set off. It should be quick enough to repeat, but careful enough to catch obvious problems before they become harder to manage while moving.
- Notice the horse and setting. Look at the horse's behavior and your route. Pause if the horse is unusually unsettled or the path is cluttered.
- Check the halter. Confirm it fits as intended, sits correctly, and has secure buckles, straps, and rings. Do not use a visibly damaged halter.
- Attach the snap completely. Connect it to the designated ring and confirm that its gate is fully closed.
- Run your hand along the lead. Feel for cuts, frays, knots, thin areas, stiffness, or a damaged section near the hardware.
- Organize spare length. Hold it in loose folds. Keep it away from the horse's legs and do not wrap it around your hand or body.
- Recheck your route. Make sure gates, doors, and nearby objects will not snag the rope, and then move attentively with the horse.
Use a lead to guide rather than punish or jerk the horse. If the horse pulls, rears, or behaves in a way that puts someone at risk, prioritize personal safety and seek help from an experienced handler or instructor. Avoid escalating force through the rope. For horse-specific behavior or handling questions, consult a qualified professional and your veterinarian. The American Association of Equine Practitioners is a professional veterinary association and a useful place to find equine health information and veterinary guidance.
Build a calm, repeatable handling routine
The rope is only one part of a safe routine. Set aside a moment to check the route before bringing the horse through a gate or doorway. Close or secure the area as appropriate, move loose equipment out of the way, and avoid carrying items that make it difficult to manage the rope. If another person is helping, agree on who is leading and where each person will stand before moving.
Consistency also helps you notice a change. If a familiar snap suddenly sticks, the rope feels different, or the horse reacts in an unusual way, pause and reassess rather than continuing automatically. Check that the lead is not twisted around a halter part and that no loose loop is near the horse's legs. When conditions are noisy, crowded, or unfamiliar, give yourself time to settle the situation or ask an experienced handler for help.
This routine is not a substitute for instruction or judgment about a particular horse. Young, anxious, strong, or unpredictable horses may need an experienced handler and a plan suited to their behavior. Do not use a longer or heavier rope as a shortcut for managing a horse whose handling needs are beyond your experience. Ask a qualified trainer or veterinarian for appropriate advice when behavior or health may be involved.
Routine care and signs a lead rope should be replaced
Care depends on the rope's material. After use, remove dirt and moisture according to the maker's directions. Let a damp rope dry fully before storing it. Keep it in a clean place where it will not be stepped on, chewed, exposed to sharp edges, or left where it can be damaged by tack-room traffic. Avoid cleaners or treatments that may harm fibers, stitching, metal, or leather.
During care, check the entire rope rather than only the part you hold. Pay extra attention to areas that rub against the halter, the snap attachment, and any point that has been pinched in a door or dragged across a rough surface. A quick wipe can reveal a cut or a change in texture that dirt had hidden.
- Replace or set aside a rope with cut, badly frayed, or thinning fibers.
- Do not continue using one when a stitch line, splice, or knot is beginning to fail or shift.
- Retire hardware that is bent, cracked, unreliable, or too corroded to operate normally.
- Check leather for cracks, stretched holes, dry damaged areas, or failing stitching, and follow suitable care instructions.
- When uncertain whether damage affects the connection, stop using that rope until a knowledgeable person can assess it.
Surface dirt alone does not necessarily mean a rope has reached the end of its useful life, and a clean appearance does not prove it is sound. Focus on structural wear and the areas carrying the connection. If you discover damage during a check, do not put the rope back into the equipment rotation simply because you need one immediately. Choose another sound option and address the damaged one separately.
Frequently Asked Questions
Can I use any lead rope with any halter?
Not always. Check that the snap fits the halter ring, moves freely, and closes fully. Inspect the halter and rope together before use, and do not use damaged equipment.
Is a longer lead rope always better?
No. More length can suit some supervised activities, but extra rope takes more attention to control and can drag or tangle. Select a length appropriate to the task and your ability to manage its unused portion safely.
Can I tie a horse with a regular lead rope?
Do not assume a rope intended for leading is a complete or suitable tying system. Follow established barn practices and use appropriate tying equipment and arrangements. Never leave a tied horse unattended.
How often should I inspect a lead rope?
Check it before each use, especially around the snap, attachment, and any area that rubs against the halter. Inspect it again during cleaning and after it has been caught, dragged, or exposed to conditions that may have damaged it.
What should I do if a horse pulls hard on the rope?
Do not wrap the rope around your hand or body or try to brace in a way that could trap you. Put personal safety first and get help from an experienced handler or instructor. If the horse's behavior is a recurring concern, ask a qualified professional who can assess the horse and handling situation.
Does a heavier snap mean a safer lead rope?
Not by itself. Hardware should fit the halter, operate reliably, and suit the rope. Inspect the snap and its attachment, and avoid judging suitability by weight alone.
Choose a lead rope that suits the job, fits the halter, and feels manageable to you, then inspect and care for it consistently as part of everyday horse handling.


