

Bit guards are rubber, neoprene, silicone or leather rings that sit between the bit's rings and your horse's lips to stop pinching and rubbing. To choose one, match the material and closure to your bit, size the bit so the guards lie flat, and check your rulebook: USEF dressage prohibits them.
Picking the right gear for your horse can be a challenge, especially with so many options on the market. Even a simple piece of tack like a bit guard now comes in several materials, from classic stretch-on rubber to soft neoprene with hook-and-loop closures, flexible silicone and laced leather. The right choice can make a real difference in your horse's comfort and in how steady the bit feels.
This guide explains what bit guards are, when your horse may need them, how the main types compare, how to fit and install them, how to care for them, and where competition rules restrict them. Let's get started on making your horse's ride more comfortable.
What Are Bit Guards and Does Your Horse Need Them?
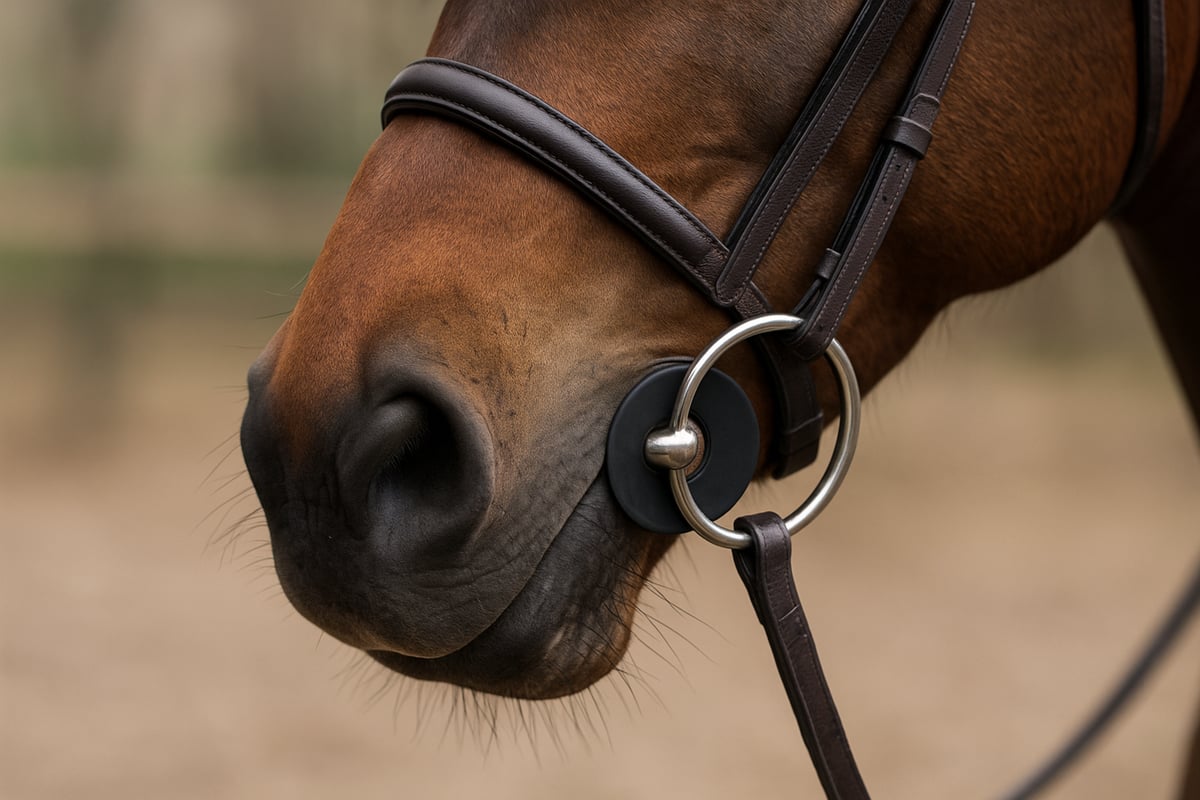
Bit guards are small, flexible discs placed on either side of a horse's bit. They sit between the bit rings and the corners of the horse's mouth. Riders most often use them to keep the bit from pinching or rubbing the skin at the lips, especially with loose ring snaffles, where the ring slides through the hole in the mouthpiece.
Bit guards serve a few practical purposes. First, they act as a soft barrier between the metal and the skin, reducing friction at the corners of the mouth. Second, they can help steady the bit, keeping it centered and limiting side-to-side sliding. Third, they make it harder for the bit to be pulled through the mouth when you use an opening rein.
Common situations for using bit guards include riding young or green horses who are still learning to respond to the rein, riding horses with sensitive skin at the corners of the mouth, and using loose ring snaffles or other bits that tend to shift during work. In these situations, bit guards can make a noticeable difference in comfort.
Comfort matters for communication, too. A horse that isn't distracted by a pinch at the lips is free to concentrate on your aids. If your horse does develop sores or swelling at the corners of the mouth, though, have your veterinarian or equine dentist look at the cause; a bit guard protects the skin, but it doesn't fix a bit that doesn't fit or a dental problem.
Here's a quick summary of the main benefits and potential drawbacks of bit guards:
| Benefits | Potential Drawbacks |
|---|---|
| Prevents pinching and rubbing | Can cause bulkiness if not fitted |
| Reduces friction at the lips | Some horses may not tolerate them |
| Improves bit stability | Not legal in all competitions |
| Helps stop the bit pulling through | May mask underlying bit issues |
While bit guards offer real advantages, they are not always necessary. In many cases, a well-fitted bit alone is enough. Guards that are too thick or too tight can crowd the lips and interfere with subtle rein aids. Some competitions restrict them as well, so check your rules before you enter an event.
Think of bit guards as one tool among many. Used thoughtfully, alongside a bit that fits and regular dental care, they help keep your horse's mouth comfortable.
The Purpose and Function of Bit Guards
At their core, bit guards serve two primary functions: protecting your horse's mouth and improving how the bit sits. Think of them as a simple tool to increase comfort and clear up communication between you and your horse. They create a soft barrier that keeps the sensitive skin on your horse's lips and cheeks from getting pinched by the bit rings, which is especially common with loose ring snaffles. They can also help steady a bit that is a fraction too wide, so it doesn't slide uncomfortably in your horse's mouth. By addressing these common issues, bit guards help create a more comfortable experience for your horse under saddle.
Preventing the Bit from Pulling Through
One common reason riders use bit guards is to keep the bit from sliding through the mouth. The guards sit flat against the horse's face, creating a buffer between the skin and the metal bit rings. This simple barrier stops the bit from pulling through the mouth when you use a strong opening rein, and keeps it from catching the delicate skin at the corners of the lips. This is particularly helpful for young or green horses who are still learning to respond to rein pressure, as well as for any horse with sensitive skin. Making sure all of your horse tack fits comfortably is key to a happy partnership, and bit guards are a useful addition to your toolkit.
Making a Slightly Large Bit Fit Better
Bit guards can also help if your horse's bit is just a little too wide. By taking up a few millimeters of extra space on either side, they help the bit sit more centrally in the horse's mouth. That added stability limits side-to-side sliding, which can distract the horse and blur your rein aids. They can't fix a bit that is drastically oversized, but they are handy for small adjustments. If the bit is more than a little too wide, the better answer is a bit in the right size.
A Guide to Bit Guard Types, Materials, and Designs
Choosing the right bit guards means understanding the options available. The main differences are the material, how the guard goes on the bit, and its diameter. Let's look at how they compare.
Traditional vs. Modern: Which Style is Best?
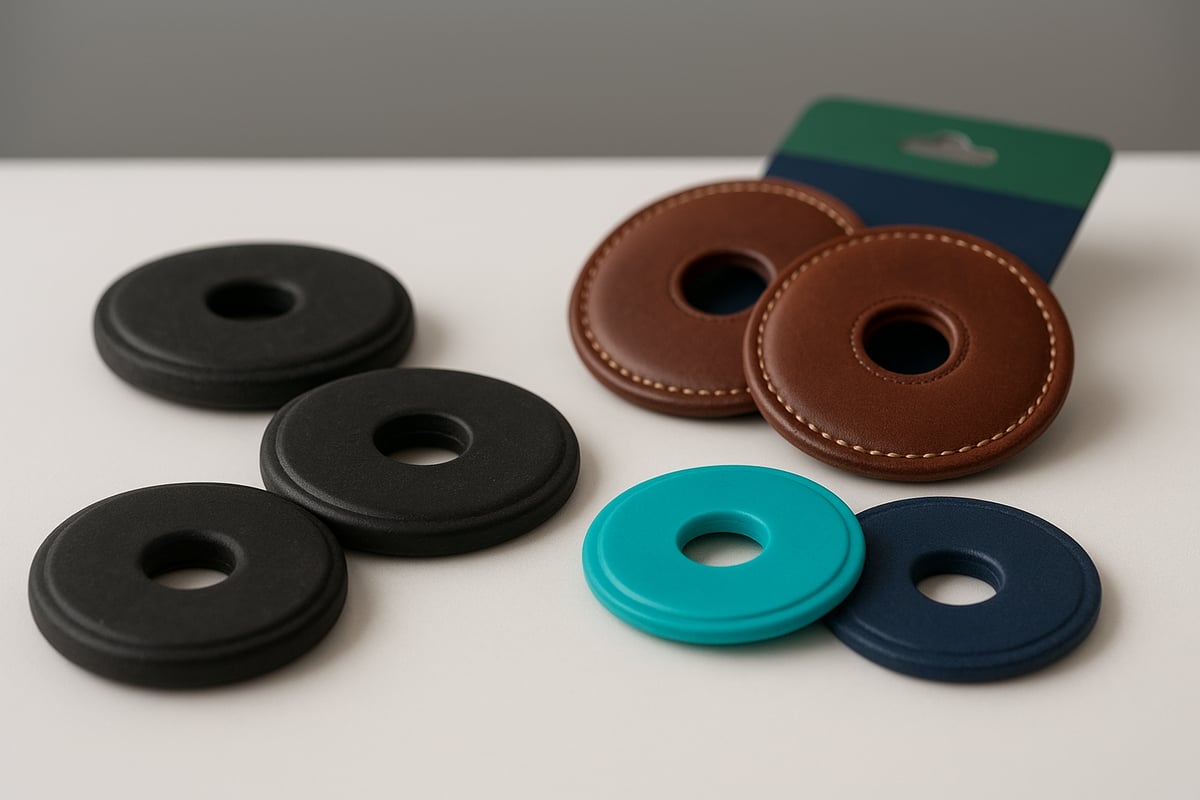
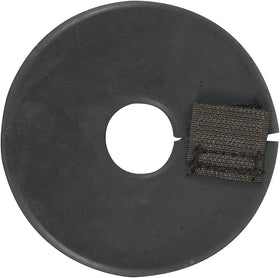
Traditional bit guards are made from firm rubber that you stretch over the bit ring. They are simple, inexpensive and widely available, which is why they are a staple in many tack rooms. The Weaver Leather Black Rubber Bit Guards are a classic example: a pair of 3-1/2 inch rubber rings that stretch on over the bit.
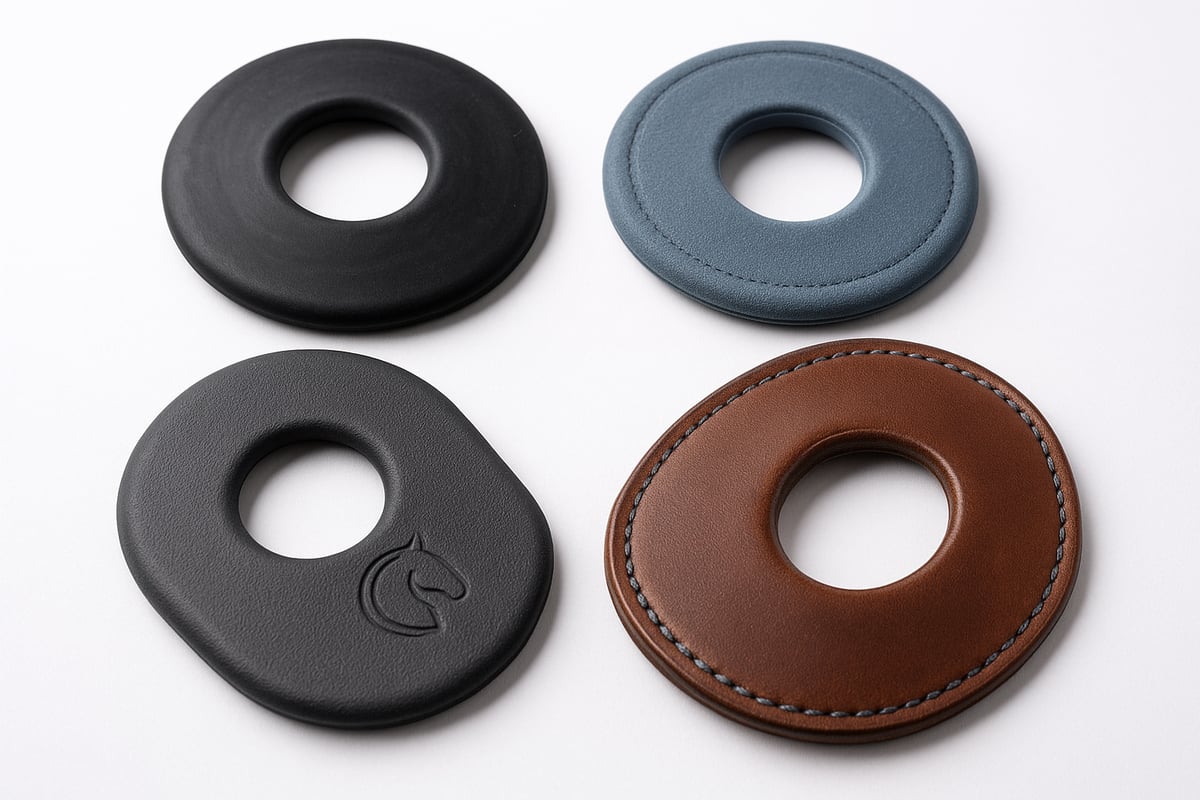
Leather bit guards have a traditional look that matches leather headstalls, and they are often seen in western tack rooms. The Professional's Choice Texas Leather Bit Guards are sold in pairs and tie on with leather laces, so you don't have to stretch anything over the ring. Synthetics such as neoprene and silicone are lightweight and easy to clean. Each material has its pros and cons:
| Material | Pros | Cons |
|---|---|---|
| Rubber | Flexible, inexpensive | Can be stiff to install; can degrade over time |
| Leather | Durable, traditional look | Needs cleaning and conditioning |
| Neoprene | Soft; usually hook-and-loop, so easy on and off | Thicker, so it takes up more room on the mouthpiece |
| Silicone | Very stretchy, easy to clean | Thin guards give less cushioning |
The right choice depends on your horse, your bit and how you ride. For more on pairing bit guards with the right bit, see How to Find the Right Bit for Your Horse.
Beyond Rubber: Other Materials
If your horse's skin reacts to one material, trying another is often the simplest fix. A horse that rubs with firm rubber may go better in soft neoprene, and a horse that dislikes the bulk of neoprene may be happier in a thin silicone ring. Watch the corners of the mouth after each ride when you make a change, so you can tell whether the new material helps.
As with any tack that touches your horse's mouth, read the maker's description so you know what the guard is made of, and keep it clean. A guard that is caked with dried saliva or dirt can rub as badly as the metal it's meant to cover.
Exploring Gel, Neoprene and Silicone Options
Many riders choose softer guards for sensitive horses. Neoprene gives a cushioned barrier between the ring and the lip, and most neoprene guards close with hook-and-loop, so you can add them without taking the bridle apart. The Professional's Choice Neoprene Bit Guards are sold in pairs with a hook-and-loop closure. Silicone guards stretch easily over the ring and snap back into place; the Shires Silicone Bit Guards (#5050) are a one-size stretch design. If you have a horse that is prone to rubs, one of these softer options can make for a more comfortable ride.
Key Features: Material and Water Resistance
When you choose any equipment that touches your horse's mouth, safety comes first. Check what the guard is made of, and avoid anything that is cracked, sticky or crumbling, since a damaged guard can rub or break. Water resistance also matters if you ride outdoors or rinse your tack after each ride. Rubber, neoprene and silicone all tolerate water, while leather should be dried and conditioned so it doesn't stiffen.
Easy-On Designs: Hook-and-Loop Cheek Guards
Fumbling with stiff, traditional bit guards can be a frustrating part of tacking up. Many newer designs use hook-and-loop closures instead. This simple feature makes attaching and removing bit guards fast, and you don't have to take the bit off the bridle to do it. For busy riders who switch bits between horses, that convenience adds up. The Weaver Neoprene Bit Guards, for example, are 2-3/4 inch neoprene guards with hook-and-loop closures.
You can browse bit guards alongside our full range of bits in the Bits & Curbs collection.
Matching Bit Guards to Your Discipline
Discipline matters as much as material, because the rules differ. In USEF dressage, bit guards are prohibited: rule DR121.14 of the 2026 USEF Dressage Rules bans nasal strips, bit guards and tongue ties during exercise and in competition, under penalty of elimination. At FEI dressage events, check the current FEI Tack and Equipment Requirements and the FEI TackApp before you use any bit accessory.
In jumping, eventing, western and pleasure riding, bit guards are common in schooling, but rules for competition vary by organization, class and phase. Never assume a guard that is fine in the schooling ring is fine in the show ring. Read the current rulebook for the exact class you are entering, and ask the steward or technical delegate if you're unsure.
Outside competition, choose by job. A schooling horse that leans on an opening rein may need a guard that keeps the bit from pulling through. A horse on long rides may need something that stays put and is easy to clean afterward.
Guards for Trail and Working Horses
When your horse is out on the trail or putting in a hard day's work, you need gear that can keep up. For these jobs, look for guards that stay securely in place and hold their shape, so the bit stays steady as you cover uneven ground. A stable bit isn't just about preventing rubs; it also helps with clear communication when you need a quick response. The last thing you want is the bit shifting and pinching your horse's mouth corners during a long ride.
Working and trail horses are often out in sweat, dust and moisture for hours, so cleaning matters. Choose a material you can rinse easily, and check the guards and the corners of your horse's mouth when you untack. Leather guards like the Professional's Choice Texas Leather pair suit a western headstall, while rubber and neoprene rinse clean quickly.
Shop This Post

Featured in this article
AV Bob Avila Double Ring Snaffle Horse Bit - Sweet Iron Mouthpiece, 3" Rings - Multiple Sizes
$165.00
Shop Now →

How to Choose the Right Bit Guards: A 7-Step Guide
Choosing the right bit guards can make a real difference in your horse's comfort. This step-by-step guide walks you through the key considerations so you can pick the best fit for your horse.
Step 1: Consider Your Horse's Needs
Start by looking at your horse's individual needs. Consider the shape and size of the mouth, any past problems at the corners of the lips, and how sensitive the skin is.
Think about the bit you use and the work you do. A horse in a loose ring snaffle that slides through the mouth needs something different from a horse in a fixed-cheek bit that only rubs now and then.
Talk to your veterinarian, equine dentist or trainer if your horse has a history of mouth problems. Sores at the corners of the mouth can have causes that a bit guard won't solve, such as a bit that is the wrong size or sharp edges on the teeth.
By thinking through your horse's needs first, you lay the groundwork for choosing guards that actually help.
Step 2: Choose the Right Material and Design
Once you have a clear picture of your horse's needs, choose the material and design.
Rubber bit guards are flexible and inexpensive, and they suit most general riding. Leather guards offer a traditional look. Neoprene gives more cushioning and is usually easy to put on, while silicone stretches easily and cleans up quickly.
Match the design to your bit. Stretch-on rings work over most loose rings and many fixed rings; hook-and-loop and lace-tie guards go on without stretching, which helps with large or awkward rings.
If your horse reacts to one material, try another. Always put comfort and safety first.
Step 3: Measure for the Perfect Fit
Proper measurement keeps bit guards effective and comfortable. Two measurements matter: the size of your bit's rings, so the guard covers them, and the width of the mouthpiece, because the guards take up room on it.
Follow these steps:
- Remove the bit and lay it flat.
- Measure the ring diameter and the width of the mouthpiece between the rings.
- Compare those numbers with the guard's stated diameter and thickness.
Common mistakes include measuring with the bit still on the bridle and forgetting the thickness of the guards themselves. A thick neoprene guard on each side can make a bit that fit well feel too narrow. If the guards crowd your horse's lips, you may need a slightly wider bit.
A correct fit lets the bit guards lie flat without restricting the bit's action or pressing on the lips.
Step 4: How to Put On and Adjust Bit Guards
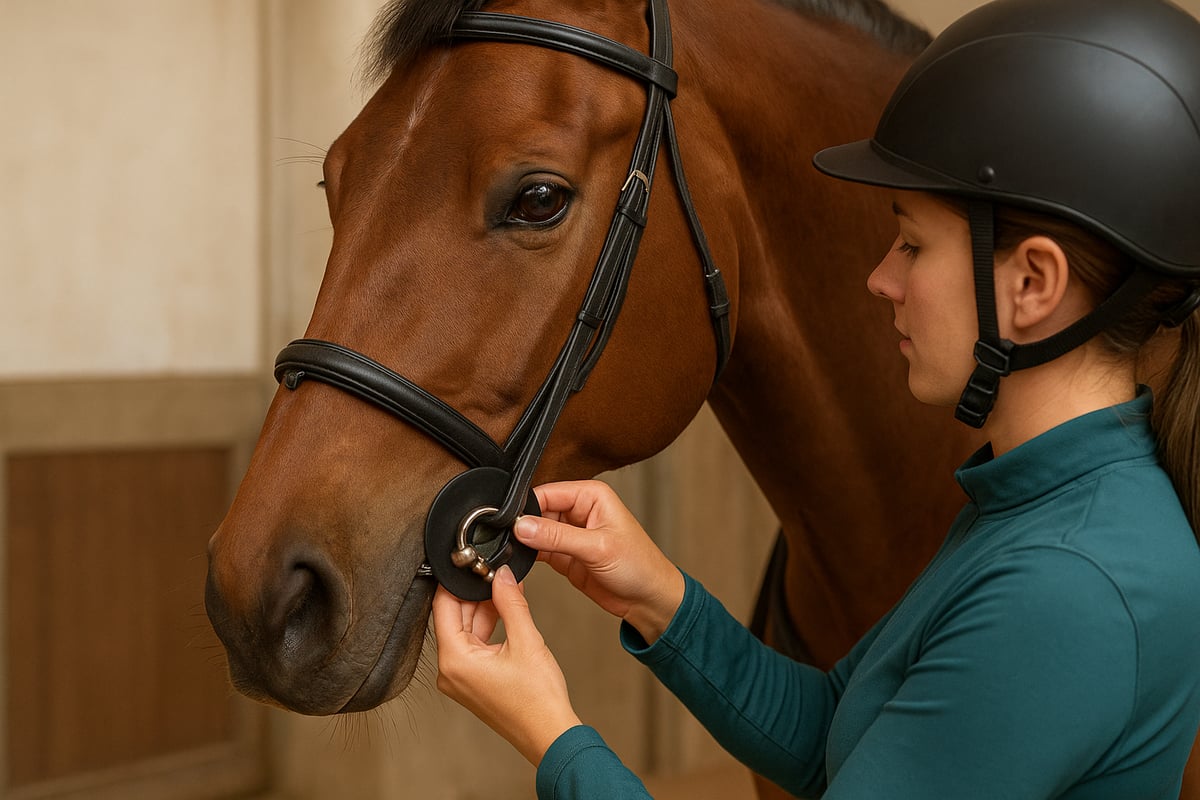
Installing bit guards is straightforward, but attention to detail keeps them safe and comfortable. If you are using stretch-on rubber guards, soak them in warm water first to soften them, so they are easier to stretch over the bit rings.
Take the bit off the bridle, slide one edge of the ring through the center hole of the guard, then gently work the rest of the guard over the ring. Repeat on the other side. For hook-and-loop or lace-tie guards, follow the maker's instructions; these go on around the mouthpiece next to the ring without stretching.
Check that the bit guards sit evenly on both sides and don't bunch or twist. They should be secure but not restrict the bit's natural movement. On a loose ring snaffle, make sure the ring can still move freely through the mouthpiece hole.
Practical Tips for Installing Stiff Bit Guards
Let's be honest: getting a new pair of stiff rubber bit guards onto a bit can feel like a real workout. If you're struggling, you're not alone. First, soak the new guards in hot water for a few minutes. This softens the rubber, making it easier to stretch over the bit rings. Work the guard on a little at a time rather than forcing it, so you don't tear it. For particularly stubborn guards, some riders use a little soapy water to help them slide on; if you do, wash and rinse the bit and guards thoroughly before they go anywhere near your horse's mouth. Once installed, check that the guards sit flat against the bit rings without bunching and don't interfere with the bit's action. If you would rather skip the struggle, a hook-and-loop or lace-tie guard is the easier route.
Step 5: Take a Trial Ride
After installation, watch your horse closely during the first few rides with the new bit guards. Look for signs of discomfort, such as head tossing, resistance or a busier mouth than usual.
Look for improvements, too, like less rubbing at the corners of the mouth or a steadier contact. If you notice ongoing problems, adjust the fit or try a different material or design.
Every horse is different, and finding the right bit guards may take a little experimenting and patience.
Step 6: How to Make Your Bit Guards Last
Caring for your bit guards extends their life and keeps your horse comfortable. Clean rubber, neoprene and silicone guards regularly with mild soap and water, rinse well, and let them dry completely before reuse. Wipe leather guards with a damp cloth and condition them as needed.
Inspect bit guards for wear, such as cracks, tears, stiffness or worn hook-and-loop, and replace them at the first sign of damage. Store them away from direct sunlight and extreme temperatures to help them last.
With consistent care, your bit guards will stay effective and safe for longer.
Step 7: Troubleshooting Common Issues
Even with careful selection and care, you may run into rubbing, slipping or skin irritation. If your horse develops sores or irritation, stop using the guards until the area heals, and try a softer material or a different fit.
For slipping, double-check the size and make sure the guards are installed correctly. If your horse starts resisting the bit after you add guards, check for pinching or crowding at the lips. Persistent problems call for advice from your veterinarian, equine dentist or trainer.
Addressing issues quickly keeps your horse comfortable and gets the most out of your bit guards.
Bit Guards We Carry, by Type
Choosing the right bit guards starts with matching the type to your horse and your bit. Here is how the main types compare, with examples from our shelves, so you can make an informed choice.
Classic Stretch-On Rubber
For many riders, classic rubber bit guards are the place to start. They are simple and inexpensive, and once they are on, they stay put.
What to look for:
- A diameter that covers your bit's rings
- Rubber that is smooth and free of cracks
- A pair, so both sides match
The Weaver Leather Black Rubber Bit Guards are a 3-1/2 inch pair. Soak them in warm water before you fit them.
Soft Neoprene With Hook-and-Loop
Horses with sensitive skin, or riders who swap bits often, may prefer neoprene. It is soft against the lips and goes on without stretching.
Things to know:
- Neoprene is thicker than rubber, so check that the bit still fits with the guards on
- Hook-and-loop closures let you add or remove guards without taking the bridle apart
- Check the closure regularly, since worn hook-and-loop can loosen
We carry the Professional's Choice Neoprene Bit Guards (sold in pairs) and the Weaver Neoprene Bit Guards (2-3/4 inch, hook-and-loop).
Stretchy Silicone
Silicone guards are thin and very stretchy, so they slip over large rings without hot water. They rinse clean easily.
Things to know:
- A thin profile takes up less room on the mouthpiece than neoprene
- One-size designs fit a range of rings
- Thinner guards give less cushioning than thick neoprene
The Shires Silicone Bit Guards (#5050) are a one-size stretch design.
Traditional Leather
Leather bit guards suit riders who want guards that match a leather headstall. They need a little more care than synthetics.
Things to know:
- Lace-tie leather guards go on without stretching
- Leather should be cleaned, dried and conditioned
- Check the laces for wear
The Professional's Choice Texas Leather Bit Guards are sold in pairs and tie on with leather laces.
Pairing Guards With a Loose Ring Snaffle
Loose ring snaffles are a common place to use guards, because the ring slides through the mouthpiece hole. A loose ring such as the Professional's Choice Equine O-Ring Signature Snaffle (5-1/4 inch mouthpiece, 3 inch rings) is a typical example. Choose a guard that covers the ring and leaves the ring free to move.
Tips for Buying Bit Guards Online
Buying bit guards online is convenient, but a few checks help you get the right pair the first time.
Smart shopping tips:
- Check the stated diameter against your bit's rings
- Note whether the guards are sold singly or as a pair
- Check how they attach: stretch-on, hook-and-loop or lace-tie
If you are looking for a compatible bit, the Bits & Curbs collection is a good place to find gear that works with your guards.
Related Bit Accessories to Explore
Bit guards are just one part of a comfortable bridle setup. Depending on your bit and discipline, other accessories can help too. Items like curb straps and curb chains affect how a leverage bit works, and a properly fitted curb strap can add precision to your aids. Think about your bridle as a whole system, so every part works together. For a broader overview of how bit guards fit into your tack, see Your Guide to Essential Horse Tack and Gear.
Getting the Fit Right: Tips for Safety and Comfort
Making sure your bit guards fit correctly is essential for your horse's comfort and safety. A well-fitted pair protects the corners of the mouth and supports clear communication. Yet even experienced riders can overlook small issues that lead to rubs.
What a Good Fit Looks Like
Bit guards should sit flat against the horse's face without pinching or crowding the lips. The guard should cover the bit ring where it meets the mouth, while letting the bit move freely.
| Sign of Proper Fit | What to Look For |
|---|---|
| No pinching or redness | Skin is smooth and unmarked |
| Free bit movement | Bit and rings move easily |
| No slippage | Guards stay in place during the ride |
If you notice marks, swelling or excessive chewing, the bit guards may be too tight, too thick for the bit width or incorrectly positioned.
Is Your Horse Uncomfortable? What to Look For
Watch for subtle changes in your horse's behavior, such as head tossing, reluctance to accept the bit or sudden resistance. These can point to discomfort from the guards or from the bit itself. Address issues promptly by checking the fit, trying a different material or asking a professional.
Sensitive horses may do better in softer guard materials. Keep an eye on your horse's response as seasons change, too, since heat, cold and humidity can change how materials feel.
Introducing Bit Guards to a Young Horse
Young or green horses often need extra patience when you introduce bit guards. Start with short sessions and soft materials, and increase ride time as the horse adapts. Recheck the fit as the horse grows and as the teeth change.
If your horse has always gone without bit guards, watch closely for any change in how it accepts the bit or chews.
Adjusting for Weather and Environment
Temperature and humidity can affect how bit guards perform. In hot weather, rubber may soften; in cold weather, it can stiffen and rub more easily. Check for wear more often during seasonal changes, and keep up your cleaning routine to prevent irritation.
Make Checks a Habit
Get in the habit of checking the guards and the corners of the mouth before and after each ride. Regular checks catch wear and early rubs before they become a problem, and they tell you when it's time to replace a pair.
For more on how the bit and bridle work together, see Horse Bridles 101: A Complete Guide for Riders.
Quick Safety Checks Before You Ride
Before every ride, run your fingers around the edge of the bit guards to check for cracks, rough spots or sticky residue. Replace guards that show wear or cause irritation. If you notice ongoing problems, such as recurring sores or changes in behavior, talk to a qualified trainer, equine dentist or veterinarian.
A simple pre-ride check can prevent most problems and keep your horse comfortable and responsive.
Can I Use Colored Bit Guards?
Bit guards come in several colors, and some riders like to match them to their tack for schooling. Whether colored guards, or any guards, are allowed in the show ring depends on the rules for your class, so check your rulebook before you show.
Key Takeaways
- Focus on Comfort for Clearer Communication: Bit guards are primarily a tool to prevent pinching and rubbing. A more comfortable horse can relax, focus and respond more willingly to your rein aids.
- Choose a Material That Suits Your Horse and Bit: Your options go beyond basic rubber. Consider neoprene or silicone for sensitive horses or quick changes, and leather for a traditional look.
- Ensure a Proper Fit: An ill-fitting bit guard can cause more problems than it solves. The guard must lie flat against your horse's face without bunching, crowding the lips or interfering with the bit's action.
- Check the Rules: USEF dressage prohibits bit guards under DR121.14, and other organizations set their own rules, so read the rulebook for your class before you show.
Frequently Asked Questions
Can bit guards be used with all types of bits?
Bit guards are most often used with loose ring snaffles, and they also fit many D-ring and eggbutt snaffles. They don't suit every bit; on some curbs and specialty bits the shape of the cheek gets in the way. Check that the guard fits your bit's rings and leaves the bit free to work.
Are bit guards allowed in competition?
It depends on the organization, discipline and class. In USEF dressage, rule DR121.14 prohibits bit guards during exercise and in competition, under penalty of elimination. For FEI events, check the current FEI Tack and Equipment Requirements. For jumping, eventing, western and other disciplines, read the current rulebook for your exact class, and ask the steward if you're unsure.
How often should bit guards be replaced?
Inspect bit guards before each ride for cracks, tears, stiffness or worn closures. How long they last depends on the material and how often you ride, but replace them at the first sign of damage. Clean, well-kept guards last longer and keep your horse comfortable.
How do I clean bit guards?
Take the guards off the bit for a thorough cleaning. Wash rubber, neoprene and silicone guards with warm water and mild soap, then rinse and let them dry completely. Wipe leather guards with a damp cloth and condition them when they dry out. Clean the bit at the same time.


