

Updated November 6, 2026
A Myler bit is a horse bit from the Myler family's bitting system, distributed by Toklat. Its mouthpieces are graded Level 1 to Level 3: Level 1 puts the most pressure on the tongue, and Level 3 gives the most tongue relief, shifting pressure to the bars, poll and chin. Most mouthpieces offer independent side movement.
Quick picks
One in-stock example for each Myler level and common use. Match the exact mouthpiece code, cheek style and mouth size; none of these is right for every horse.
| Product | Best for | Why |
|---|---|---|
| Myler MB 02 Comfort Snaffle Dee Ring | Green or sensitive English horses (Level 1) | Curved Level 1 mouthpiece with a wide center barrel for independent side movement |
| Myler MB 04 Loose Ring Snaffle Bit | English horses ready for some tongue relief (Level 2) | Quarter-inch low port comfort snaffle in stainless steel with copper inlay |
| Myler 33WL Eggbutt Snaffle | Finished dressage horses that need more tongue room (Level 3) | The MB 33 WL wide low ported barrel is listed as permitted in USEF Annex A to DR121 |
| Myler Western Dee Snaffle Bit MB 03 | Western horses starting in a Myler snaffle (Level 1) | Sweet iron comfort snaffle with a copper roller |
| Myler MB 01 Combination Bit | Horses that resist mouth pressure, ridden by experienced hands | A 1-inch slide brings in the nose, chin and poll before the mouthpiece |
| Myler Black Steel Seven Shank MB 33 | Finished Western horses in a curb (Level 3) | MB 33 port 1 1/2 inches wide on a 6 3/4-inch black steel seven shank |
Before adding a bit to your cart
- Confirm the exact mouthpiece code, cheek style and size on the product page.
- Review fit and suitability with a qualified trainer or bit fitter.
- For competition, check the current rules for the exact configuration.
You can compare every mouthpiece, cheek and size we carry in the Myler bits collection.
Choosing the right bit is one of the most important decisions we make for our horses. It's our direct line of communication, yet finding the perfect one often feels like a frustrating guessing game. That drawer full of expensive, barely-used bits? We've all been there. The Myler bit system offers a clear path forward. It’s not just another piece of metal; it’s a thoughtful system built around your horse’s comfort and training level. This guide walks through how the system works and how to select, fit and use the right Myler for your horse.
Below you will find an overview of Myler bits, their main features, step-by-step selection and fitting tips. Ready to improve your horse’s performance and deepen your connection? Let’s get started.
What Makes Myler Bits Different?
Choosing the right equipment for your horse is vital for both comfort and communication. Myler bits have redefined what riders expect from a bit, built on the Myler family's decades of riding and of studying how bits work in a horse's mouth.
Breaking Down the Myler Bit System
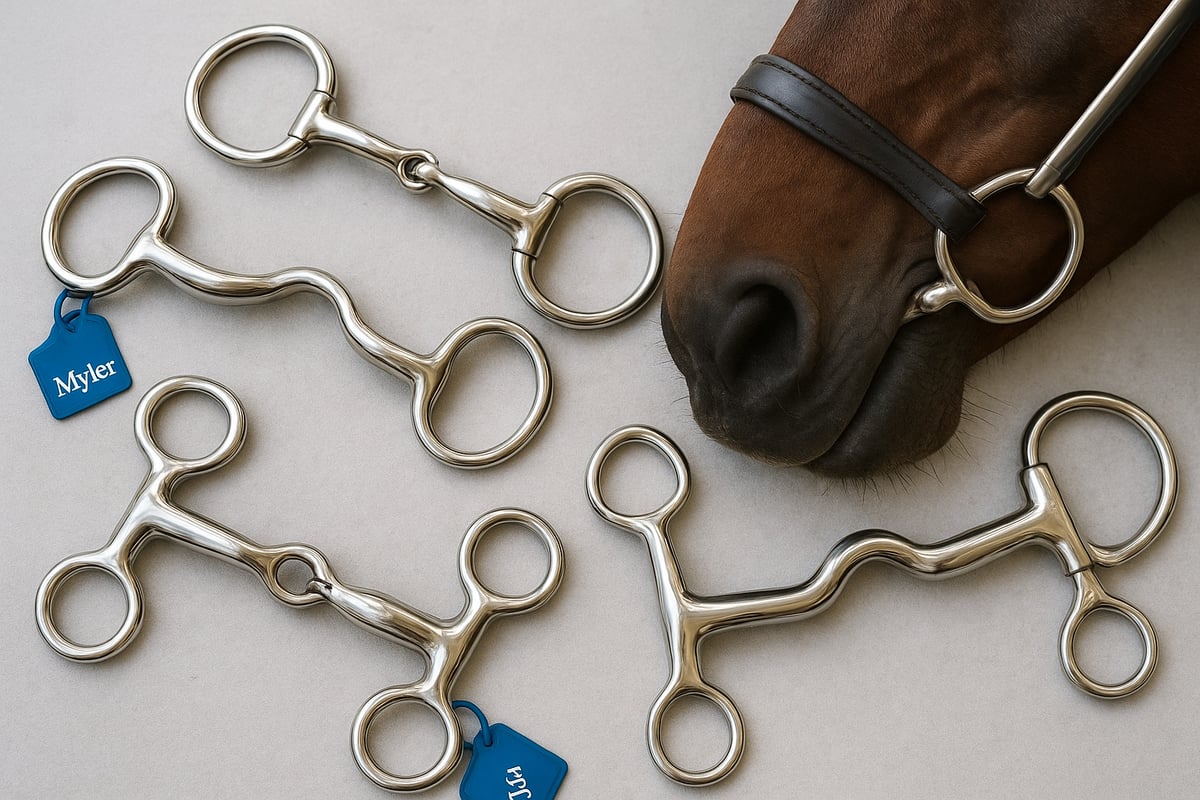
Myler bits were developed by the Myler brothers, Dale, Ron, and Bob, who drew on their own riding, their work helping other riders, and input from equine dentists and chiropractors, according to Toklat's Myler brochure. Their core philosophy centers on improving the horse's comfort, promoting communication, and providing tongue relief. Unlike traditional bits that often apply uniform pressure, myler bits are designed to accommodate the horse’s oral anatomy and encourage relaxation.
A major difference is the focus on tongue relief. Many myler bits feature ported mouthpieces and independent side movement, allowing horses to swallow and move their tongues freely. The thinking is that a horse that can swallow and keep its tongue comfortable is better able to listen to the rider's hands. Myler mouthpieces are used across disciplines, from dressage and jumping to Western, trail and young-horse training.
There are misconceptions about myler bits, such as the belief that all ported bits are severe. In reality, the design aims to reduce pressure rather than increase it. For a deeper dive, Toklat, Myler's distributor, publishes an introduction to the Myler bitting system that covers the levels and mouthpieces.
What Sets Myler Bits Apart?
One of the standout aspects of myler bits is the range of mouthpiece shapes and levels. The system is divided into Level 1, Level 2, and Level 3, each tailored to a horse’s training stage and sensitivity. Level 1 provides the most tongue pressure for green horses, while Level 3 offers maximum tongue relief for advanced, responsive horses.
Materials also differ by line. Toklat's Myler brochure states that English mouthpieces are stainless steel with copper inlay, while Western mouthpieces are sweet iron with copper inlay. Many riders like sweet iron and copper because horses tend to accept the taste, but the mouthpiece shape matters more than the metal.
Toklat describes the mouthpieces as patented designs. The signature barrel in the center allows for independent side movement, so the rider can communicate clearly with each side of the horse’s mouth. The curved mouthpiece shapes are designed to follow the contours of the horse’s mouth rather than lie flat across it.
These features are aimed at common bitting problems such as resistance, gaping or head tossing. No bit fixes a dental or training problem on its own, so treat a mouthpiece change as one part of the answer.
Myler bits have become a preferred choice for riders seeking both horse comfort and precise communication. Their design grew out of years of trial, rider feedback and work with equine dentists.
Core Design Philosophy: Comfort and Communication
At the heart of every Myler bit is a simple yet profound idea: a comfortable horse is a willing partner. Developed by brothers Dale, Ron, and Bob Myler, these bits were born from a blend of practical horsemanship and thoughtful engineering. Their core philosophy is built on improving the horse's comfort to foster clearer communication between horse and rider. Unlike many traditional bits that apply consistent pressure across the tongue, Myler bits are specifically designed to work with the horse’s oral anatomy. By providing significant tongue relief and encouraging relaxation, they create an environment where your horse can listen to your cues without discomfort or anxiety.
How Myler Bits Differ from Traditional Bits
The most significant departure from traditional bit design is the Myler system's focus on tongue relief. Many Myler mouthpieces feature a port or a curved shape that gives the horse space to swallow and move its tongue naturally. The Myler view is that constant, excessive tongue pressure is a common source of resistance and discomfort. When a horse can relax its tongue and jaw, it is far more receptive to the rider's aids. That reasoning is behind the ported and curved mouthpieces used as a horse moves up the levels.
The Role of the Center Barrel
A patented feature that truly sets Myler bits apart is their signature center barrel. This small, rotating barrel sits in the middle of the mouthpiece and allows each side of the bit to move independently. What does this mean for you in the saddle? It means you can give a precise, clear signal to one side of your horse's mouth without engaging the other. For example, when you ask for a turn with one rein, the pressure is isolated, preventing the confusing "nutcracker" effect of many single-jointed snaffles. This independent side movement refines your communication, making your cues easier for your horse to understand and respond to correctly.
Key Features for Clearer Signals
The combination of ergonomic shapes, the central barrel, and a commitment to tongue relief directly addresses common bitting issues like head tossing, gaping, or leaning on the bit. By sharing pressure between the bars and lips while giving the tongue room, Myler bits are meant to remove one common source of oral discomfort. These features work together to create a clearer, quieter line of communication, allowing for a more harmonious and effective partnership with your horse.
A Guide to Myler Bit Types and Their Jobs
Selecting the right Myler bits can transform both horse comfort and rider control. With a wide range of options, understanding the types and uses of Myler bits is essential for every equestrian looking to optimize performance.
Snaffles, Curbs and Combination Bits
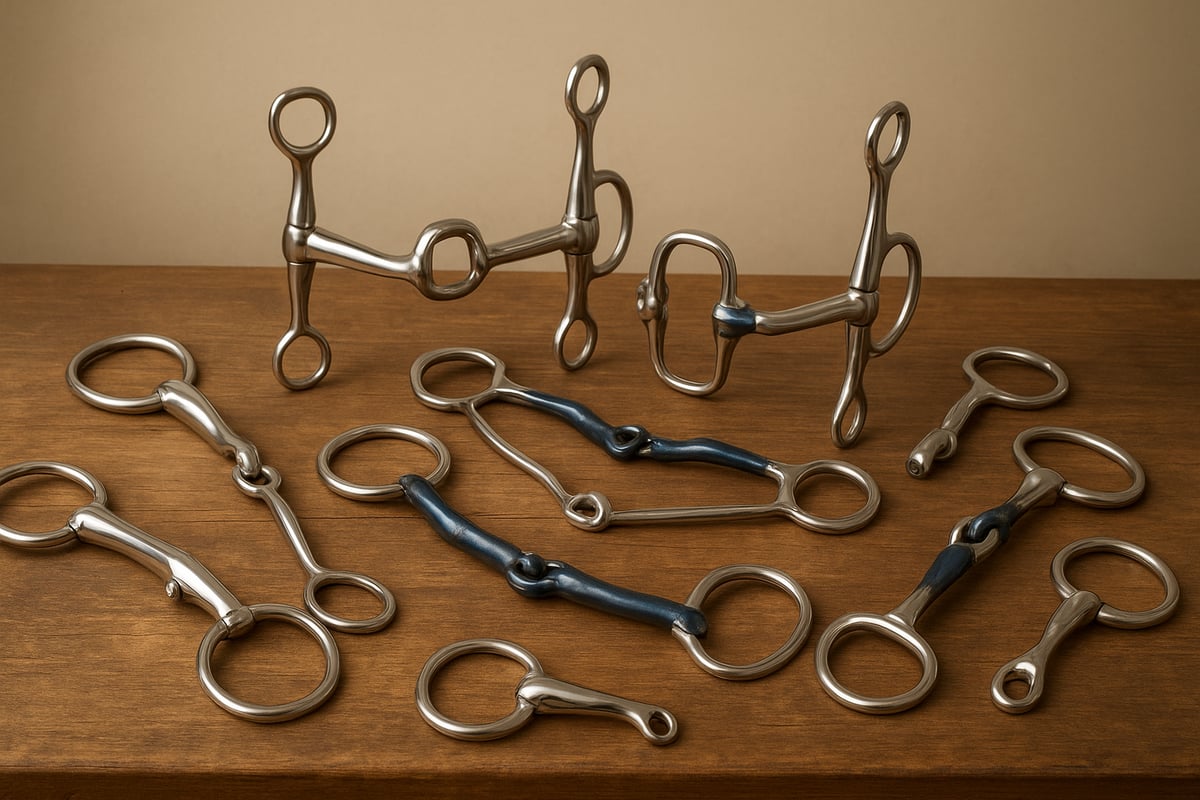
Myler bits are designed to address the diverse needs of horses across disciplines. The main categories include snaffles, curbs, combination bits, and specialty designs. Each type offers unique features suited to specific training levels and riding styles.
Snaffle Myler Bits:
These bits are popular for their gentle communication and are often used in early training or for sensitive horses. Snaffles use direct rein pressure and come in various mouthpiece options. For a deeper dive into bit types and their uses, see our guide to horse bit types and uses.
Curb Myler Bits:
Curbs introduce leverage, making them suitable for more advanced horses or those needing refined cues. The shank length and mouthpiece style influence the amount of pressure applied.
Combination Myler Bits:
Myler's 3-ring combination bits pair a mouthpiece with a noseband and curb strap, so pressure reaches the nose, chin and poll as well as the mouth. The Myler MB 01 Combination Bit is one example, with a 6-inch shank and a leather noseband.
Specialty Designs:
Myler bits also include unique options like the correctional ported barrel and wide low port, which cater to specific oral conformations or behavioral challenges.
English vs. Western Myler Bits:
English styles typically use eggbutt, loose ring and dee ring cheekpieces, while Western bits often use Western dees, shanks or curb styles. Both lines share the same mouthpiece codes, so an MB 02 is the same mouthpiece shape whether it sits on a loose ring or a shank. The main difference is the metal: stainless steel with copper inlay for English, sweet iron with copper inlay for Western.
Bit Levels and Mouthpieces
Myler bits are organized into levels, matching a horse's experience and temperament:
| Level | Horse Experience | Mouthpiece Characteristics |
|---|---|---|
| 1 | Green or sensitive | No port; mouthpiece rotates onto the tongue for the most tongue pressure |
| 2 | Intermediate | Some tongue pressure; a slight port on some designs |
| 3 | Advanced, finished horse | Wider ports for the most tongue relief; mainly bar, poll and curb pressure |
Choosing between ported and non-ported mouthpieces depends on the desired tongue relief and the horse's oral anatomy. Ported options generally offer more freedom, while non-ported designs provide straightforward communication.
Cheekpiece Styles:
- Eggbutt: Stable, minimizes pinching
- Loose ring: More movement, encourages relaxation
- Dee ring: Helps with lateral control
- Shank: Adds leverage, used in curbs
- Combination: Blends features for versatility
Understanding these categories ensures that Myler bits can be tailored for every riding scenario.
How Pressure Shifts Through the Levels
The genius of the Myler system lies in how it systematically shifts pressure as your horse advances in its training. Level 1 bits are designed for green or sensitive horses, applying broad pressure across the tongue, with little or no port. This creates a clear, easy-to-understand signal for a horse just learning to yield and accept contact. As your horse progresses to Level 2, the bit introduces a slight port, offering the first degree of tongue relief. This design begins to transfer pressure from the tongue to the bars of the mouth, rewarding the horse for correct responses and encouraging a softer, more relaxed jaw.
By the time a horse is ready for a Level 3 bit, they are considered "finished" and responsive to subtle cues. These bits feature a higher port that provides maximum tongue freedom, allowing the horse to swallow and carry the bit comfortably. Communication now primarily occurs through pressure on the bars, and with curb bits, the poll and chin groove. This evolution from tongue pressure to bar and poll pressure is fundamental to the Myler philosophy. It’s a system that rewards learning with comfort, making it easier to find the right piece of horse tack that matches your horse’s specific stage of training and communication needs.
Matching a Myler Bit to Your Riding Discipline
Each riding discipline benefits from specific Myler bits, matching their unique demands with optimal horse comfort.
Dressage:
Dressage riders usually look at Myler snaffles on loose ring, eggbutt or dee cheeks. In U.S. competition, permitted bits are listed model by model in Annex A to USEF Dressage rule DR121. In the current edition (updated May 6, 2026), a port may be no higher than 30 mm, and the Myler 33 Ported Barrel snaffle is listed as not permitted because its port exceeds that, while the MB 33 WL wide low port is permitted. Check the current Annex A for your exact model, and the FEI Dressage Rules for FEI classes.
Jumping:
Jumpers require control and flexibility. Riders often look at Level 2 mouthpieces or a combination bit for a mix of brakes and tongue relief; check your discipline's rules before you show.
Western:
Western riders often choose curb Myler bits with longer shanks for precise rein effects. Level 2 to 3 mouthpieces, such as the correctional mouthpiece on the Myler MB 27 Correctional Curb Horse Bit, are meant for seasoned horses that already understand leverage.
Trail and Endurance:
Long rides demand comfort and minimal fatigue. Myler bits with soft, ergonomic mouthpieces and stable cheekpieces help maintain steady contact without causing soreness.
Training and Green Horses:
Young or green horses usually start in Level 1 Myler bits, which work mostly on the tongue, the pressure a horse first learns in a snaffle. As training progresses, riders move up the levels for more tongue relief and finer cues.
The Myler Combination Bit: A Gentle Option
The Myler Combination Bit spreads the signal across several points instead of concentrating it in the mouth. Toklat's Myler brochure explains that the noseband and chin strap connect through the purchase, so pressure reaches the nose, chin and poll before the mouthpiece engages. If the horse ignores that first signal, the mouthpiece slides and gives a second warning, so the horse has several chances to respond before the mouthpiece comes into play. With independent side movement, you can also signal one side of the mouth at a time. That staged action is why some riders use a combination bit with horses that resist a conventional bit, but it is still a leverage bit and needs quiet, experienced hands.
Shop This Post

Featured in this article
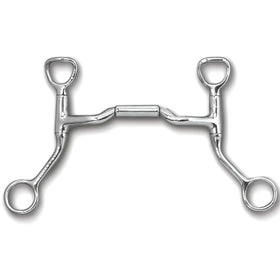
Myler MB 03 Comfort Snaffle Horse Bit - 5" Mouth Sweet Iron Mouthpiece with Copper Roller - Level 1 Independent Side Movement
$191.95
Shop Now →

Understanding and Solving Bit Resistance
When your horse starts resisting the bit, it can be frustrating and confusing. But it's important to remember that this isn't bad behavior—it's communication. Your horse is trying to tell you something is wrong, whether it's discomfort, confusion, or pain. Signs like head tossing, chomping on the bit, opening their mouth, or trying to get their tongue over the bit are all signals that they're trying to escape pressure. Understanding the root cause is the first step toward finding a solution that works for both of you and strengthens your partnership.
Common Reasons for Resistance
One of the most frequent reasons for bit resistance is a horse's attempt to relieve pressure on their tongue so they can swallow. This is a natural, instinctual response. However, resistance can also signal a deeper physical issue. Before changing your horse tack, it's crucial to rule out pain. An equine veterinarian or dentist should check for sharp points on their teeth, wolf teeth that may need removing, or even old scars on the tongue that could cause sensitivity. Sometimes, the problem isn't physical but learned. If a horse doesn't receive a clear release of pressure when they respond correctly, they may learn that resisting is the only way to get relief, a habit that can be reinforced by inconsistent hands from current or past riders.
Troubleshooting Steps for a Happier Horse
If your horse is fighting the bit, start with a health check. Schedule a visit with your veterinarian or a certified equine dentist to conduct a thorough oral exam. This will eliminate any underlying physical causes like dental problems or tongue injuries that could be the source of the discomfort. Once you've confirmed there are no health issues, you can evaluate your equipment. Is the bit fitted correctly? Does it suit your horse's mouth conformation and training level? A bit designed to offer tongue relief, like many in the Myler system, can make a world of difference for a sensitive horse. Finally, consider your own role. Working with a qualified trainer can provide valuable feedback on your rein contact and the timing of your release, ensuring your cues are clear, fair, and effective.
The Rider's Role: Bitting Principles and Best Practices
While finding the right bit is essential, it's only one piece of the puzzle. The most sophisticated piece of equipment is only as effective as the hands that guide it. Ultimately, a bit is a tool for communication, not control. True horsemanship is built on a foundation of clear signals, consistent aids, and an understanding of how a horse learns. By focusing on your role as a rider, you can create a more responsive and willing partner, regardless of the specific bit you use. This approach fosters trust and turns every ride into a productive conversation.
Common Bitting Misconceptions
A common myth in the equestrian world is that certain bits are inherently "harsh" while others are "mild." The truth is, a bit's severity is determined almost entirely by the rider's hands. A simple snaffle can feel severe and confusing with unsteady, heavy hands, while a more complex bit can be used with incredible subtlety by an experienced rider. There's an old saying that bits don't train horses; riders do. The bit is simply there to help you communicate your aids more clearly. Much of the discomfort a bit causes comes from excessive or unrelenting pressure, which is why the responsibility for the horse's comfort lies largely with the person holding the reins.
Why the Rider's Hands Matter Most
Your hands are the most direct line of communication you have with your horse's mouth. Developing independent, soft, and steady hands is one of the most important skills a rider can learn. Good horsemanship requires a deep understanding of how horses respond to pressure. The goal is to use the lightest possible cue to get the desired response. This means your hands should be quiet, following the horse's motion without bouncing, and ready to give and take pressure instantly. When your hands are clear and consistent, your horse learns to trust the bit and your signals, leading to a more relaxed and confident partnership. It's this trust that allows for truly refined communication.
The Importance of the Release in Training
The single most important aspect of teaching a horse to respond to bit pressure is the release. The release is the reward; it's how you tell your horse, "Yes, that's exactly what I wanted." If a horse yields to the bit and doesn't get an immediate release of pressure, the correct response hasn't been reinforced. Instead, the horse will keep searching for a way to get that release, often by trying other behaviors like rooting the reins or tossing their head. When they finally find a behavior that makes the pressure go away—even if it's the wrong one—that's what they'll learn to do next time. Timing is everything. An instant, complete release the moment your horse gives the correct response is the key to building a soft, willing, and responsive partner.
Your 4-Step Guide to Selecting a Myler Bit
Selecting the right myler bits for your horse is a process that requires careful evaluation, expert input, and a deep understanding of your horse’s needs. Let’s walk through each step to ensure you make an informed selection and set your horse up for success.
Step 1: Consider Your Horse's Training and Temperament
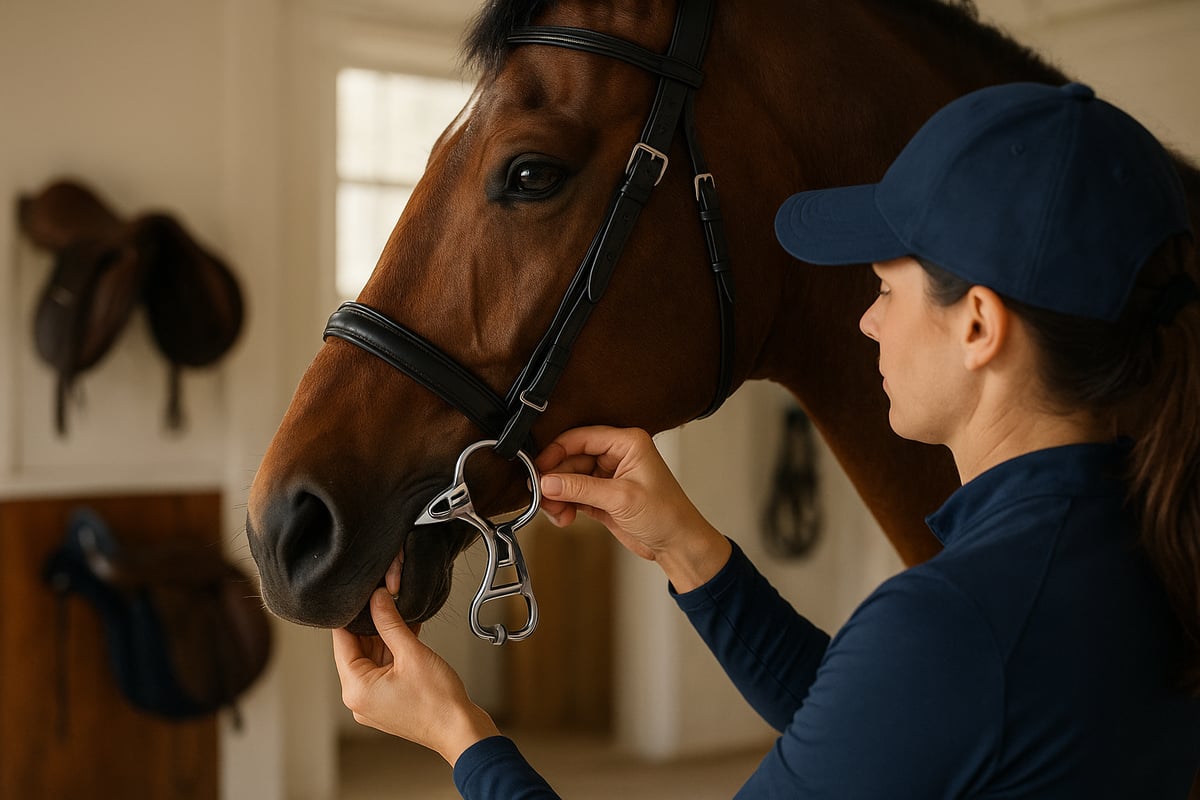
Begin by observing your horse’s behavior with its current bit. Signs like head tossing, gaping, excessive salivation, or resistance under saddle can indicate discomfort. Review your horse’s training history and mouth conformation. Horses with low palates, thick tongues, or past bitting issues may benefit from the unique features of myler bits.
Consult with your trainer, veterinarian, or equine dentist. Their expertise helps match the correct myler bits level to your horse’s experience, sensitivity, and responsiveness. For green horses or those new to myler bits, starting with a Level 1 mouthpiece is advisable.
For further guidance on evaluating your horse’s needs, see our article on how to find the right bit for your horse.
Remember, the foundation of effective communication begins with understanding your horse’s individual requirements and using myler bits designed for comfort and clarity.
Step 2: Pick the Right Mouthpiece and Cheeks
Selecting the correct mouthpiece shape and cheekpiece style is crucial for optimal pressure distribution and clear communication. Myler bits offer a variety of mouthpieces, each suited to different training levels and horse temperaments.
Here’s a quick comparison of popular myler mouthpieces:
| Mouthpiece Model | Level | Features | Best For |
|---|---|---|---|
| MB02 | 1 | Comfort snaffle with a wide center barrel | Green horses, sensitive mouths |
| MB04 | 2 | Low port, independent sides | Horses needing some tongue relief |
| MB33 | 3 | Medium-wide ported barrel for the most tongue relief | Advanced horses, experienced riders |
On the English side, examples we carry include the Myler MB 02 Comfort Snaffle Dee Ring, the Myler MB 04 Loose Ring Snaffle Bit and the Myler MB 33 Eggbutt Snaffle Bit, one from each level.
Cheekpiece style affects rein action and rider control. Eggbutt and dee ring offer stability, while loose rings encourage softer contact. Shank or combination cheeks are ideal for advanced cues and leverage.
Measure your horse’s mouth carefully to ensure a proper fit. A bit that is too wide or narrow can cause rubbing or pinching, impacting comfort and performance. When comparing myler bits, consider both the mouthpiece and cheekpiece to match your riding goals and your horse’s conformation.
Sizing Considerations
Once you've narrowed down the mouthpiece and cheekpiece, the final piece of the puzzle is sizing. Getting the size right is non-negotiable for your horse's comfort. Toklat lists Myler mouth sizes from 4 1/4 to 6 inches, and a bit that's too wide or too narrow can cause pinching and rubbing, undermining all your hard work. Not every mouthpiece comes in every size or cheek, so confirm the exact size on the product page. At Hooves and Paws, we know that the right piece of horse tack makes all the difference in your horse's comfort and performance.
Step 3: How to Test and Adjust the Fit
Introducing new myler bits should always begin with a trial period. Start by allowing your horse to wear the bit briefly during groundwork, observing for signs of acceptance such as relaxed jaw, steady chewing, and a quiet mouth. Monitor for unwanted behaviors like persistent head shaking or resistance.
Gradually increase ride duration as your horse adjusts. Assess the fit and bit position regularly; the mouthpiece should rest comfortably at the corners of the lips, without causing wrinkles or pressure points. If you notice ongoing discomfort, consider adjusting the bit height or switching to a different myler bits level.
Keep detailed notes on your horse’s reactions. This helps you and your trainer make informed decisions about when to move up or down in mouthpiece complexity or try an alternative design. A thoughtful, gradual transition gives you the clearest picture of whether the bit suits your horse.
Step 4: Keeping Your Myler Bit in Top Shape
Proper maintenance of myler bits is essential for safety, hygiene, and longevity. After each ride, rinse the bit thoroughly with warm water to remove saliva and debris. For stainless steel and sweet iron bits, use a soft brush and mild soap as needed, then dry the bit. Sweet iron is meant to develop a light rust-colored patina, which is normal.
Inspect your myler bits regularly for sharp edges, cracks, or excessive wear. Damaged bits can cause discomfort and injury. Store bits in a dry, clean area, ideally hanging or laid flat to avoid bending.
Routine care not only extends the life of your myler bits but also ensures your horse’s comfort and safety. Well-maintained bits support consistent communication and performance, making them a valuable investment in your horse’s well-being.
Fitting Your Myler Bit: Do's and Don'ts
Achieving the right fit with myler bits is essential for your horse’s comfort and performance. Proper fitting not only enhances communication but also prevents discomfort and behavioral issues. Let’s explore how to ensure an optimal fit and avoid the most common pitfalls riders face.
What a Perfect Myler Bit Fit Looks Like
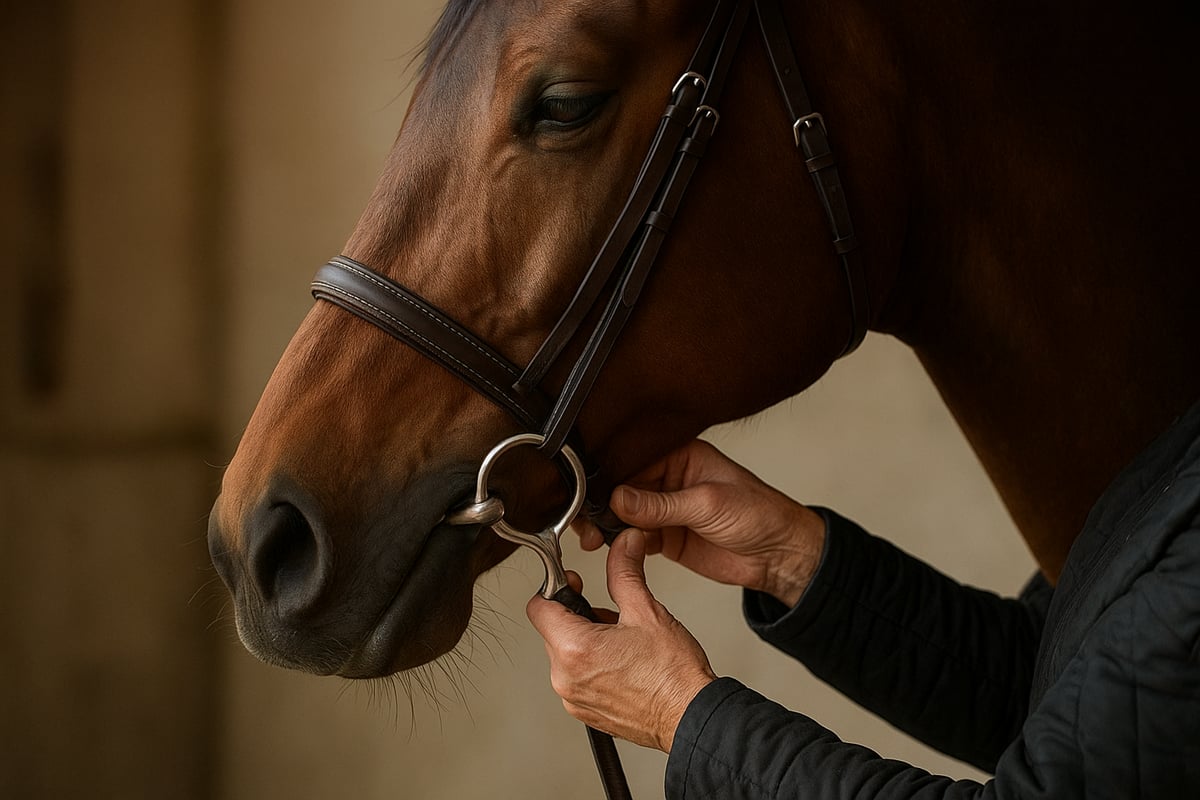
To fit myler bits correctly, start by placing the bit in your horse’s mouth and ensuring the mouthpiece rests comfortably at the corners. The bit should create a soft wrinkle at each corner without pulling the lips tight. If the bit hangs too low, it may cause the horse to mouth or play with it excessively.
Check for even pressure across the tongue and bars. Myler bits are designed for tongue relief, so make sure the port or barrel sits centrally and does not press into the palate. Examine both sides for symmetry, confirming that the bit is not pinching the lips or cheeks.
It’s important to watch for signs of discomfort such as head tossing, gaping, or excessive salivation. These may indicate an ill-fitting bit or pressure points. If you see rub marks or pinching, try adjusting the cheekpiece or adding a pair of bit guards such as Weaver Leather Black Rubber Bit Guards on a loose ring.
Here is a quick comparison table to help recognize a well-fitted vs. poorly-fitted myler bit:
| Fit Indicator | Well-Fitted Myler Bit | Poorly-Fitted Myler Bit |
|---|---|---|
| Lip Wrinkles | 1-2 Soft Wrinkles | Excessive or None |
| Bit Height | Sits at mouth corners | Too high or too low |
| Cheek Rubbing | None | Redness or sores |
| Horse’s Attitude | Relaxed, accepting | Tossing, resisting |
Be sure to monitor your horse’s reaction during rides. If you notice any resistance, it may be time to reassess the fit or consider the mouthpiece style. For horses prone to tongue resistance, explore gentle tongue relief options as discussed in our MB33WL pony bit review.
Regularly inspect the bit for signs of wear, especially at moving parts or joints. Clean myler bits after each use to maintain hygiene and longevity. Remember, a properly fitted bit leads to steady contact, clear communication, and a calmer horse.
Are You Making These Myler Bit Mistakes?
One common mistake is choosing the wrong level of myler bits for your horse’s training stage. Over-bitting, where the bit is too advanced or severe, can cause confusion and discomfort. Under-bitting, using a bit that is too mild for a strong or experienced horse, may reduce control and effectiveness.
Ignoring your horse’s feedback is another pitfall. Always pay attention to behavioral cues such as jaw crossing, reluctance to move forward, or head shaking. These often signal that the myler bits are not suited or incorrectly fitted.
Using incompatible bridles or reins with myler bits can also impact performance. Ensure your equipment complements the bit style and allows for independent side movement, which is a key feature of myler bits.
A frequent error is misinterpreting bit movement and rein action. Riders may expect instant results, but adaptation takes time. Introduce new myler bits gradually, allowing your horse to adjust. If resistance persists, revisit the fitting process or consult with a professional.
By staying attentive and correcting mistakes early, you give the bit a fair trial and your horse a clearer signal.
Common Myler Mouthpiece Codes
Myler identifies each mouthpiece with an MB number, and the same number can appear on many different cheeks. The table below lists codes we carry often, with the level shown on our product listings. Levels and descriptions come from the product data and Toklat's Myler brochure; check each product page for the exact configuration.
| Code | Mouthpiece | Level |
|---|---|---|
| MB 01 | Comfort snaffle | 1 |
| MB 02 | Comfort snaffle with wide barrel | 1 |
| MB 03 | Comfort snaffle with copper roller | 1 |
| MB 04 | Low port comfort snaffle | 2 |
| MB 10 | French link snaffle | 1 |
| MB 32-3 | Mullen triple barrel | 2 |
| MB 33 | Medium-wide ported barrel | 3 |
| MB 36 | Forward tilt ported barrel | 2 to 3 |
A higher code is not automatically a stronger bit. The level, the port and the cheek or shank together decide how a bit works, which is why two bits with the same MB number can feel quite different to the horse.
Where to Find More Myler Resources
Choosing the right Myler bit is a significant step, but the journey doesn't end there. At Hooves and Paws, we believe that understanding your equipment is just as important as owning it. The Myler system is detailed, but thankfully, there are some fantastic resources available to guide you. Whether you prefer one-on-one guidance or enjoy doing your own research, you can find the support you need to make a confident decision for your horse. This ensures you're not just buying a piece of tack, but investing in a better line of communication and comfort for your equine partner.
Getting Personalized Bitting Advice
Every horse and rider combination is unique, which is why personalized advice is so valuable. If you're feeling unsure about which Myler bit is right for your horse, you can get help directly from the source. Toklat hosts a Myler bitting questionnaire that asks about your horse, your riding and the bits you have tried. According to Toklat's page, it goes directly to Dale Myler, who follows up with specific suggestions. This is an incredible opportunity to remove the guesswork and benefit from the designers' own experience. Toklat describes Bob and Dale Myler as horsemen and educators, and their materials aim to help riders understand how bits work to create a better partnership with their horses.
Reading the Maker's Materials
If you like to learn all the details, start with what the maker publishes. Toklat's Myler page explains the level system and lists each mouthpiece by code, cheek and size. Reading the mouthpiece description next to the level helps you see how a bit will sit in your horse's mouth before you buy. These materials help you become a more informed and effective partner for your horse.
Key Takeaways
- Prioritize Tongue Relief for Better Communication: Myler bits are designed to give your horse space to swallow and relax its tongue. This fundamental comfort eliminates a major source of resistance, allowing your horse to focus on your aids instead of discomfort.
- Match the Bit Level to Your Horse’s Experience: The Myler system uses Levels 1, 2, and 3 to correspond with your horse's training progress. Start with Level 1 for green horses and advance as they become more responsive, so the bit's signals stay clear and appropriate.
- Remember That a Bit Is Only as Good as Your Hands: No bit can replace good horsemanship. The key to a soft, responsive horse is using quiet hands and providing an immediate release of pressure the moment your horse responds correctly.
Related Articles
- The Elevator Bit Horse Guide: What You Need to Know
- What Is a Snaffle Bit? A Rider's Complete Guide
- The Pelham Bit Explained: A Rider's Guide
- 8 Best Barrel Racing Bits for Speed and Control
Frequently Asked Questions
Are Myler bits legal for dressage and other competitions?
Some are and some aren't, model by model. For USEF dressage, check the current Annex A to rule DR121, which lists permitted bits individually and limits port height; for FEI classes, check the FEI Dressage Rules. Eventing, hunter and Western associations each have their own rules, so always check your rulebook before competing.
Which Myler level should my horse start in?
Most horses start at Level 1, which works mainly on the tongue like a familiar snaffle. Horses that are steady and responsive in Level 1 can move to Level 2 and later Level 3, which give more tongue relief. Toklat's bitting questionnaire and a qualified trainer can help you decide.
How long does it take a horse to adjust to a Myler bit?
It varies from horse to horse. Introduce the bit gradually, starting with groundwork and short rides, and watch for relaxed chewing and a steady head carriage. If resistance continues, recheck the fit, consider stepping down a level, and rule out dental problems.
How often should I replace a Myler bit?
With proper care, a Myler bit can last for years. Inspect it regularly for sharp edges, wear at the barrel and joints, or damage, and replace it if you find any. Clean it after every ride and store it dry.


